Worldsensing
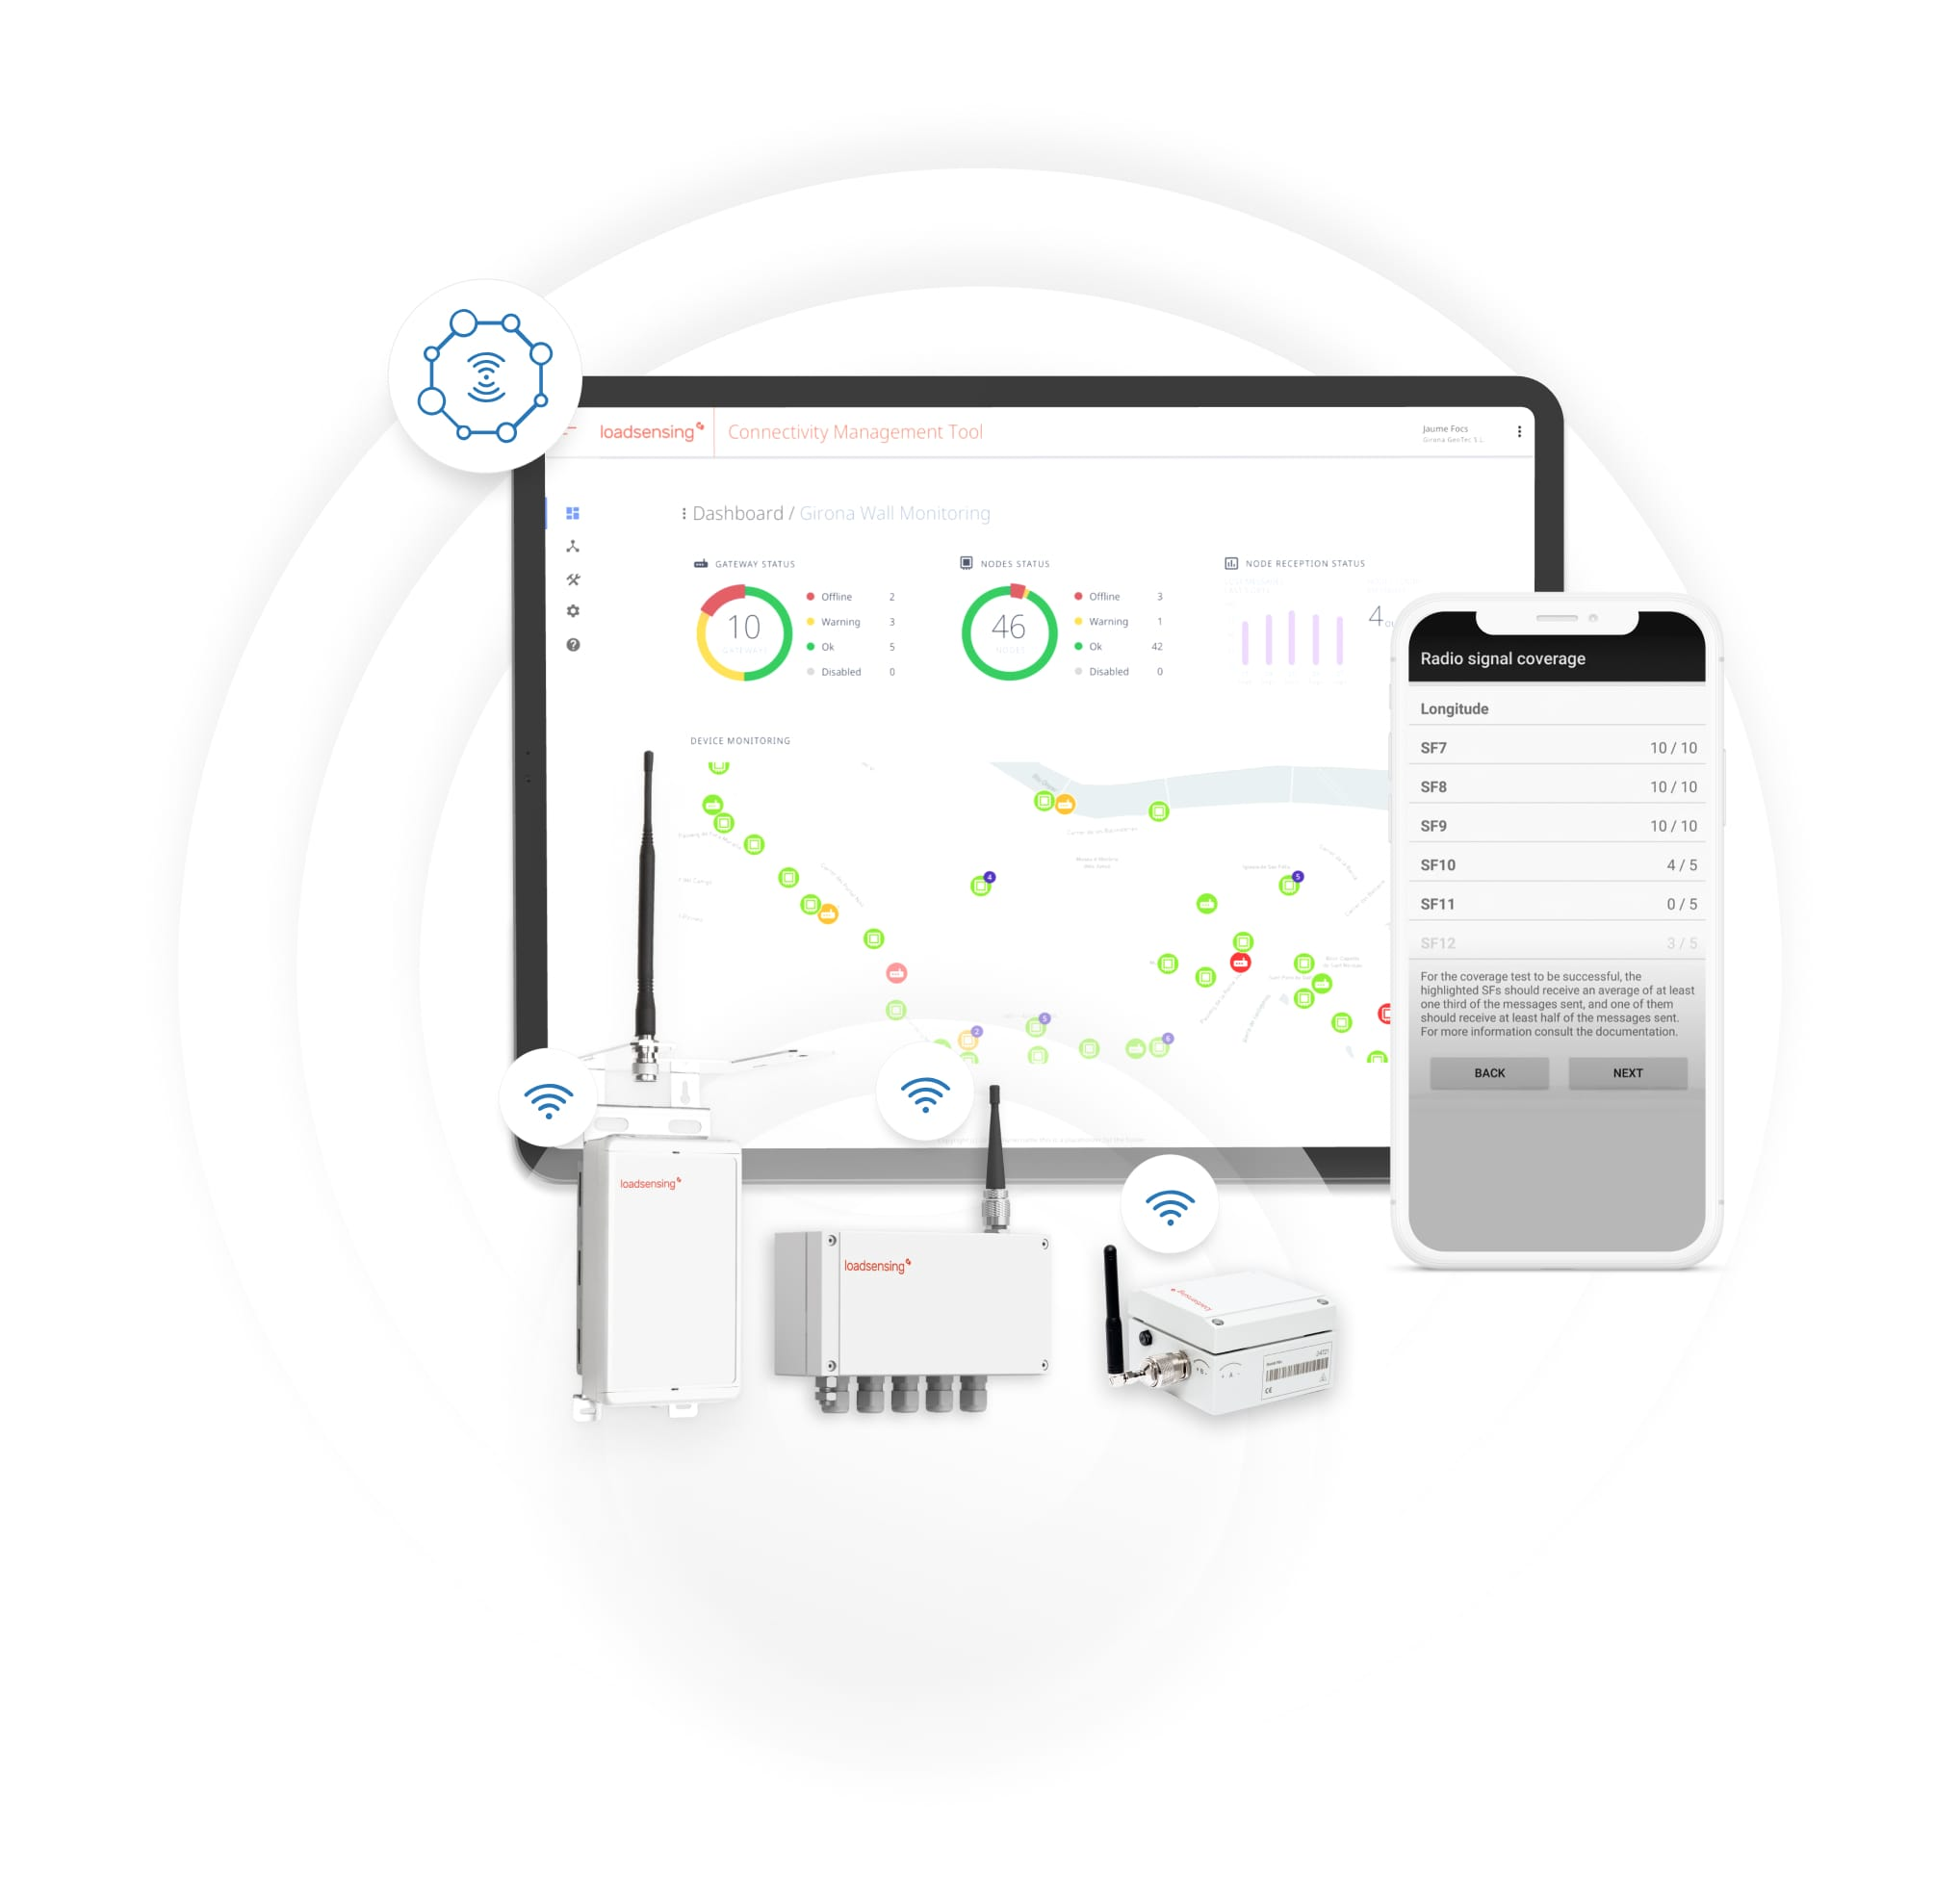
Loadsensing is the IoT remote monitoring solution by Worldsensing, a global industrial IoT leader and expert in monitoring the geotechnical, geospatial and structural performance of civil infrastructures. The monitoring solution can be connected with eagle.io through the Worldsensing software called Connectivity Management Tool (CMT) in a few easy steps.
Introduction
CMT (Connectivity Management Tool) is part of the Worldsensing connectivity portfolio. It allows integrating data collected through Worldsensing monitoring networks with 3rd party systems. The CMT software features FTP push of data to 3rd party systems, such as eagle.io.
Setting up CMT with eagle.io
Follow the steps below to configure CMT to send data to an eagle.io data source. Use a similar process to connect CMT Edge to eagle.io.
3 Steps for an easy setup:
- Configure a new eagle.io data source with the Upload data to ftp.eagle.io transport
- Configure CMT with FTP client details
- Use the first file sent as sample data to finalize configuring the data source parser, and create parameters
1. Configure an eagle.io data source
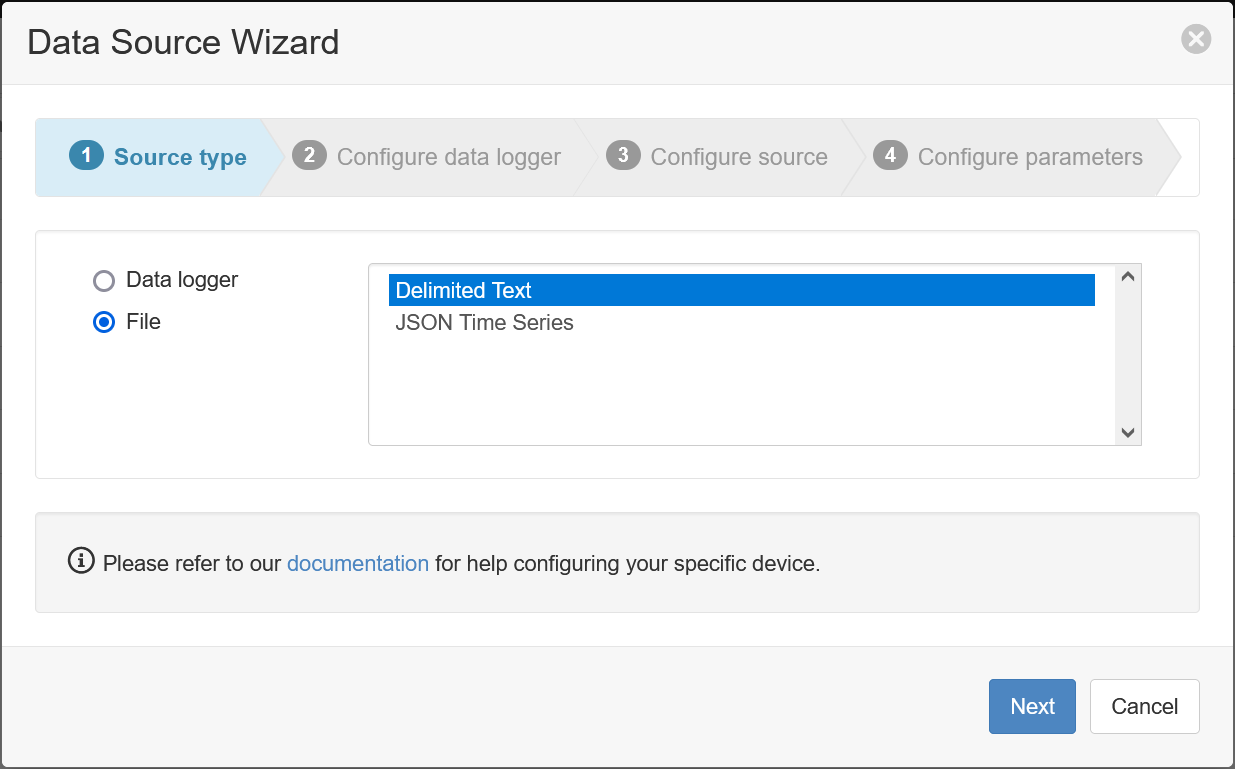
- Create a data source and select File as the Source Type. Choose Delimited Text from the list and click Next.
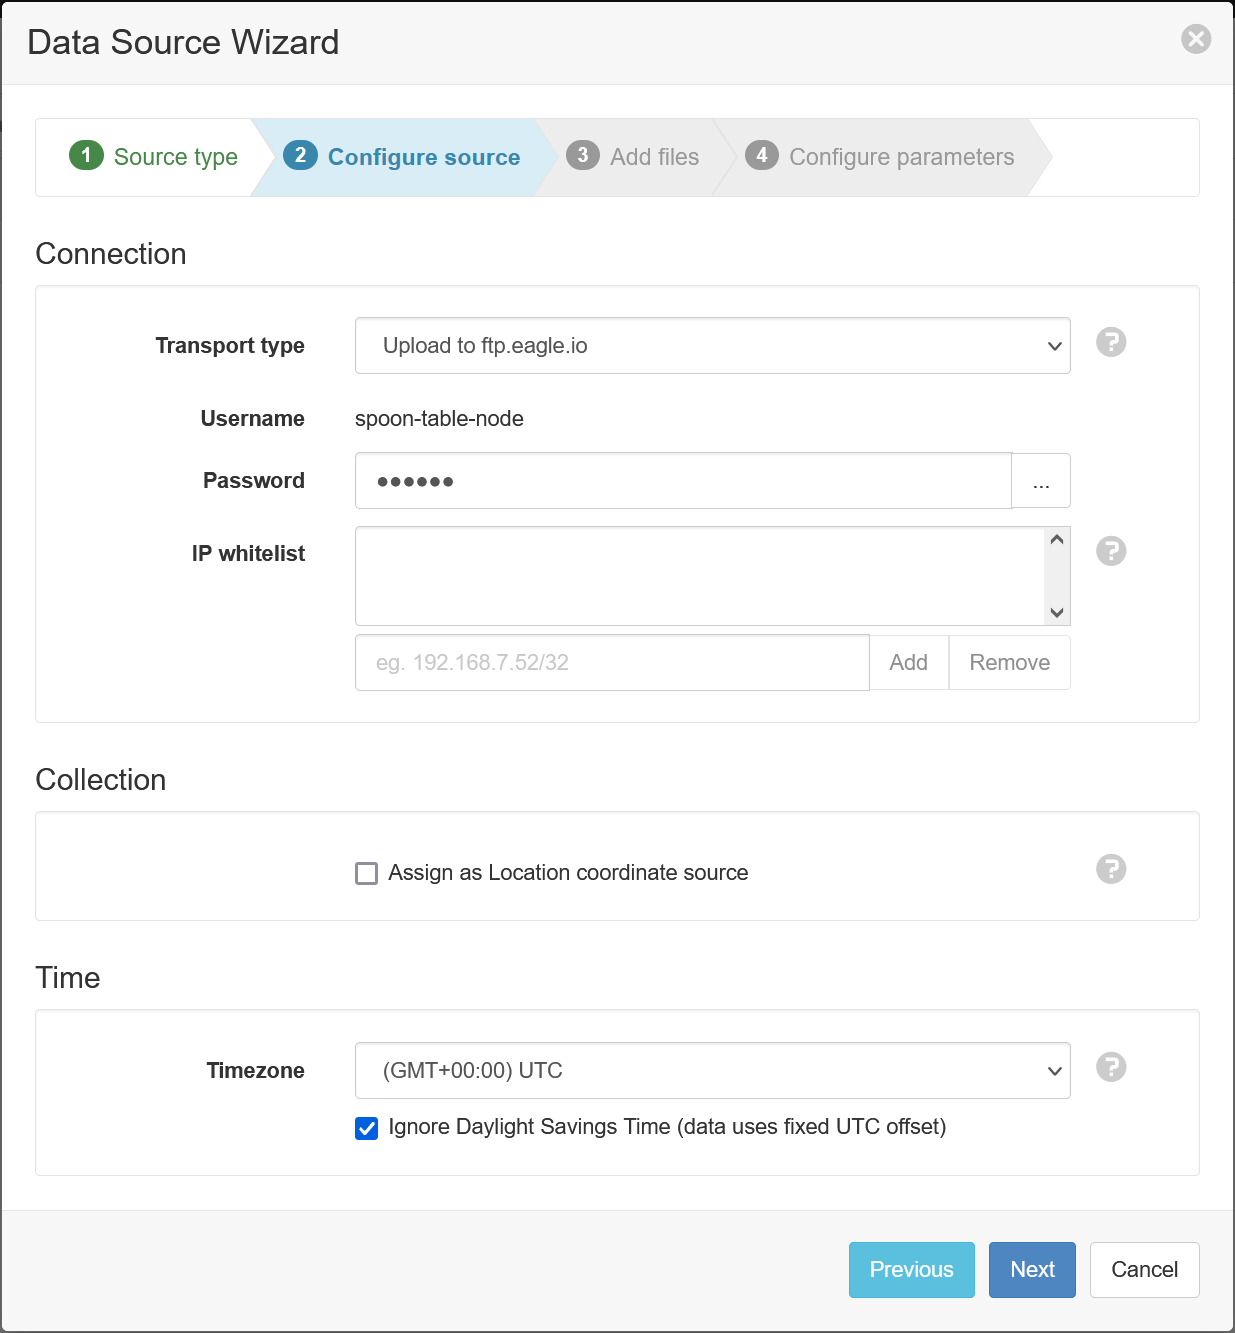
- Select Upload to ftp.eagle.io as the transport type. A unique Username will be automatically generated per data source; for this example, it is
spoon-table-node. A password should also be entered for additional security. Select the desired timezone (in this example it is UTC to match the timezone of the data file) and click Next.
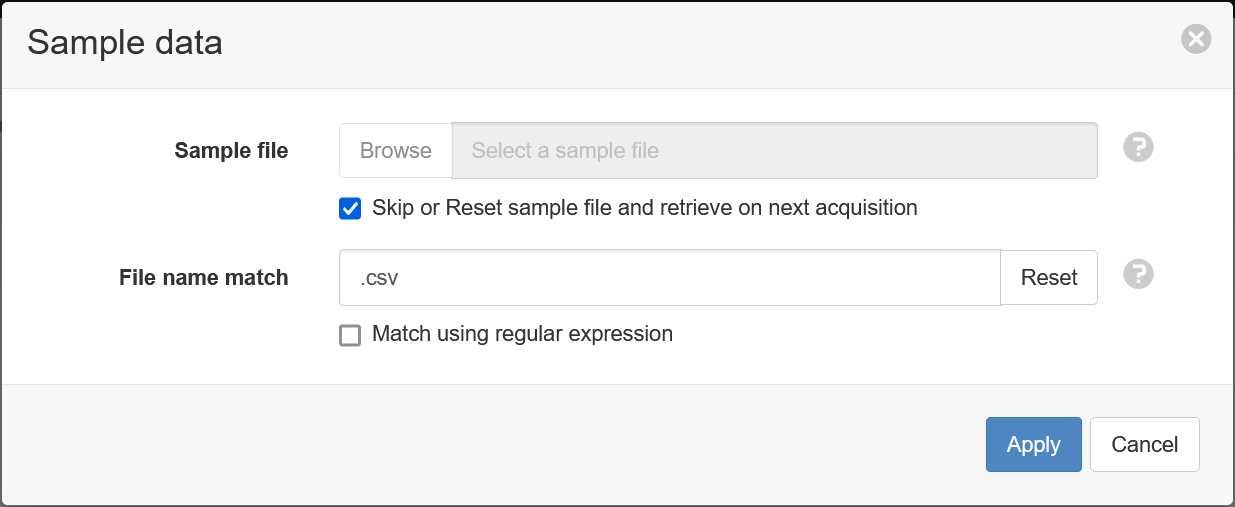
- Check the box labled Skip or Reset sample file and retrieve on next acquisition. Enter a file match of
.csvand click Apply.
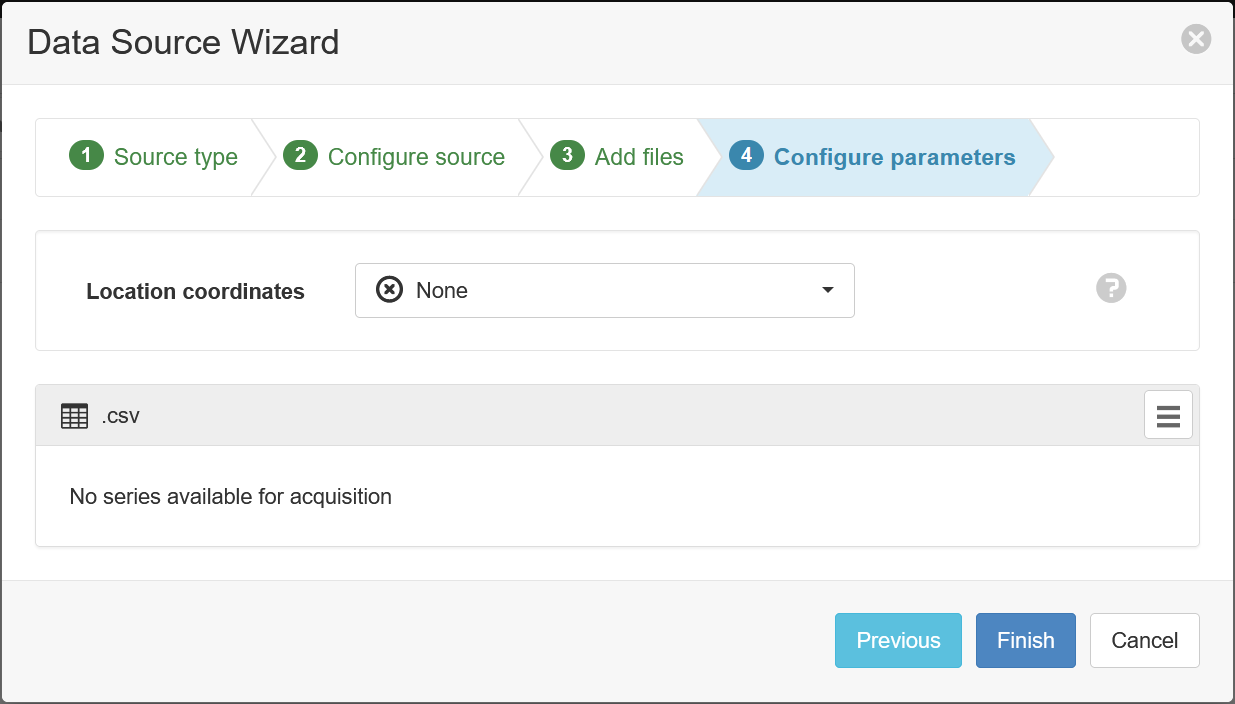
- Click Next.

- Click Finish.
2. Configure CMT
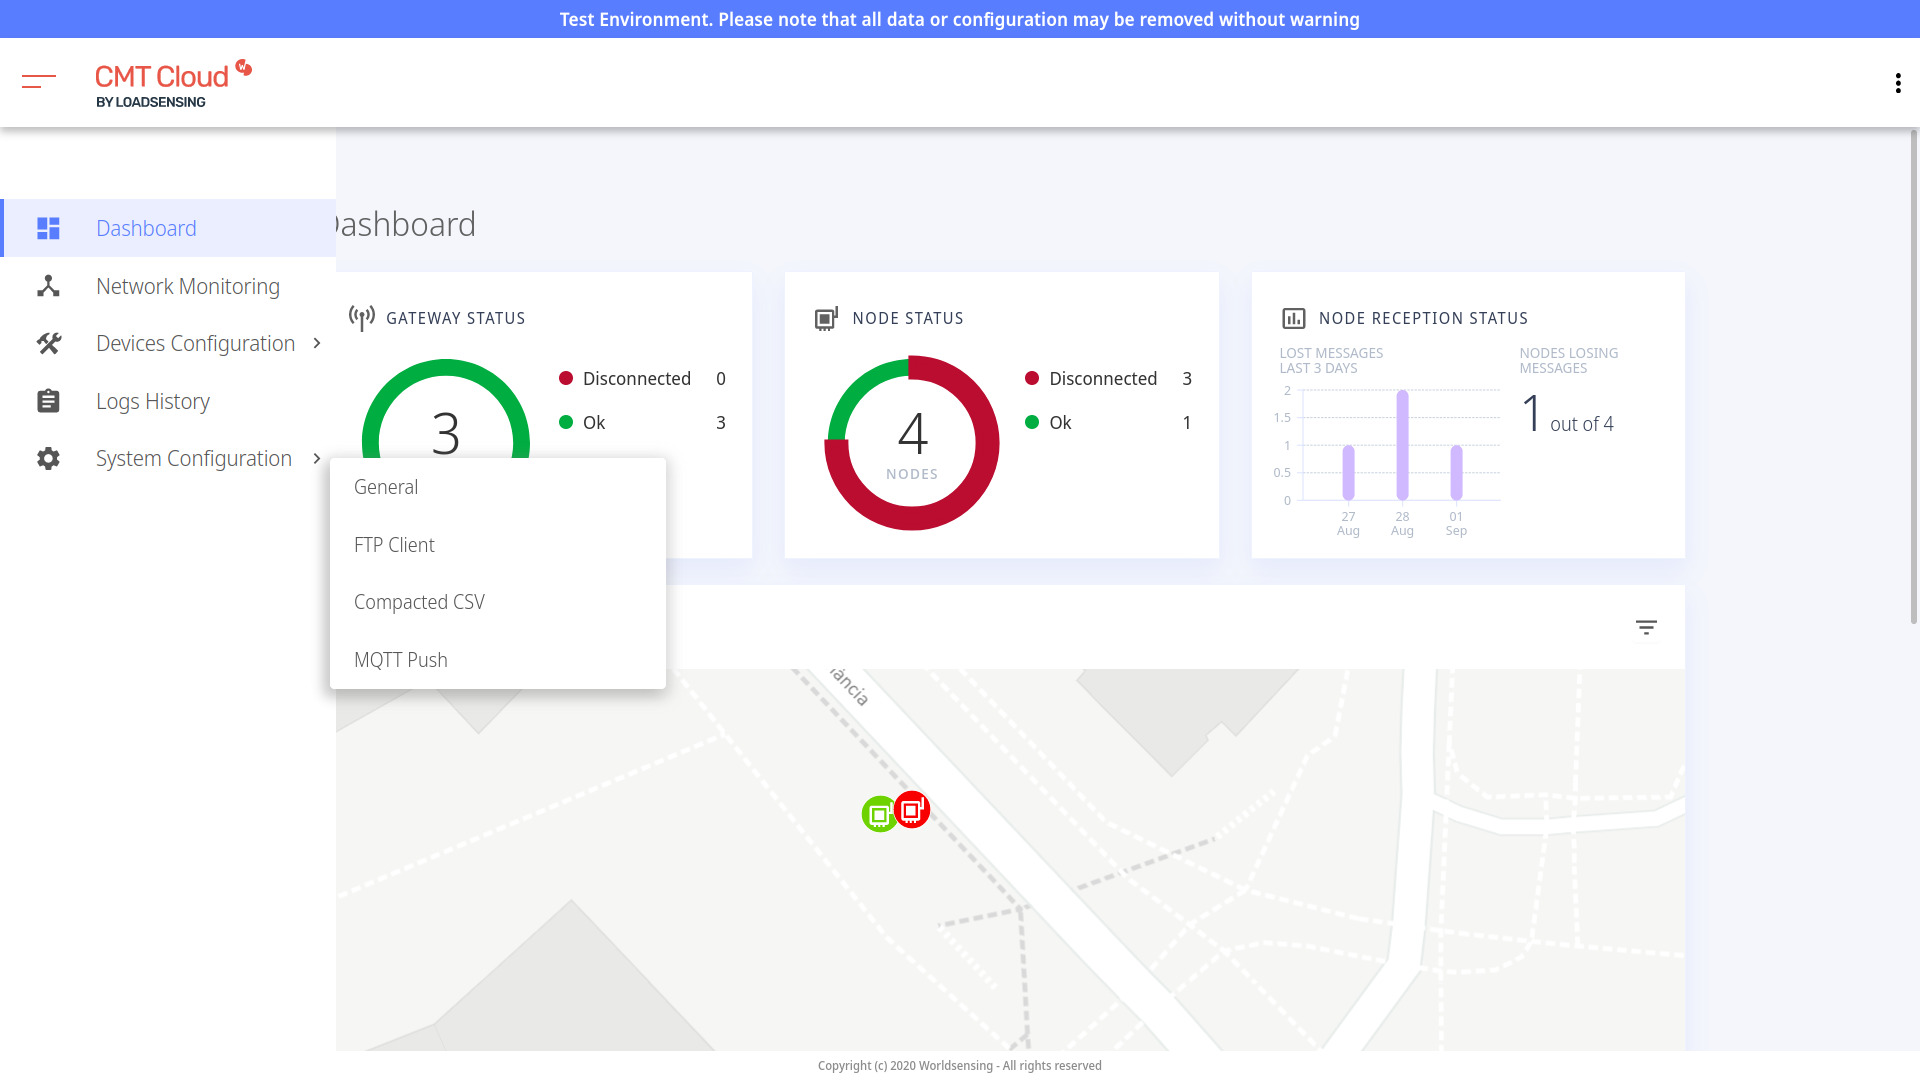
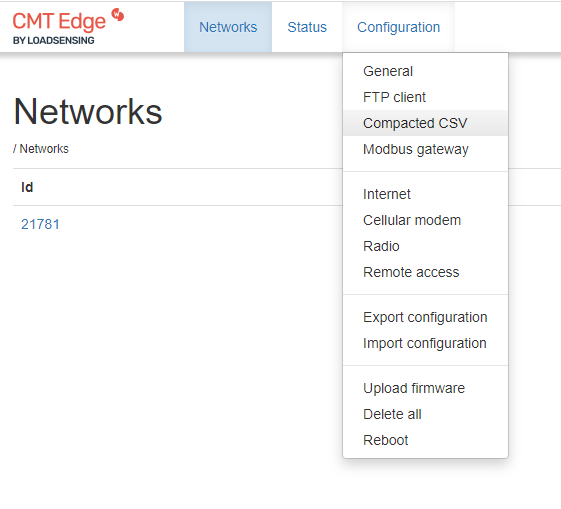
- After logging into the CMT, select System Configuration/Configuration, then FTP Client.
CMT Cloud:
CMT Edge:
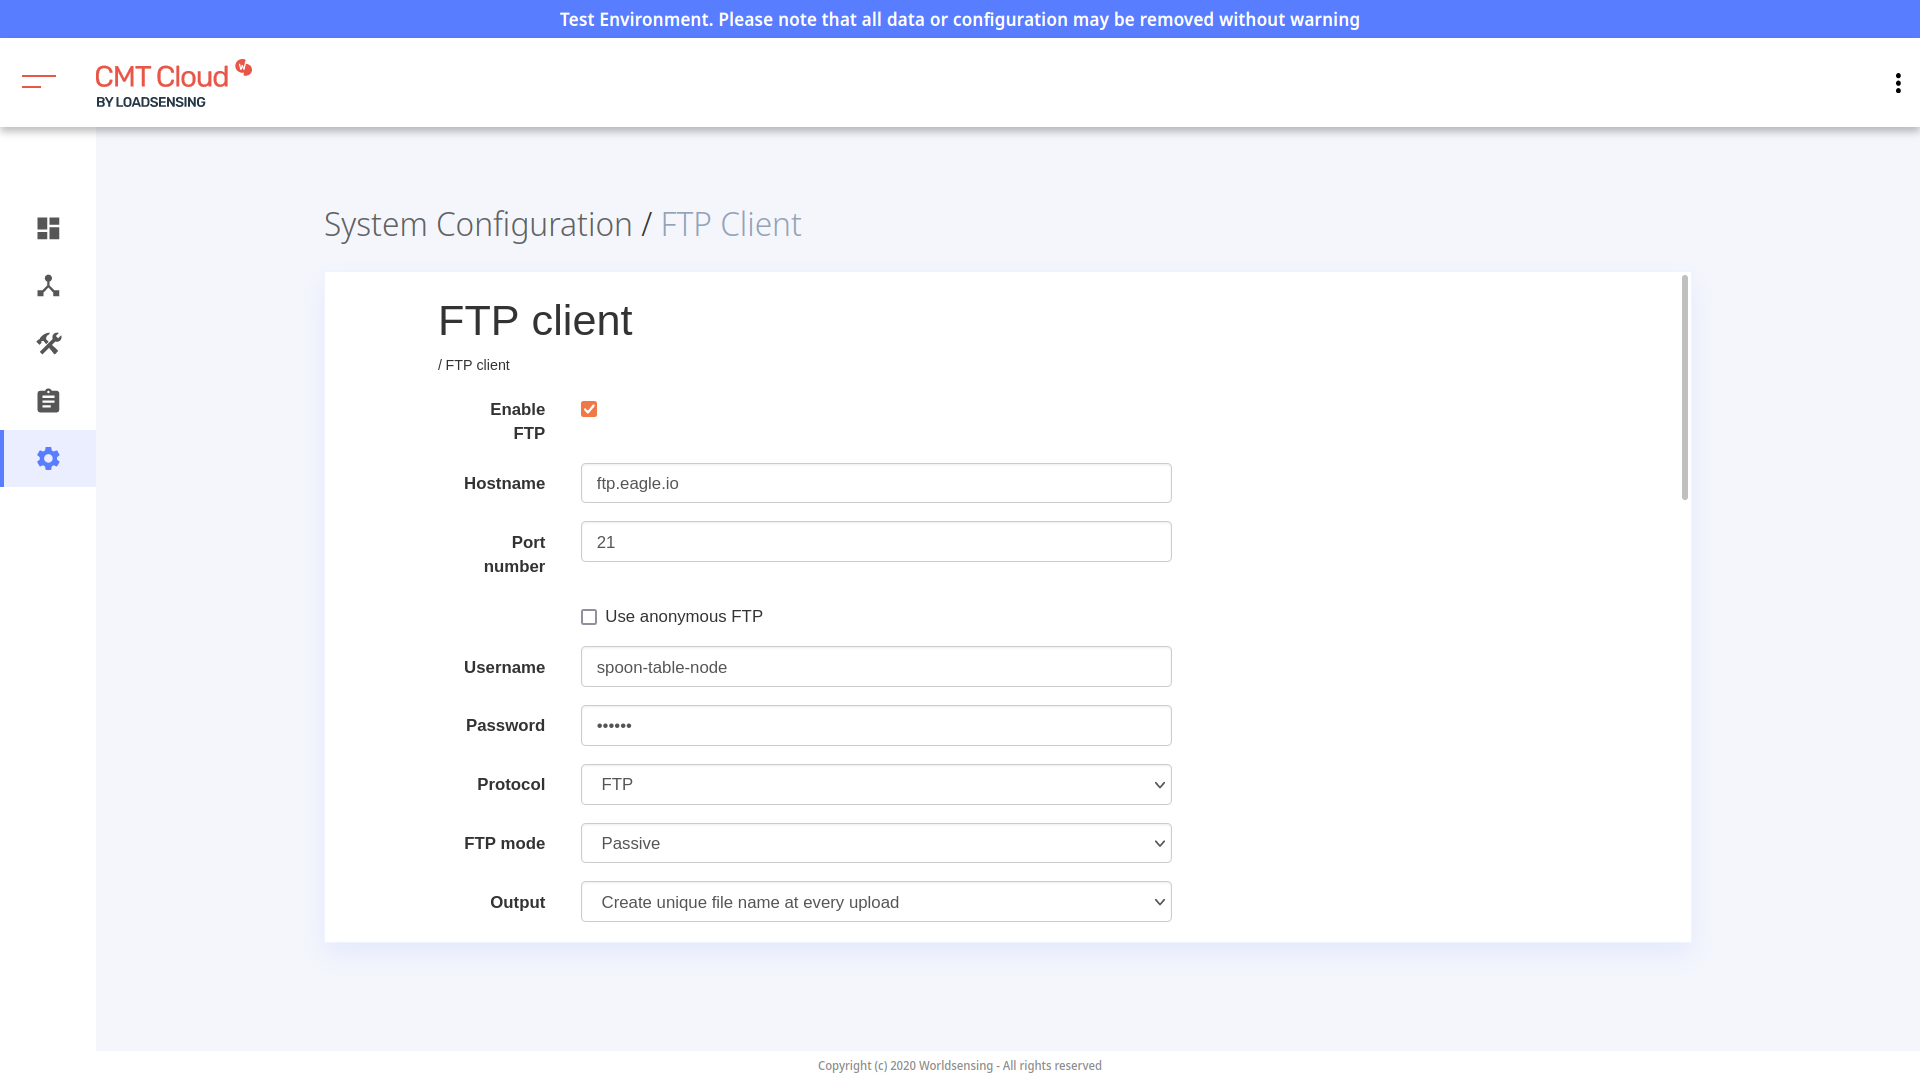
- Check the Enable FTP box and enter the following FTP client details:
- Hostname
ftp.eagle.io- Port number
21- Username
- Use the unique FTP username generated during creation of the data source. In this example, it is
spoon-table-node. Every data source will have a different unique username. - Password
- Use the password you entered during creation of the data source.
- Protocol
- FTP
- FTP mode
- Passive
- Output
- Create unique file name at every upload
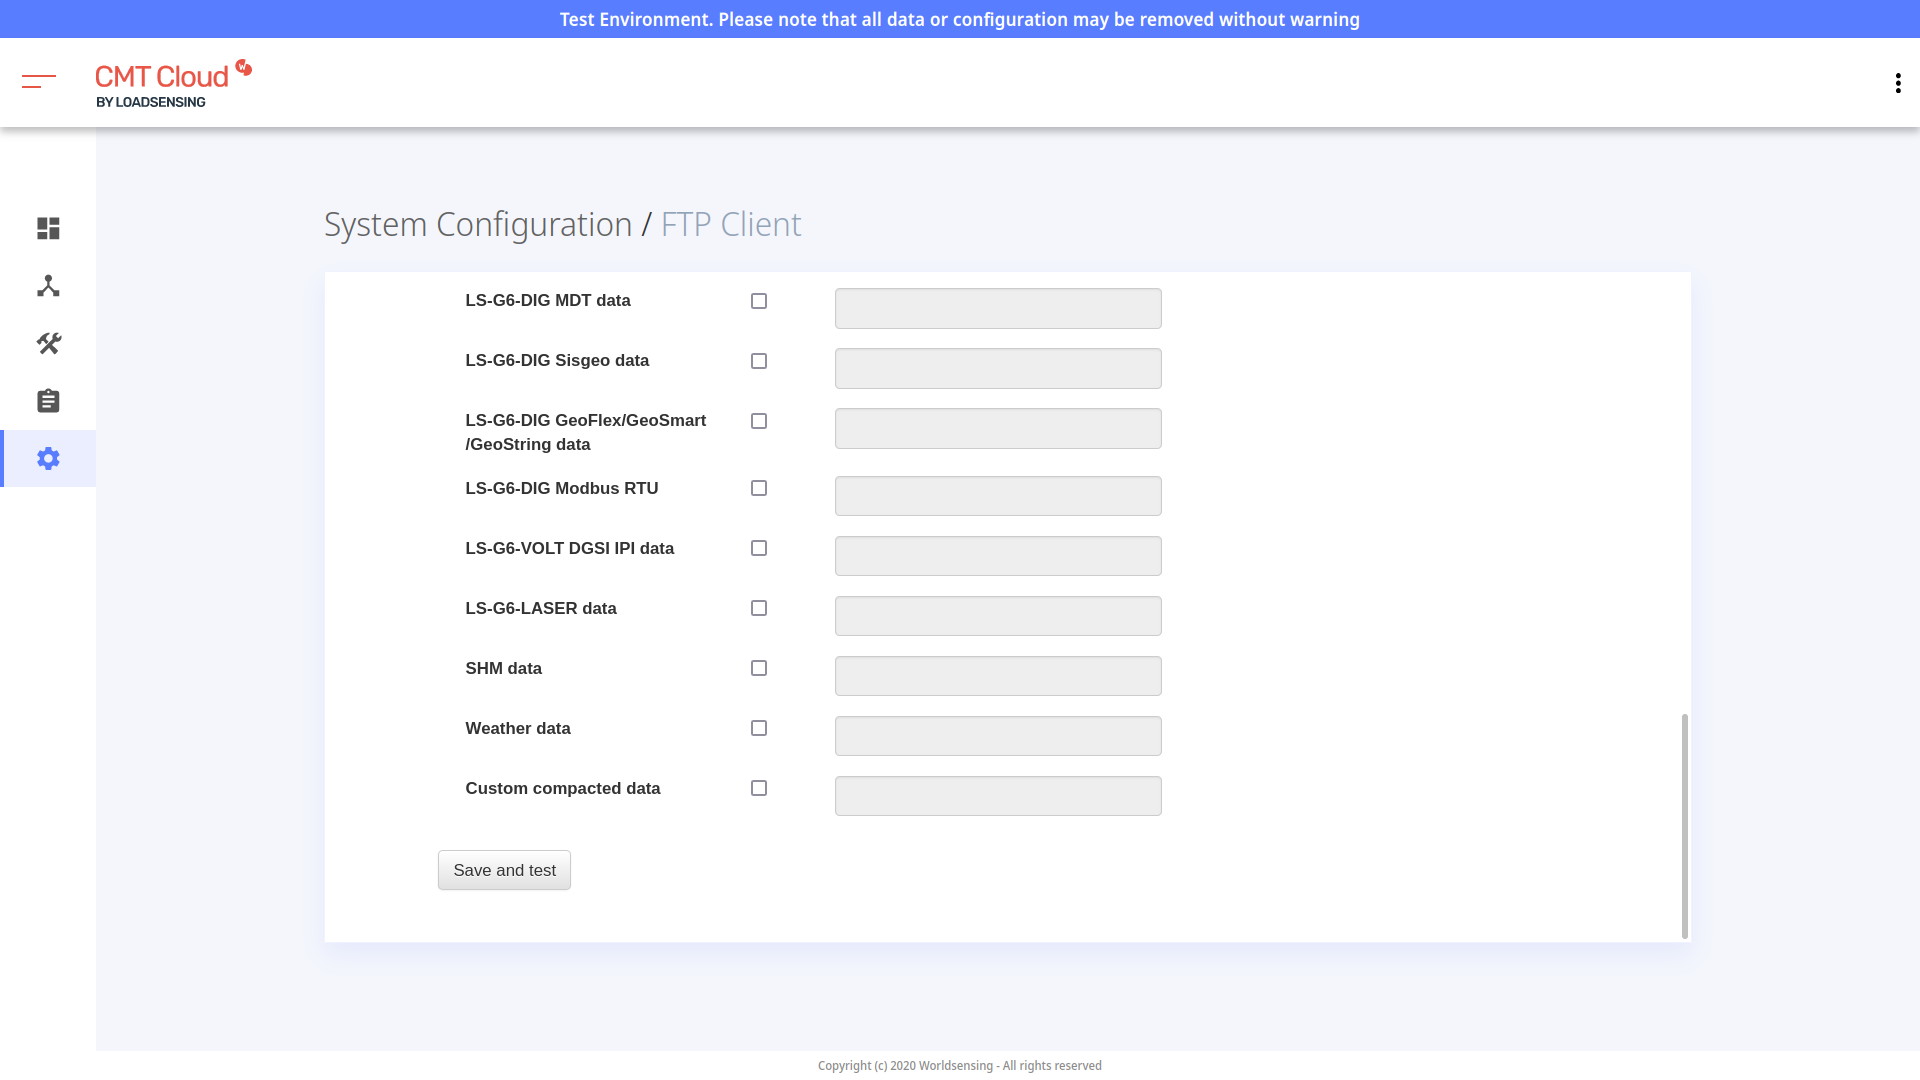
- Click a single box corresponding to the data you want to send, for example LS-G6-INC15 data, and enter a relative path of
./:
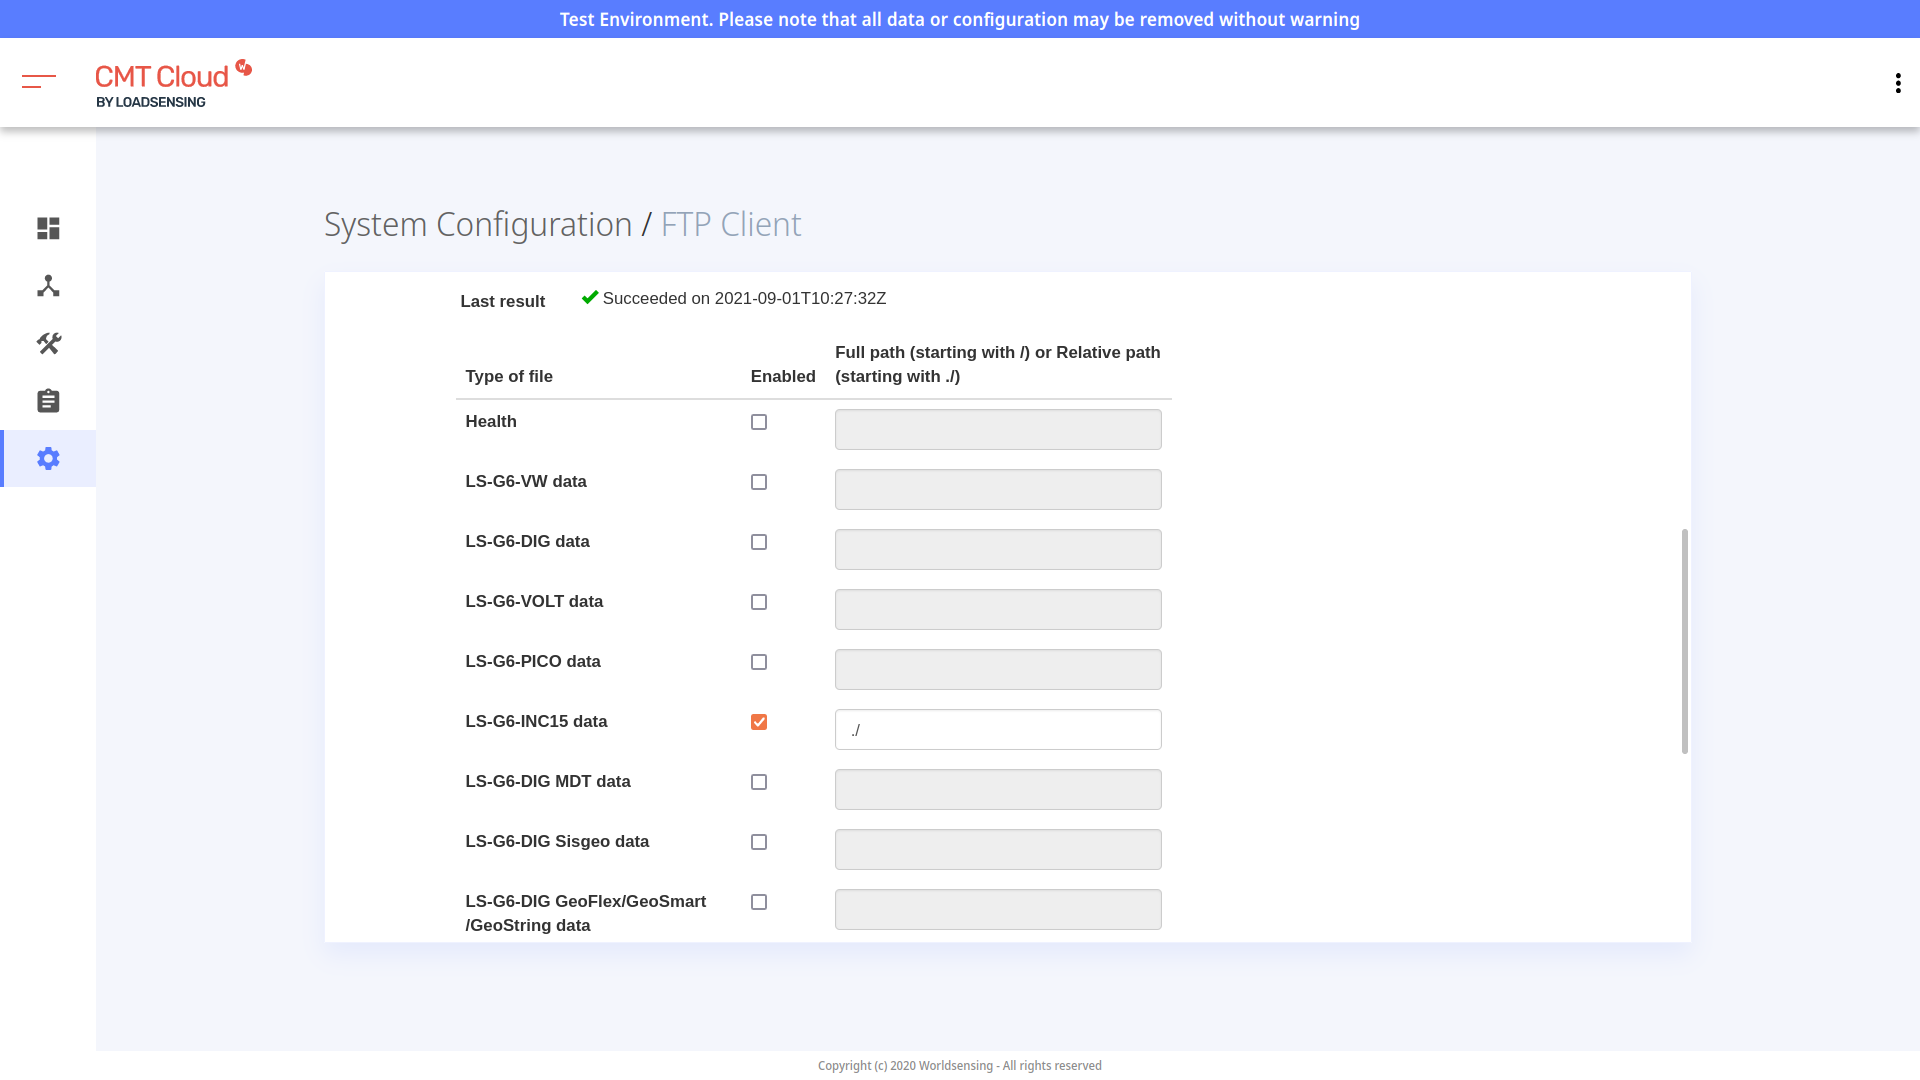
- Click Save and test
3. Finalize the configuration of the data source parser
Once a file has been sent from the CMT software to eagle.io via FTP, this file can be used to finalize the configuration of the data source that was created previously.
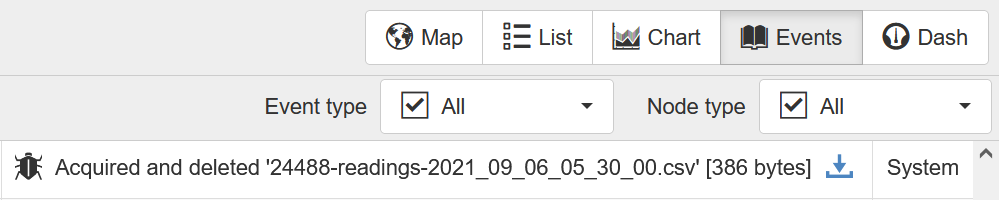
- In eagle.io, check the debug Events view of the data source to ensure that at least one file has been received. The event will look like this:
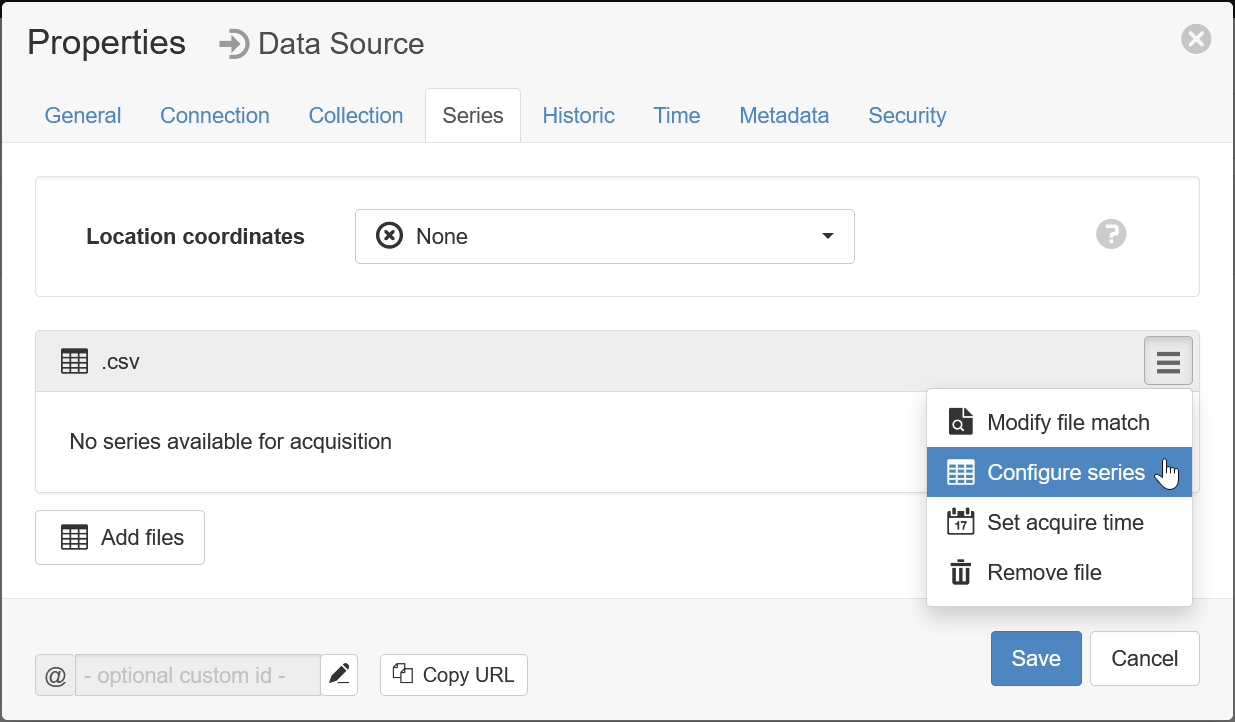
- In the data source properties dialog, go to the Series tab and choose the Configure series option for the .csv data file. If this option is greyed-out, that means a file has not yet been received (refer to the previous step):
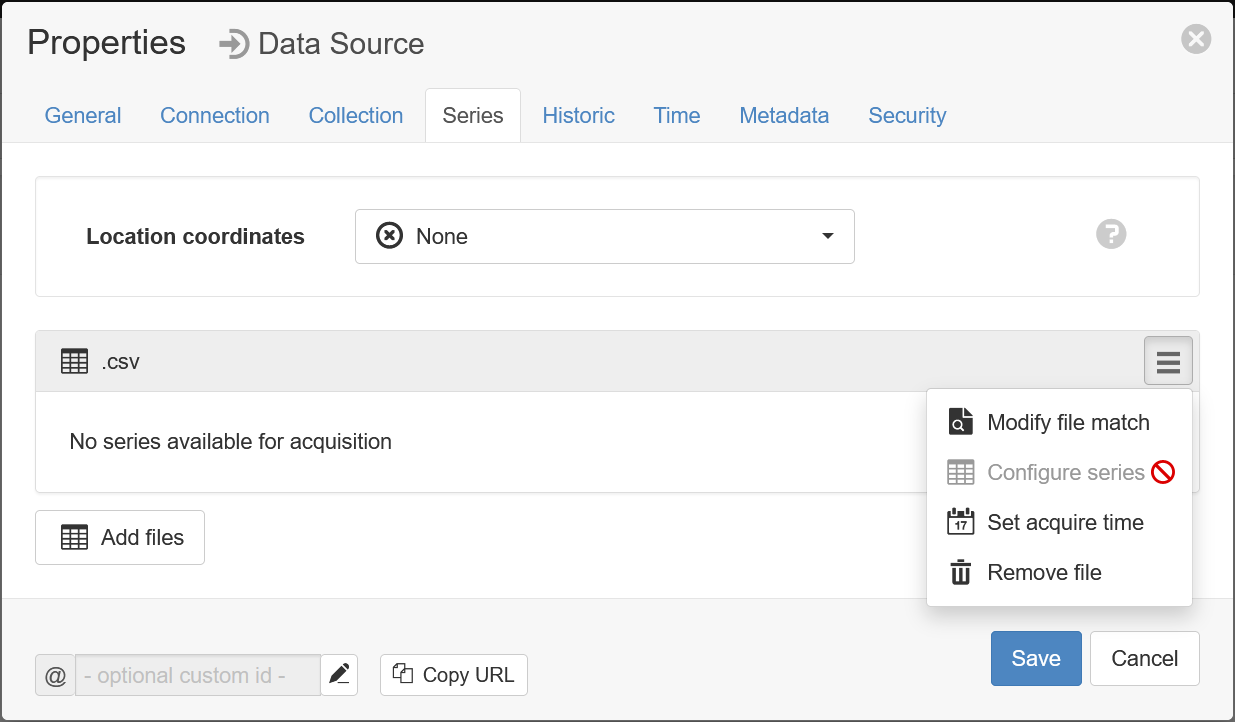
- Once a file has been received, the Configure series option for the .csv data file will be avilable:
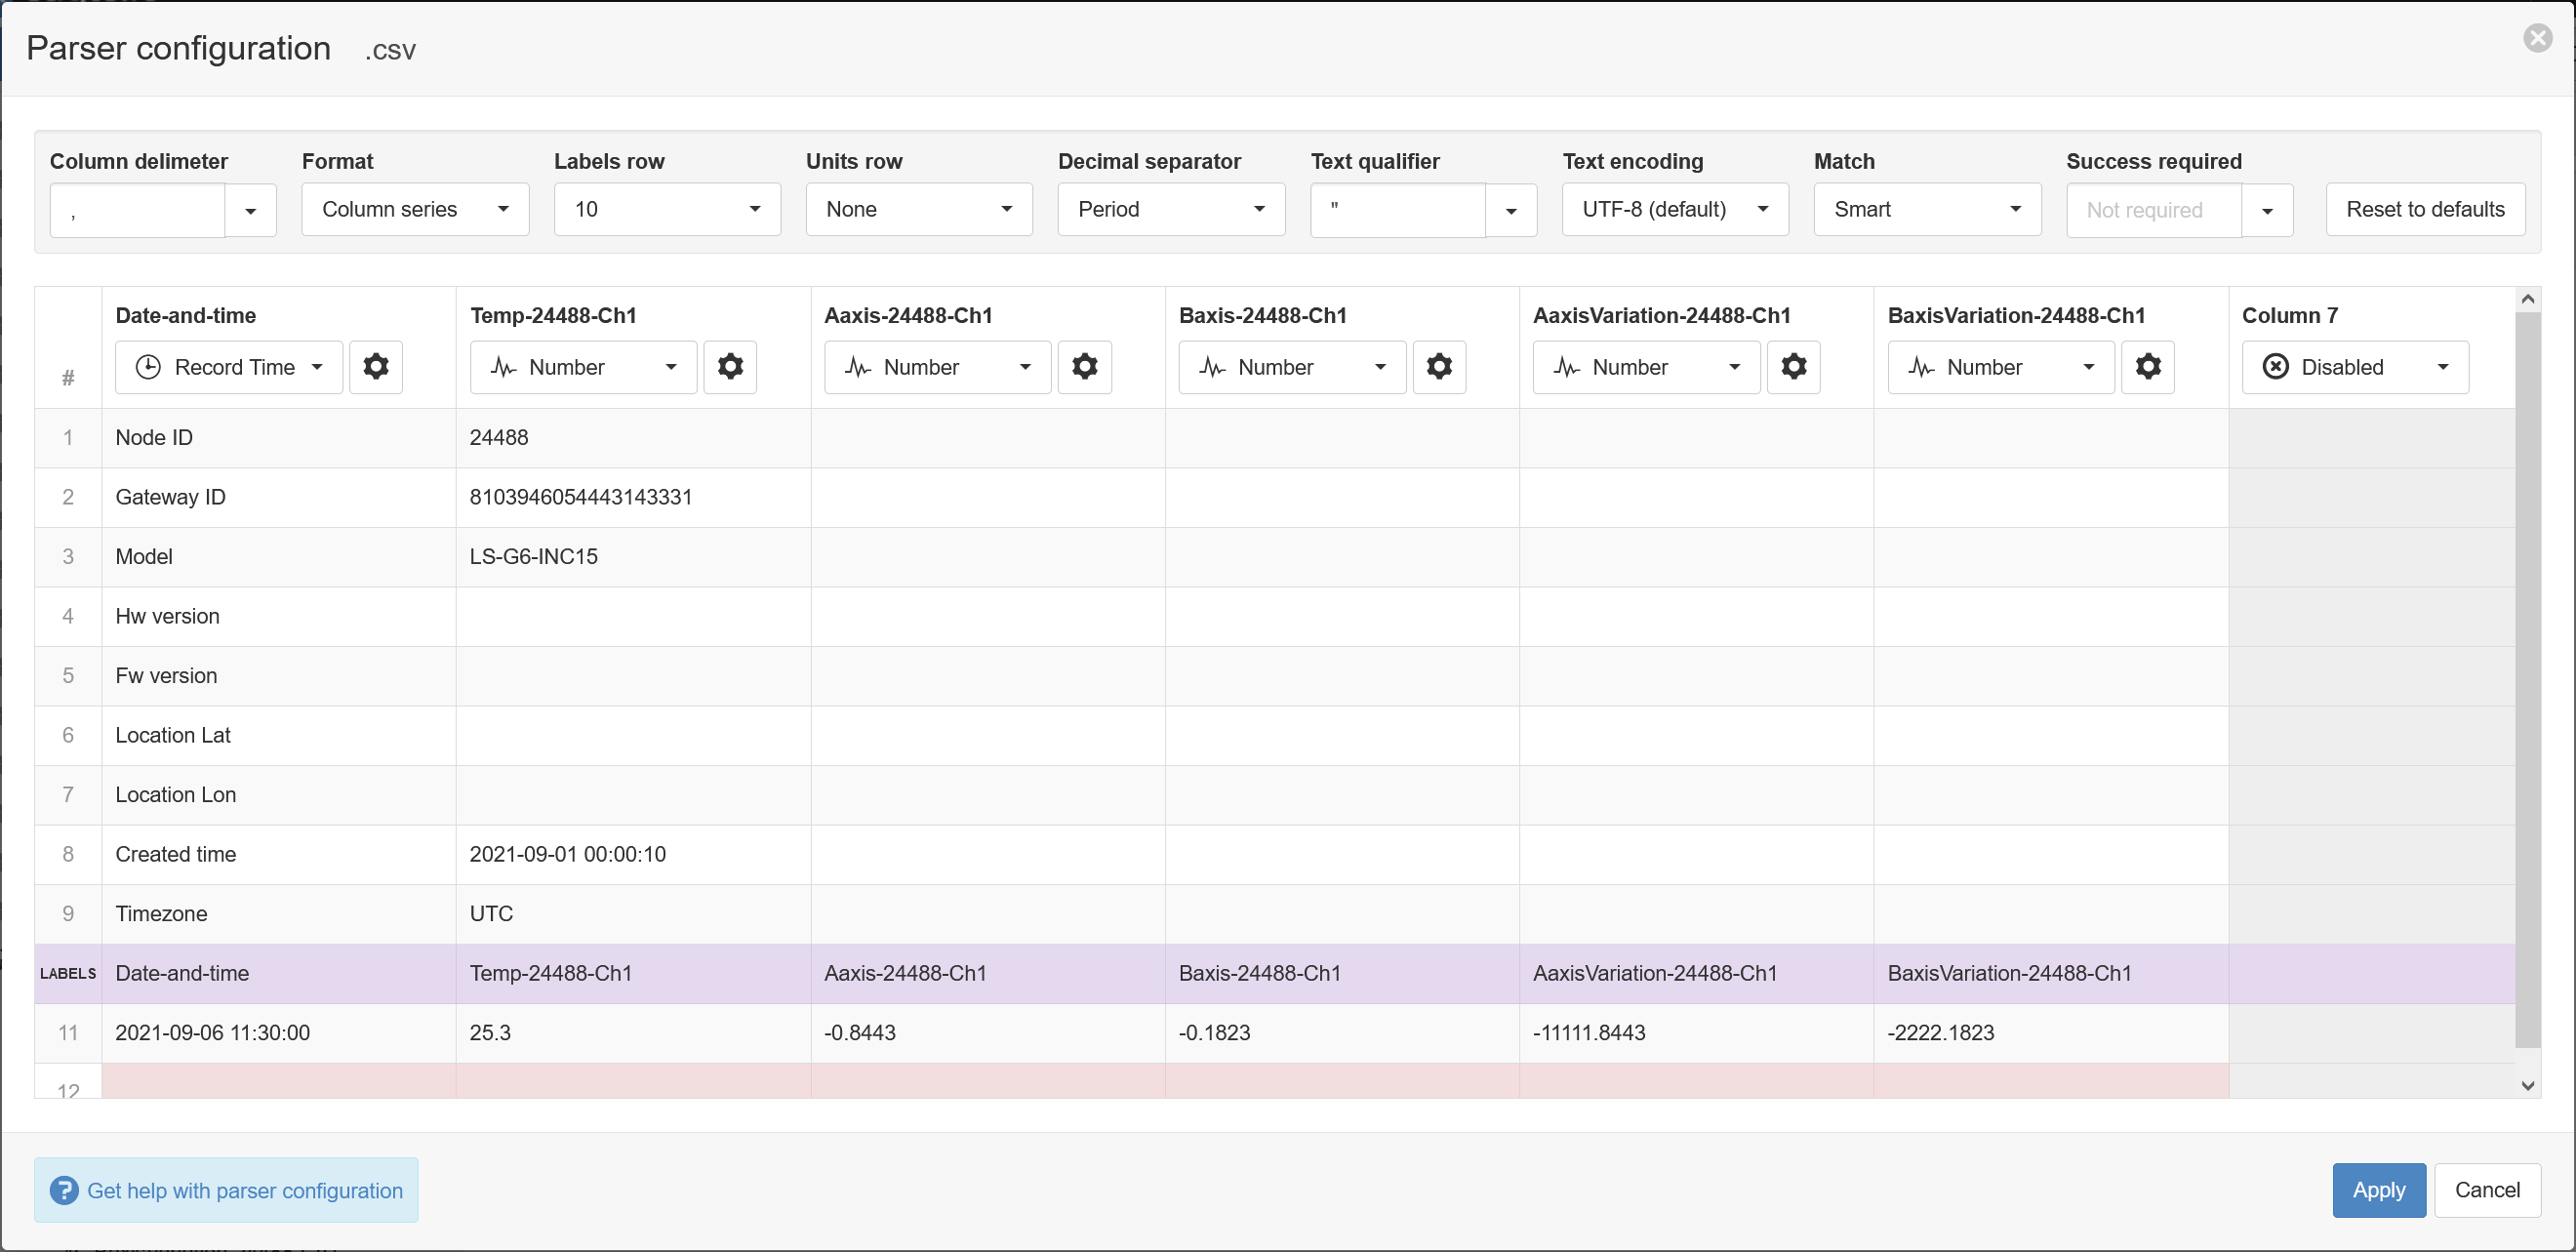
- The Parser configuration screen allows the user to describe the structure and format of the data file so it can be correctly interpreted by the system in subsequent uploads. Refer to Text Parser Configuration for full details. The data file contains a header row, so set the Labels row control to row 10 which will assign default labels for parameter creation (that is the purple line in the example below). Ensure the data in each column matches the expected column data type and format. Validation errors are shown in red. Any columns not required for collection can optionally be Disabled. The default time format for the Record Time column is already set to YYYY-MM-DD HH:mm:ss and should not need to change. After appropriate configuration, the parser should look now look like this; click Apply to continue:
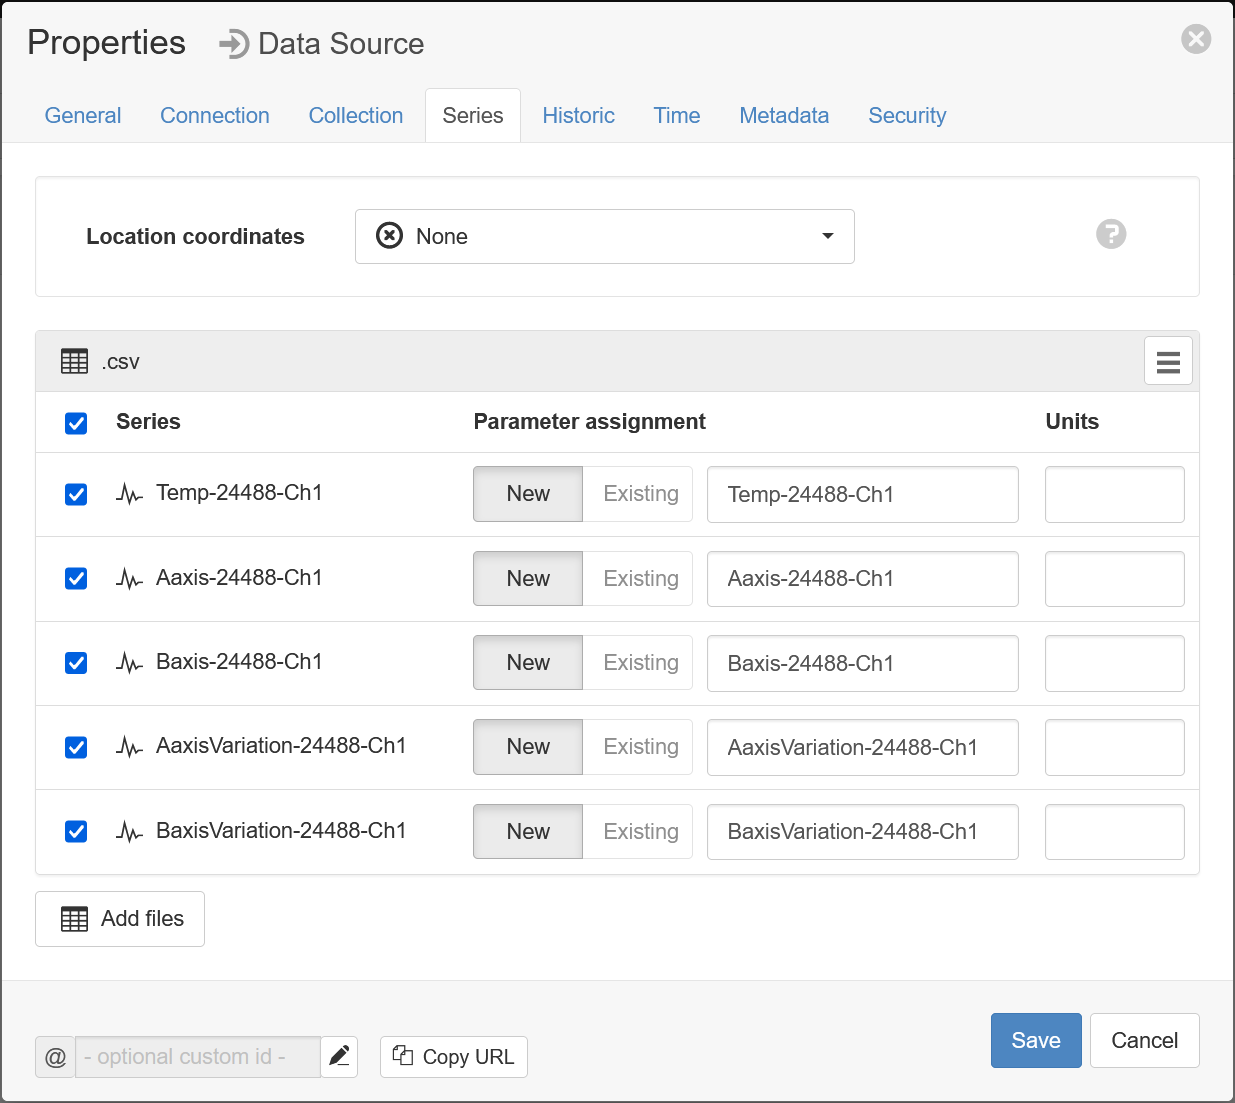
- Specify the parameter names (and optionally units) for each series/column defined in the Parser configuration. Uncheck any series you do not want to create as parameters. Click Save to complete the configuration and create the parameters.
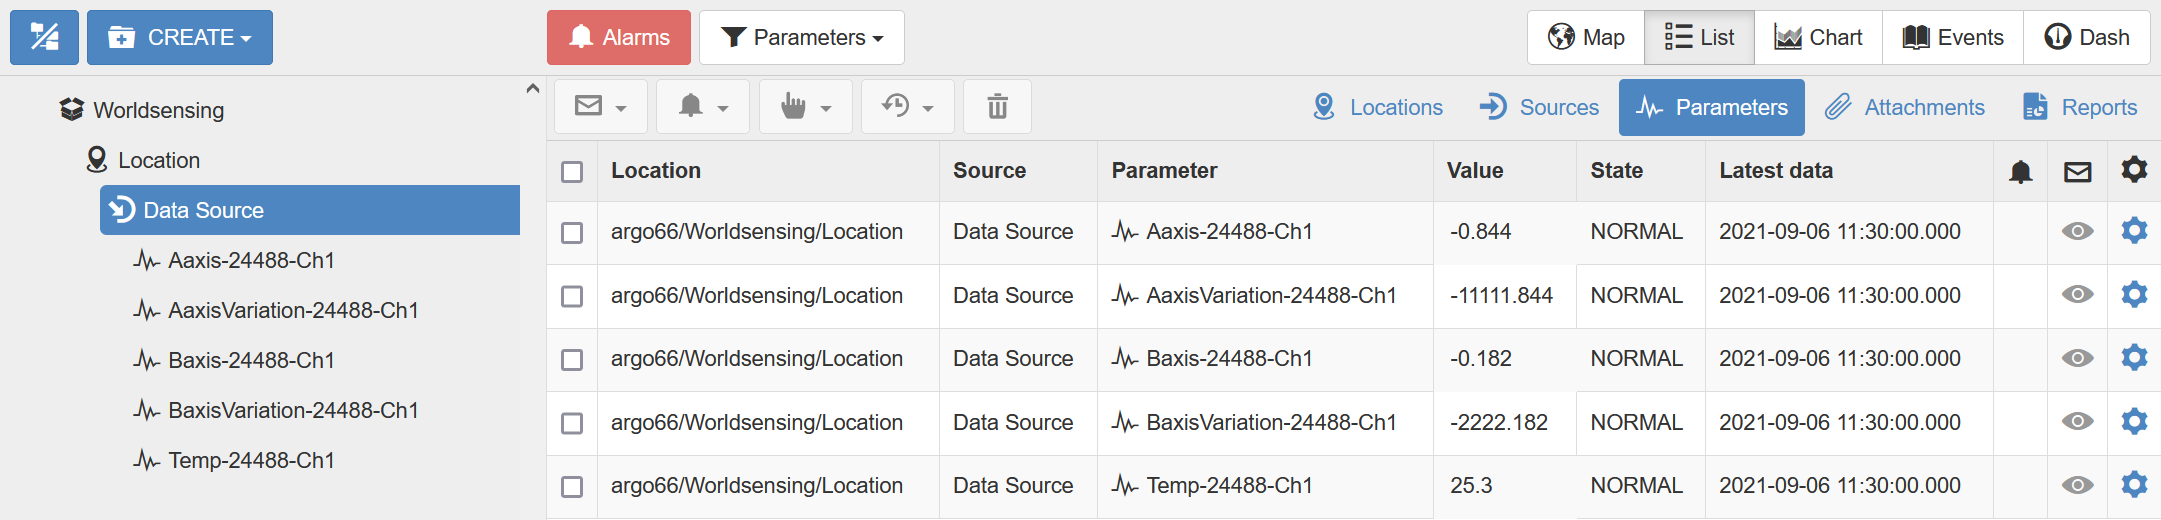
- The parameters have now been created; when data is next sent via FTP, the values will appear in the Parameters view:
Note
You can reconfigure the file name match/sample file, parser configuration and parameter assignment from the data source properties dialog after creation.
Note
Use the Events view with the detail level set to Debug for reviewing communication history and diagnosing configuration issues.