Myriota Developer Toolkit
The Myriota Network is a next generation, direct-to-orbit IoT technology platform that offers data transfer at mass scale.
The Myriota Developer Toolkit gives you all the tools you need to add affordable, long battery life IoT connectivity to your product. This unique direct-to-satellite technology offers the lowest cost of data transfer and the longest battery life for applications, and can be configured to send data to eagle.io in a few easy steps.

Introduction
There are 5 main tasks required when setting up the Myriota Developer Toolkit to work with eagle.io
- Configure an eagle.io data source with the Upload via HTTP transport
- Define Myriota message format using Ruby unpack syntax
- Determine the destination URL (defined by the data source and the message format)
- Send a sample message to the destination URL with the send message function
- Use the sample message to configure the eagle.io parser, and map/name your variables
1. Configure an eagle.io data source
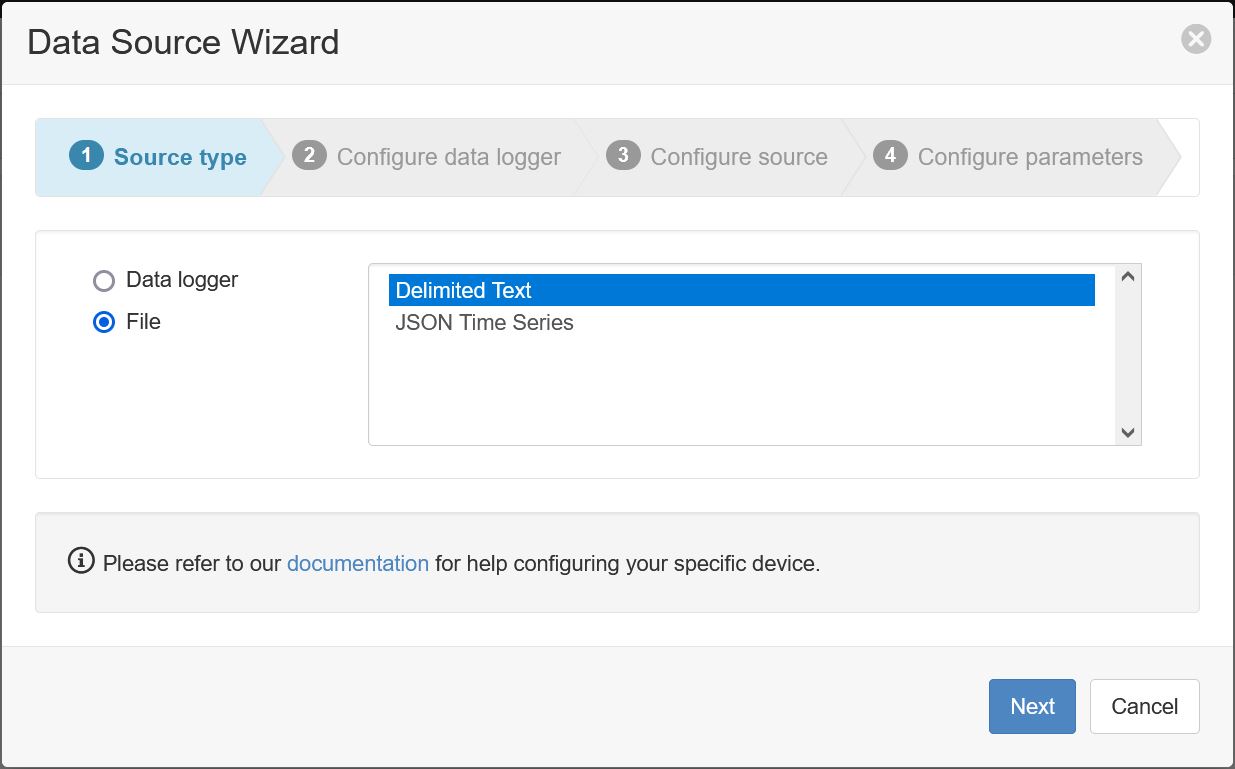
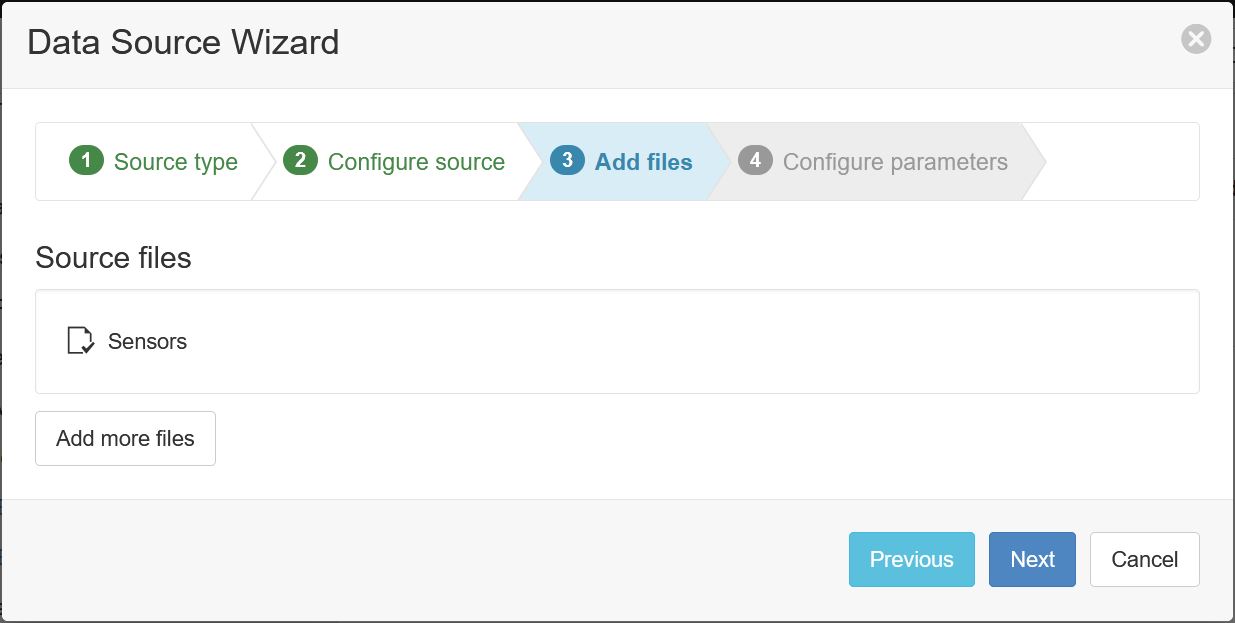
- Create a Data Source (note that a Data Source node can only be created within a Location node) and select File as the Source Type. Choose Delimited Text from the list and click Next.
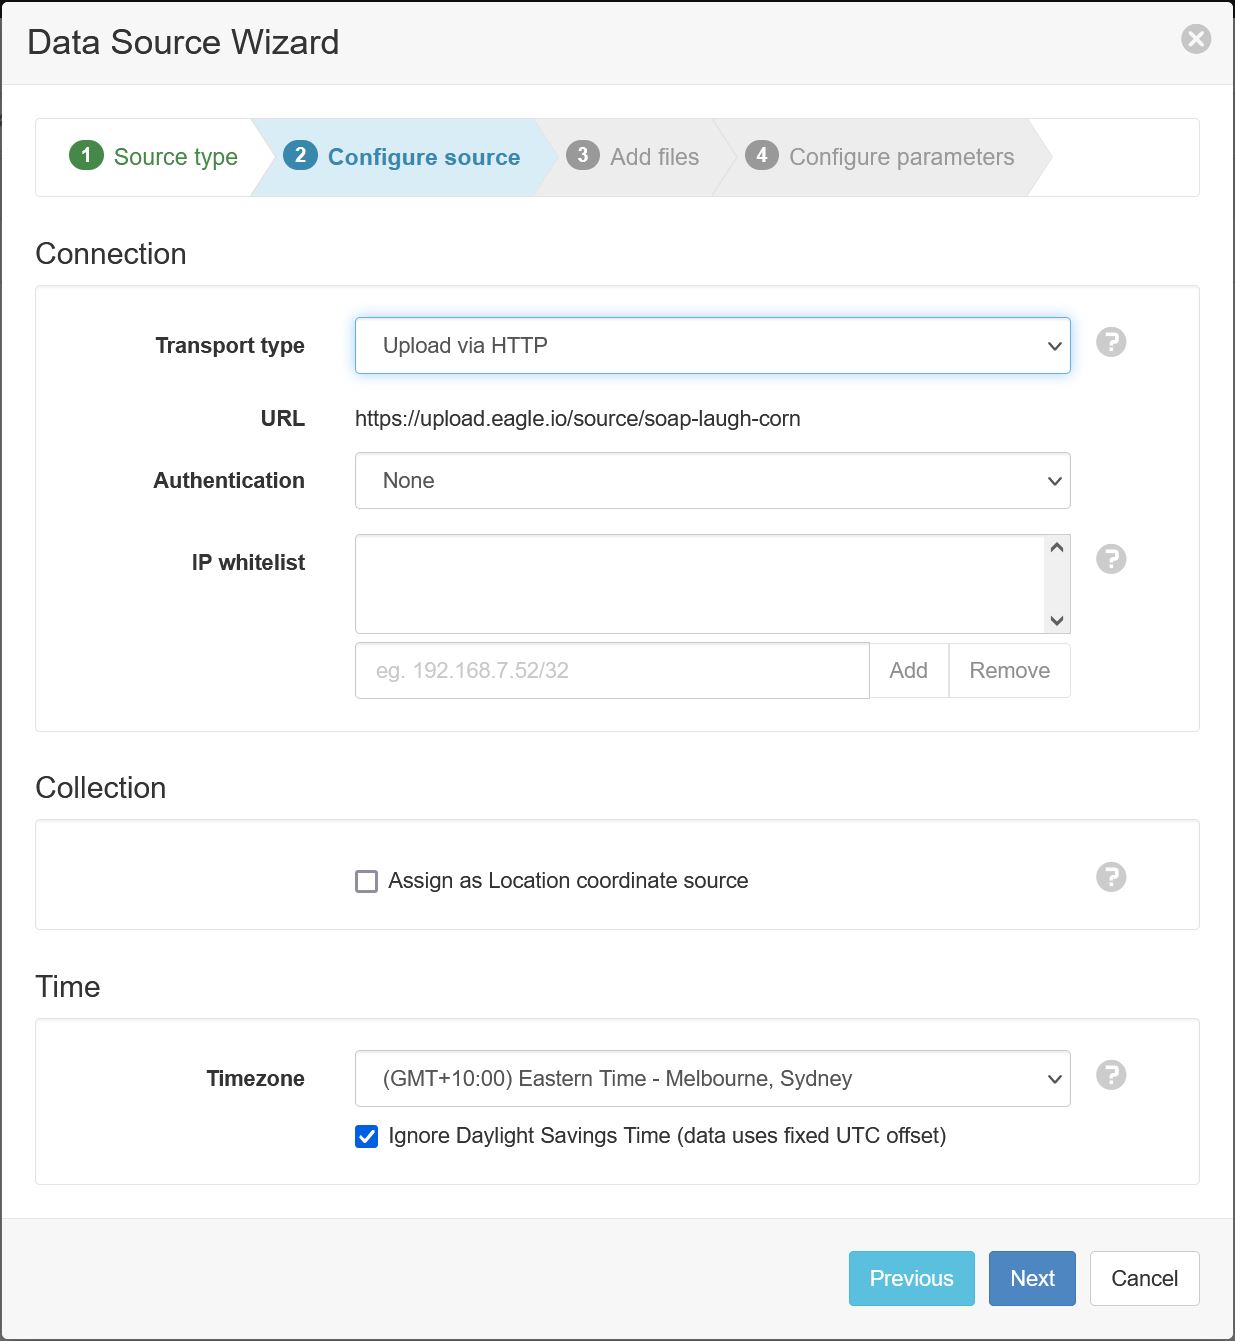
- Select Upload via HTTP as the transport type. A unique URL will be automatically generated per data source. Select the desired timezone and click Next.
- Choose the Send option:
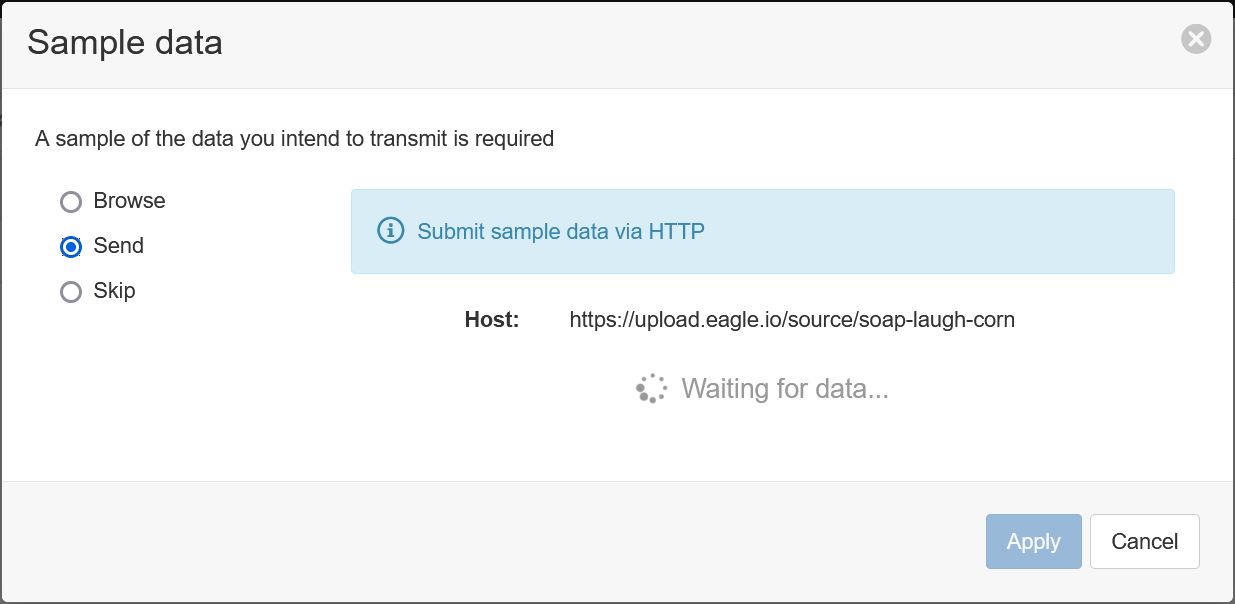
The data source is now ready to receive sample data.
2. Define Myriota message format
In order to send data from the Myriota device to eagle.io, the data format must first be defined. This will describe how to decode the message, which comprises a 40-character hexadecimal string. Ruby unpack syntax is used to define the format.
This is an example of the packed Myriota string, and the data format which defines how to unpack it:
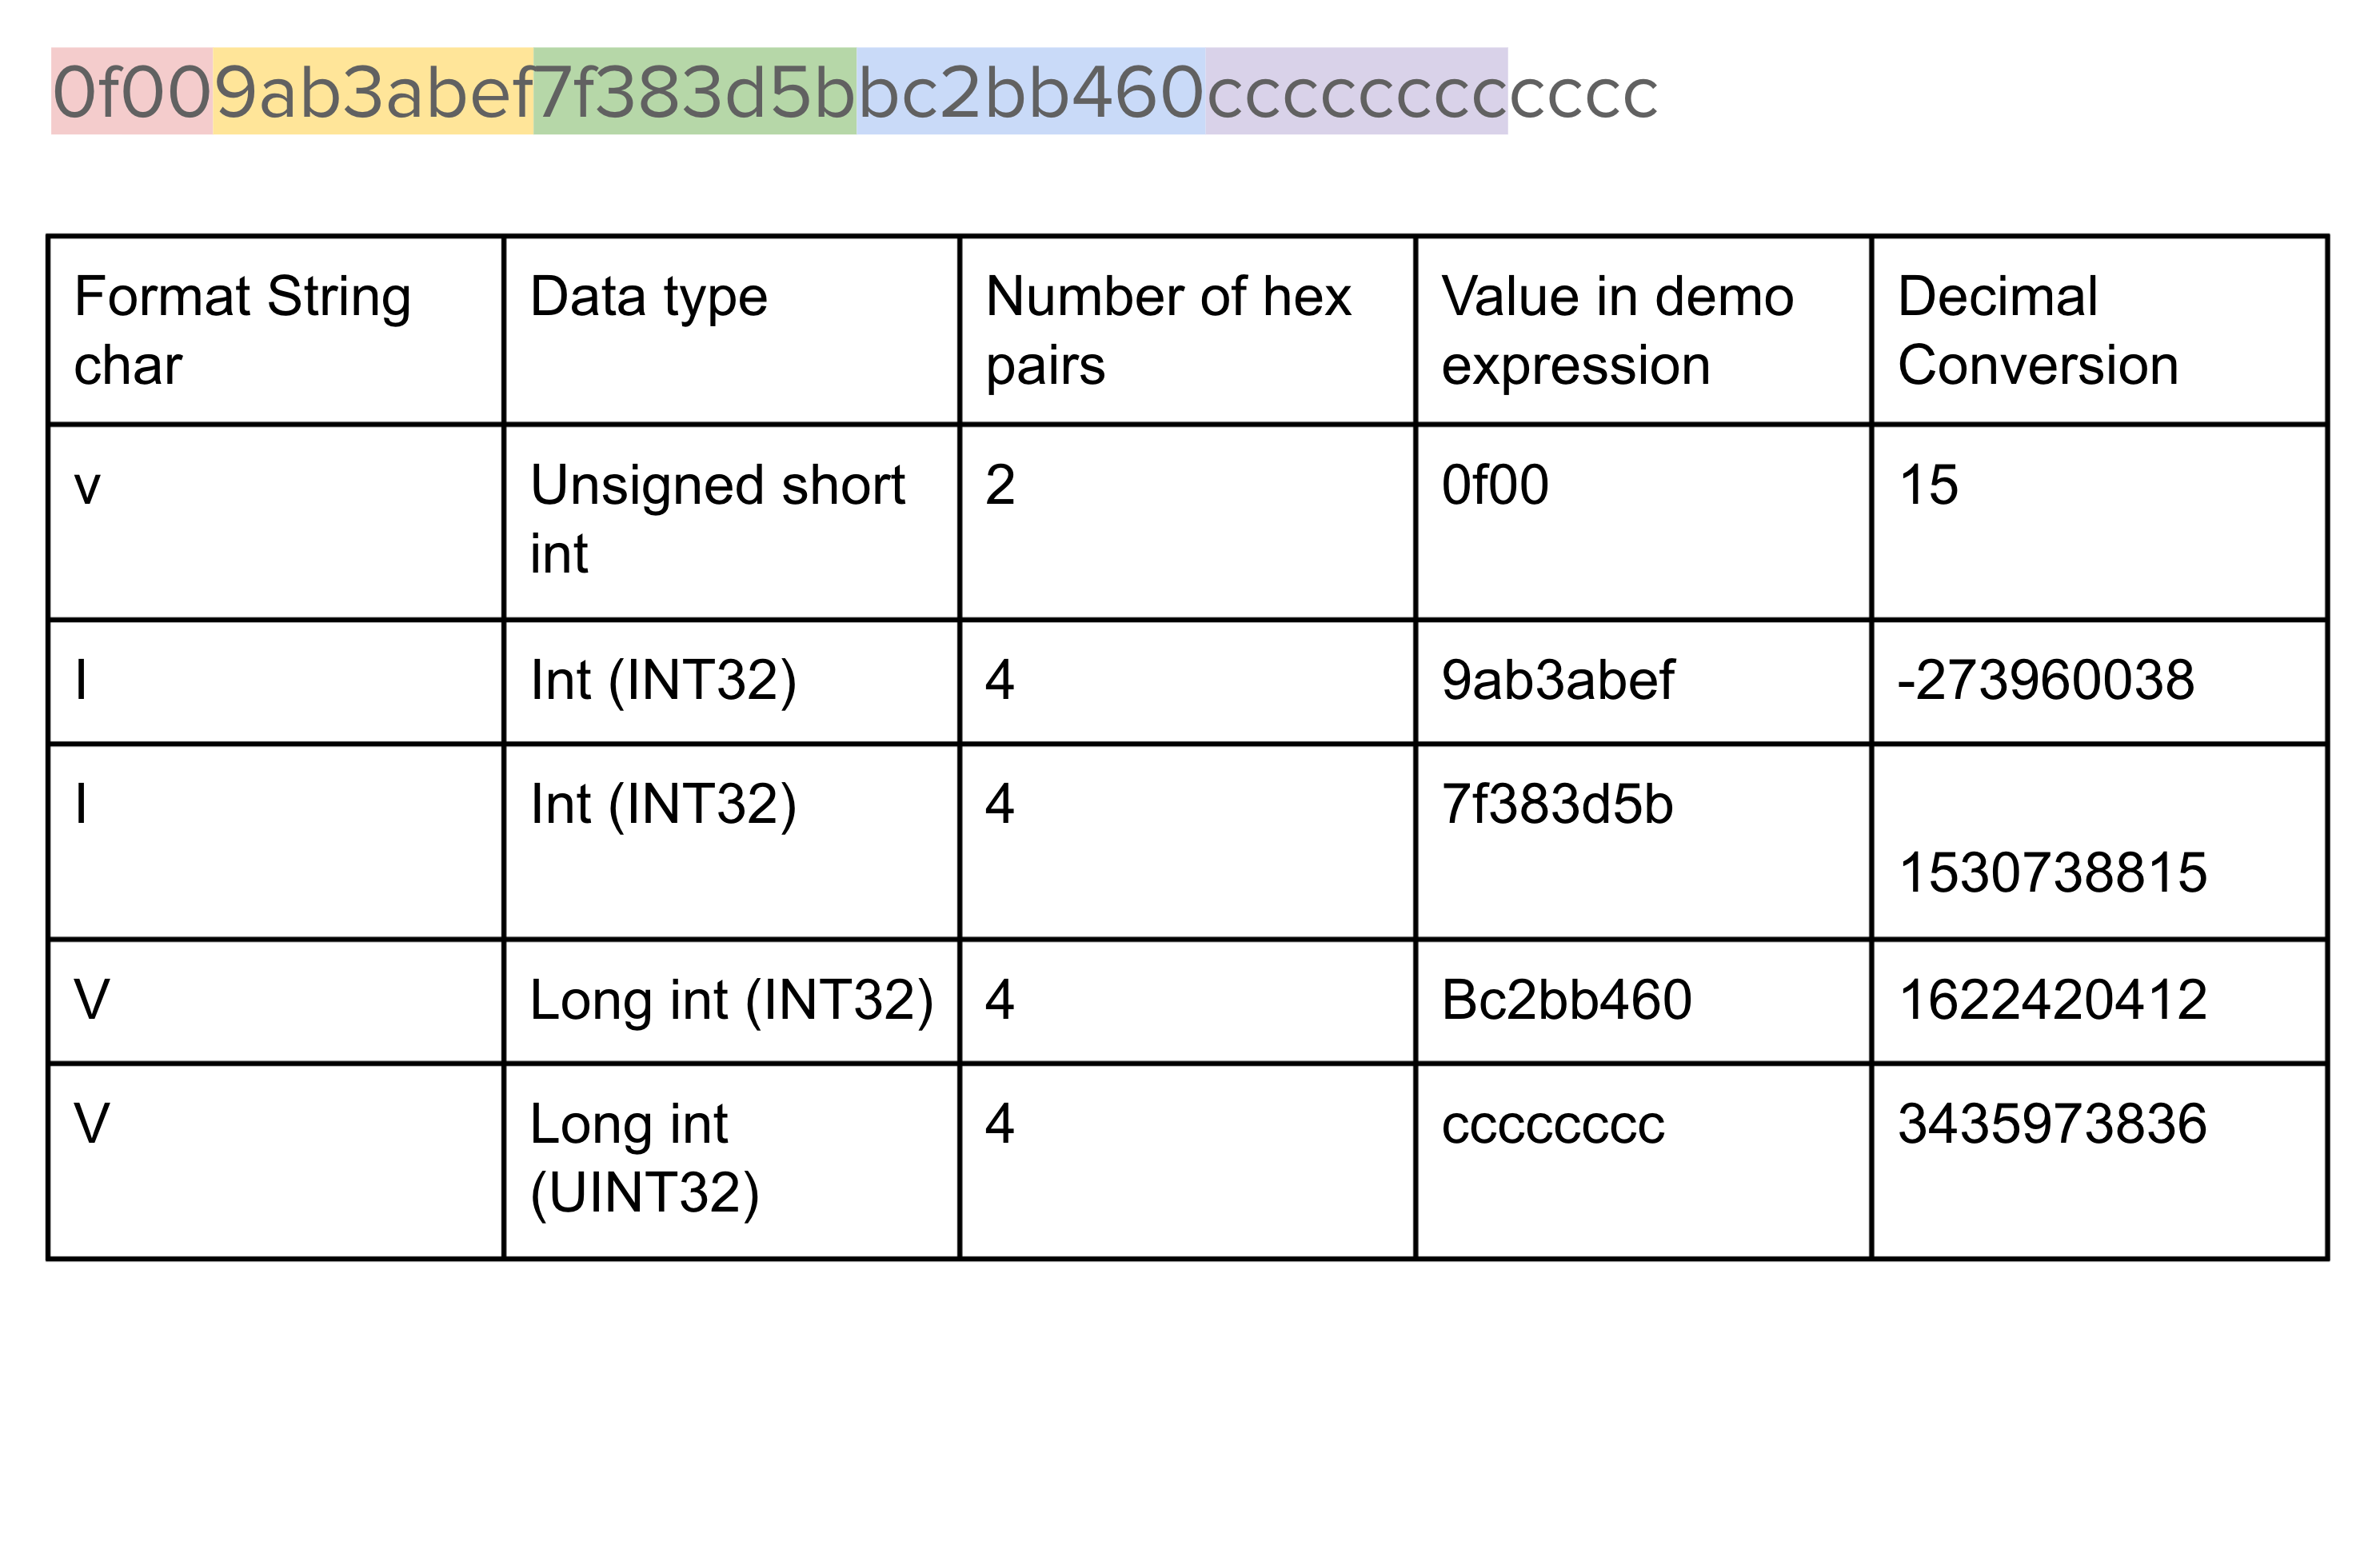
Note that each of the 5 elements packed into this particular hexadecimal string has a data type which maps to a letter code. These letter codes are an example of the Ruby unpack syntax, a shorthand way of defining data types.
The 5 elements of this example are defined by the 5 code letters, v l l V V. Although all messages will be 40-character hex strings, other messages may be defined by different combinations of data types, which will result in different combinations of the unpack letter codes.
The combination of letter codes that define the data format will play an important role in the following step.
3. Determine the destination URL
The destination URL that Myriota will send data to takes the following format:
https://upload.eagle.io/source/<server key>/myriota?format=<data format>
Where:
- <server key> is the unique three-word key that is generated as part of the URL during the data source wizard in step 1
- <data format> is the combination of letter codes that define the specific data format used to unpack the 40-character hexadecimal message
The first portion of this URL is displayed in the data source creation wizard, which at the end of step 1 was left waiting for data.
This should be appended with /myriota?format=<data format> to complete the URL, for example:
https://upload.eagle.io/source/soap-laugh-corn/myriota?format=vllVV
Note that this specific example uses a server key of soap-laugh-corn, and a data format of vllVV
4. Send a sample message to the destination URL
Using the URL determined in the previous step, the Myriota device can now be configured.
Note
Each eagle.io destination URL is unique to that data source. You will need to create a new data source with a new URL for each new Myriota device, along with with a corresponding new destination in the Myriota Device Manager
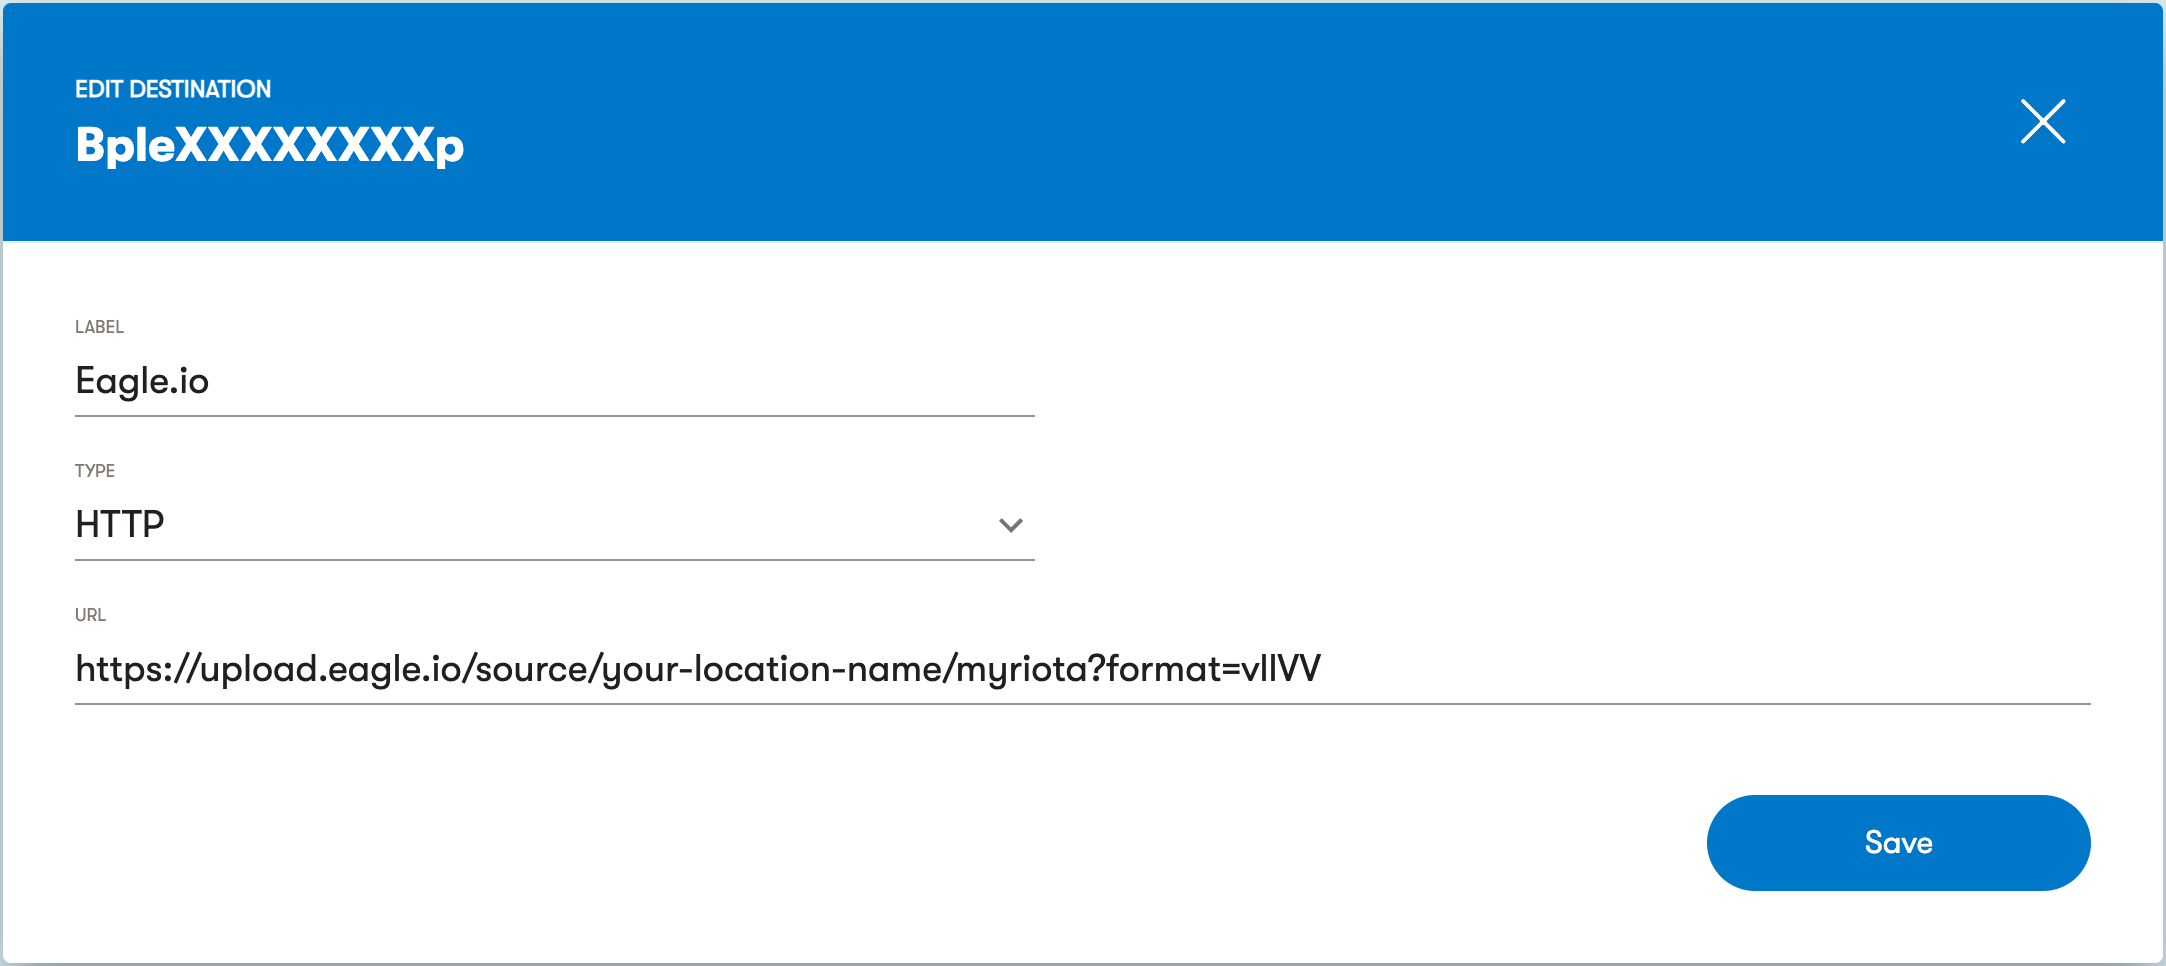
- In the Destinations section of the Myriota Device Manager, click the Create button to create a new destination. Enter a descriptive label, choose HTTP as the type, and enter the destination URL from the previous step, then click Save:
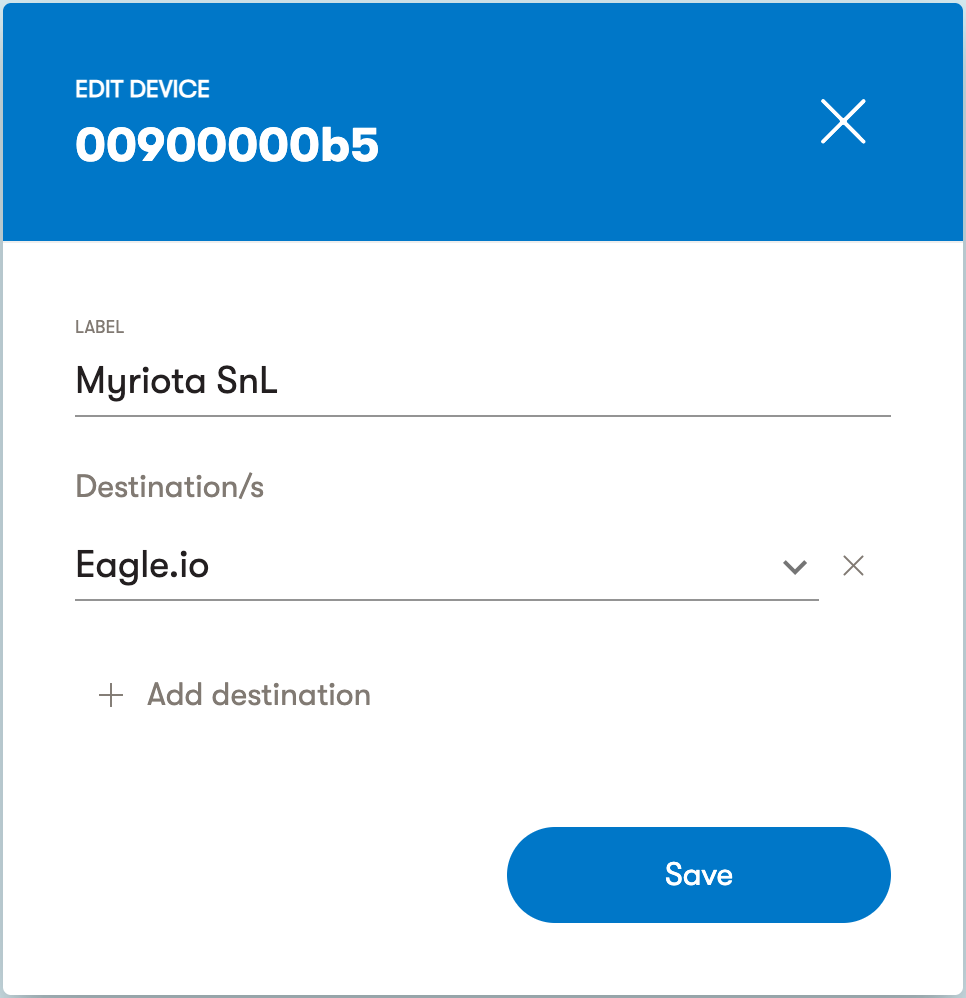
- In the Devices section of the Myriota Device Manager, assign a device to the new eagle.io destination:
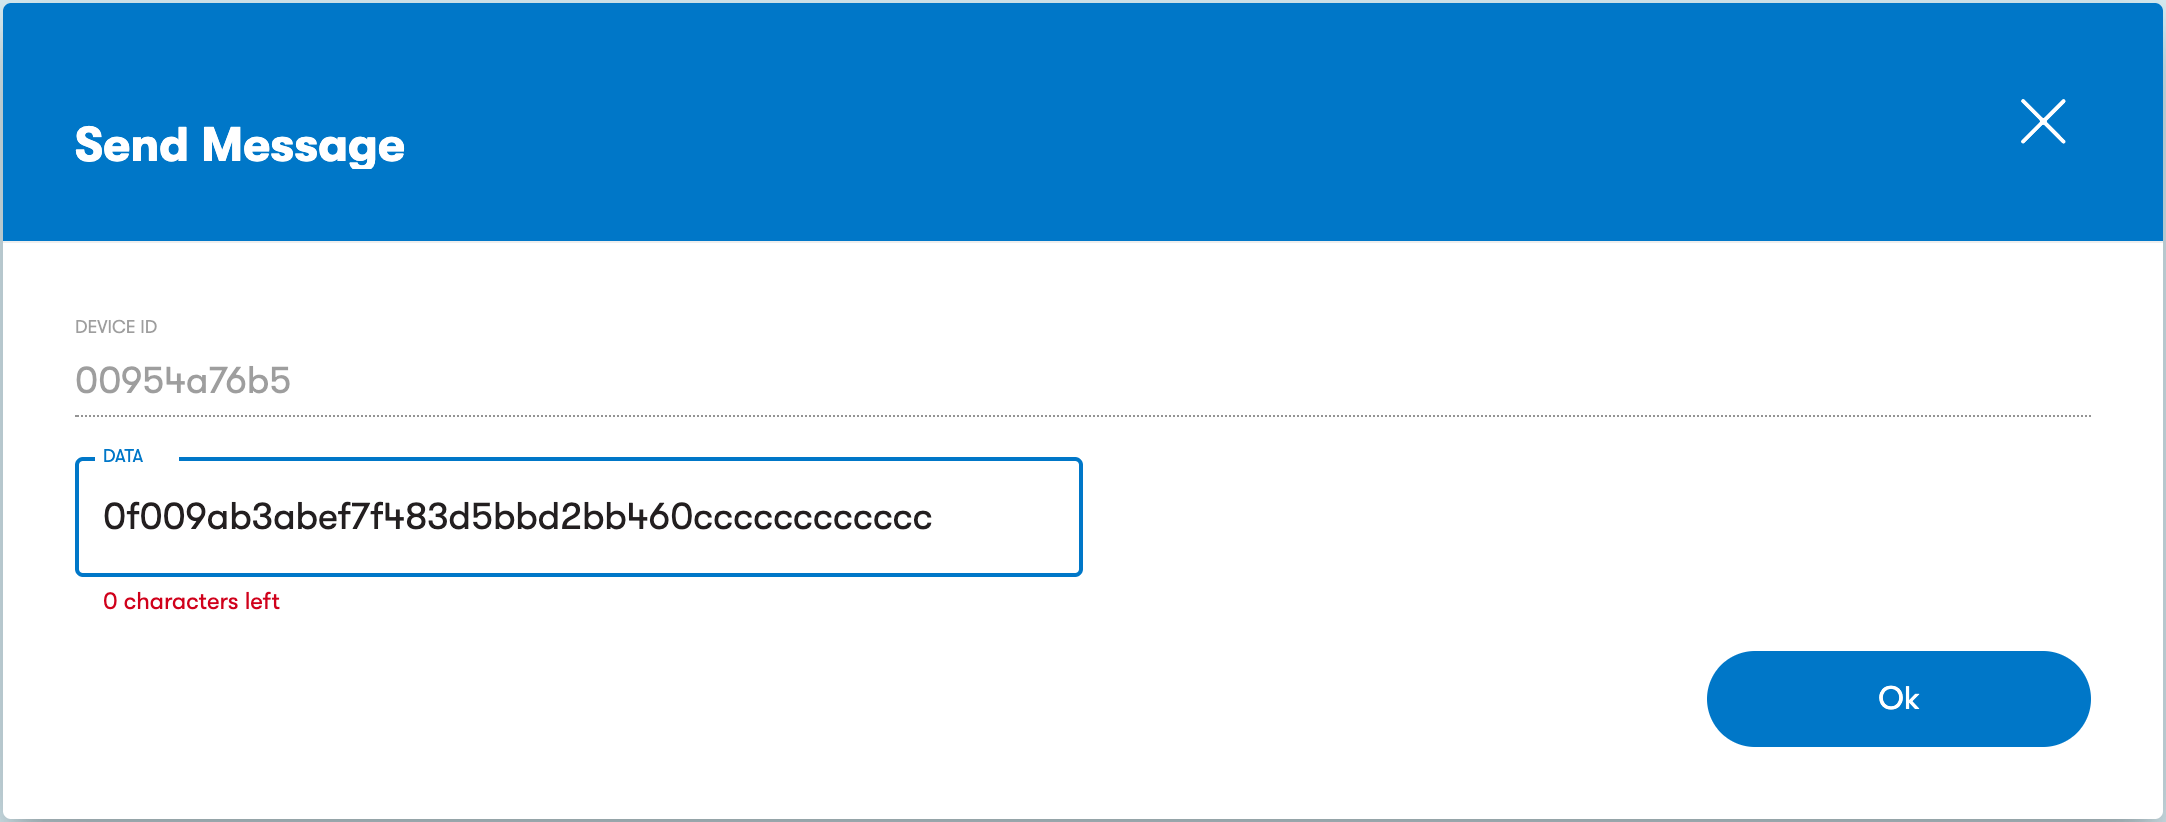
- Send a sample message from Myriota by clicking the configured device, and then clicking the Send message button.
- Enter the example data string (a 40-character hex string formatted in Ruby unpack format) and click Ok to send the data to the eagle.io data source which is waiting to receive it:
5. Use the sample message to configure the eagle.io parser
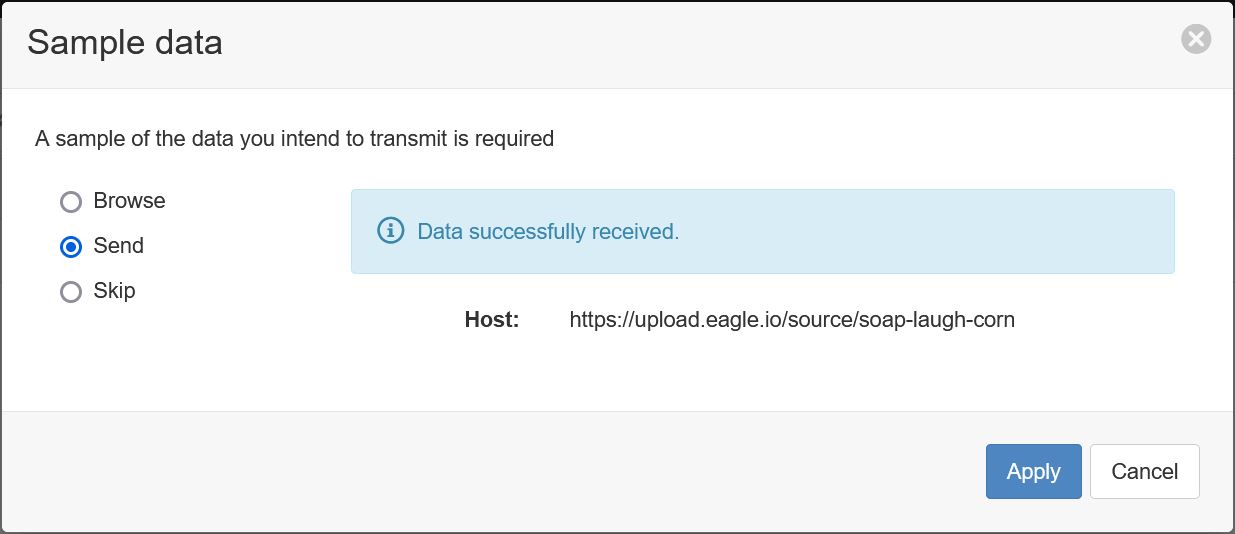
Returning to the eagle.io data source wizard, you should now see that data has been received:
Note
If the data source wizard does not say Data successfully received, review the actions taken in step 4, and ensure the correct URL was used.
Click the Apply button to move to the next step of the data source wizard.
The Parser configuration screen allows the user to describe the structure and format of the message so it can be correctly interpreted by the system in subsequent uploads. Refer to Text Parser Configuration for full details.
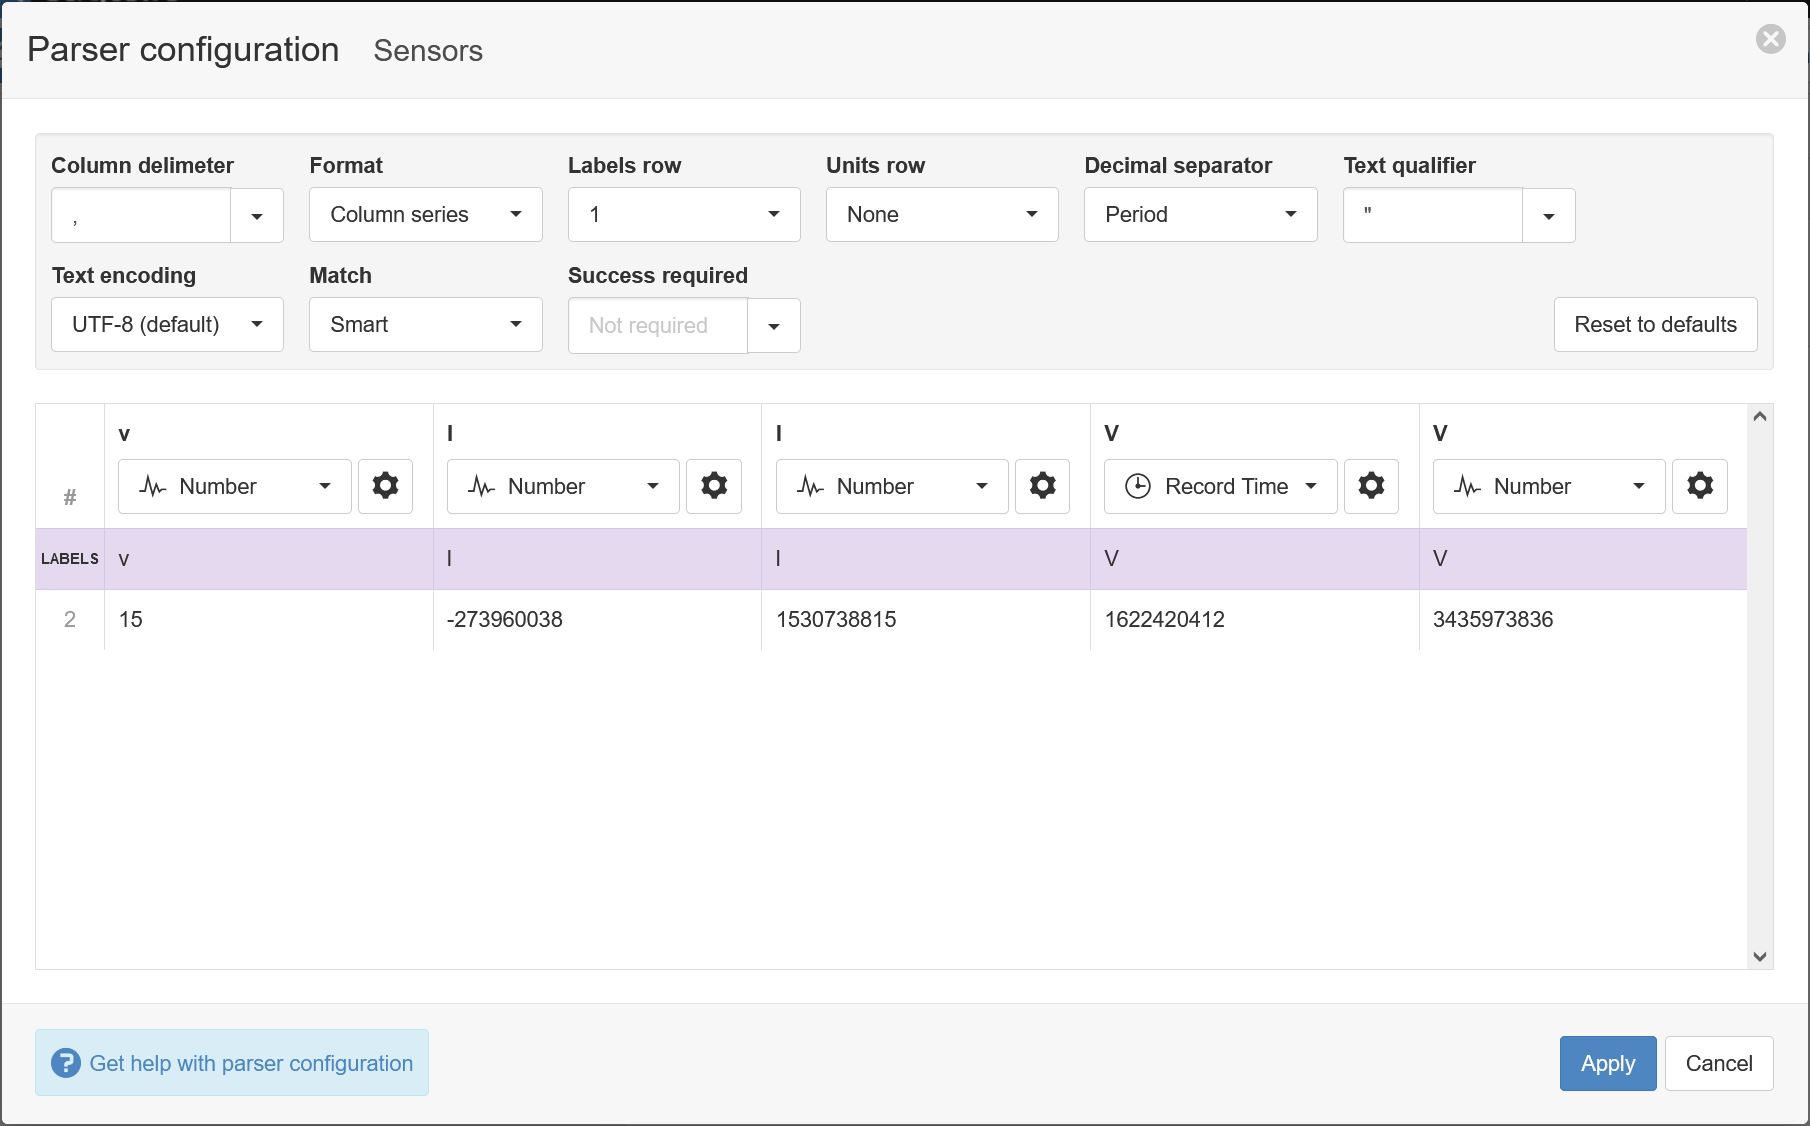
The Myriota message will be received as a header row and a data row. The header row (which is called a Labels row in the parser configuration) will comprise each letter code used in the format portion of the URL. The number of columns defined will be the same as the number of letters in the format code. In the current example the format is vllVV, therefore 5 columns will be defined with header values of v, l, l, V, V
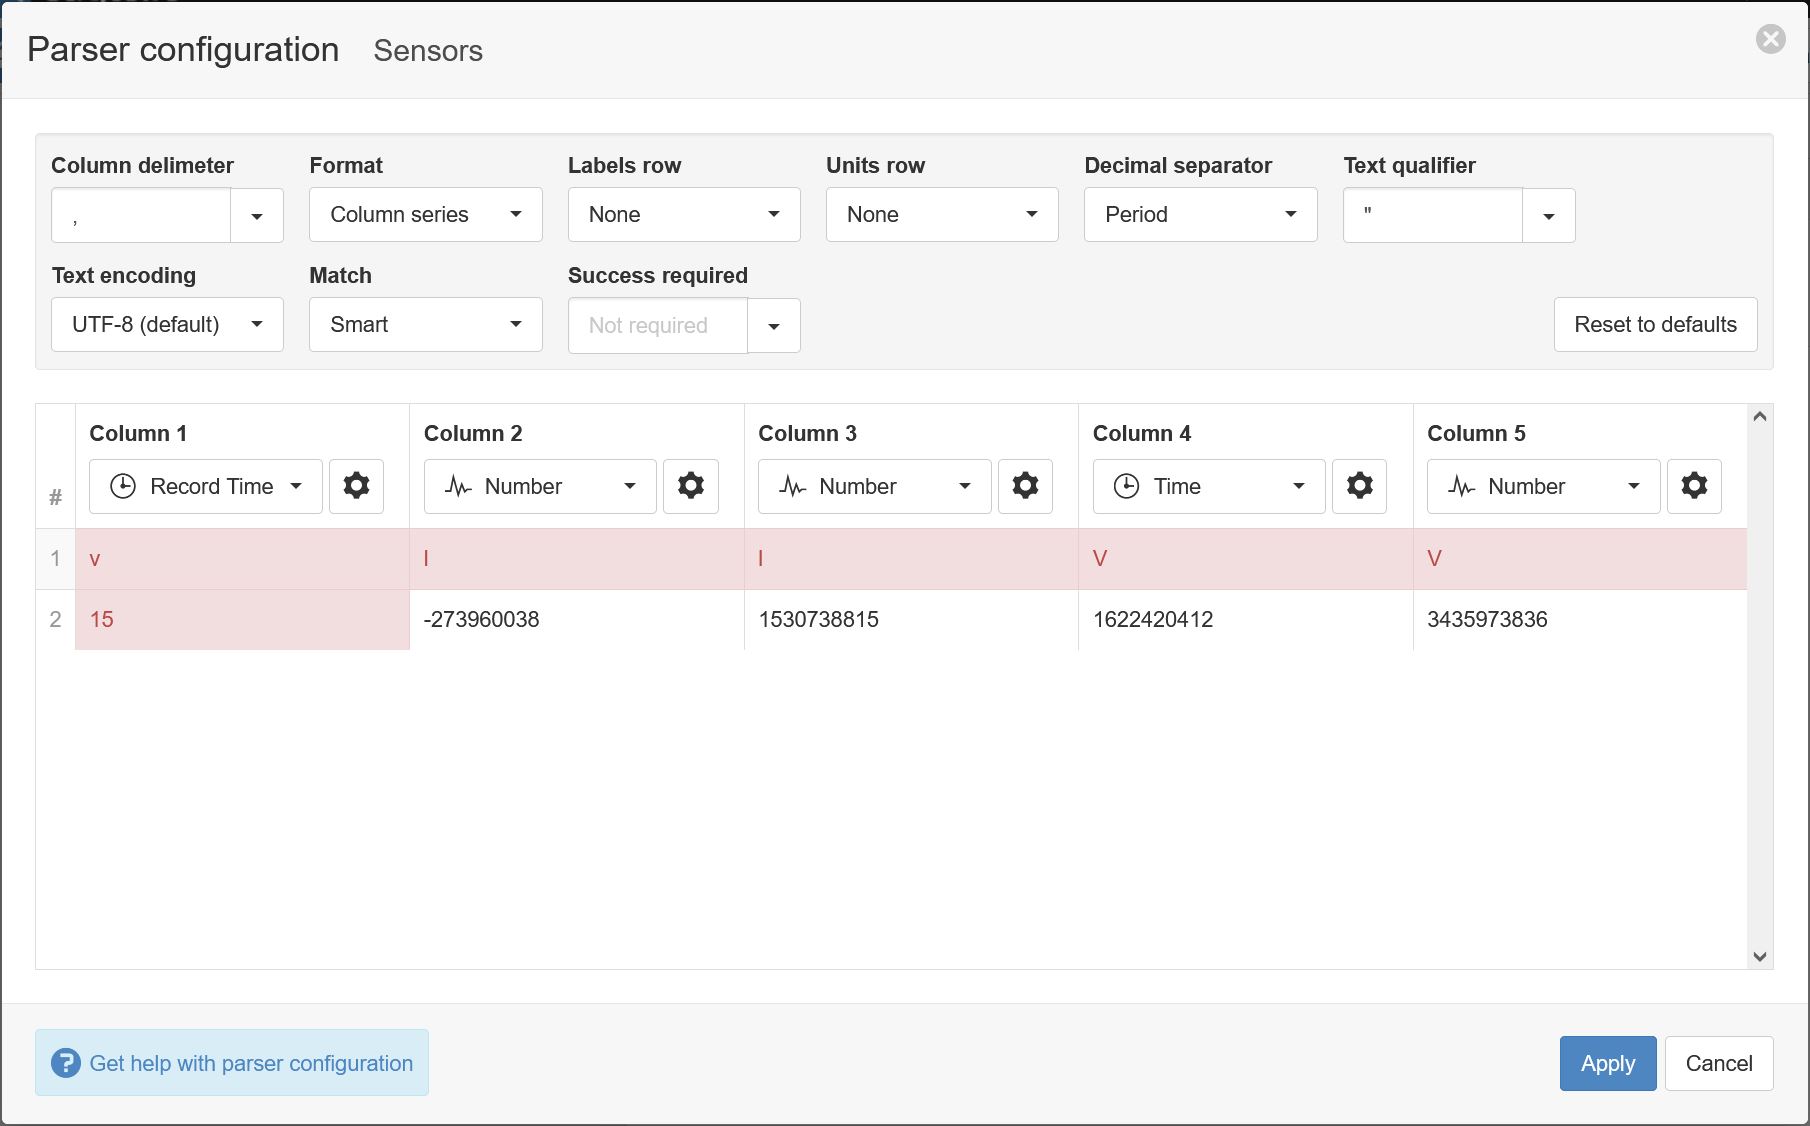
Configure the Labels row to be row 1.
The data in each column will be different when different formats are defined. The parser must be configured so that each portion of the message matches the expected column data type and format. Validation errors are shown in red. Any columns not required for collection can optionally be Disabled. The specific message in this example defines a record timestamp in column 4, with all other values being numbers. Thefore in the parser configuration, the column data type of column 1 should be changed to Number, and the column data type of column 4 should be changed to Record Time. The parser configuration should now look like this:
Additionally, the Record Time column will need to be configured to match the timestamp format. Click the cog icon next to column 4 to configure the record time format, and change the Format field to use the time format X, which defines a timestamp format of seconds since UNIX epoch:
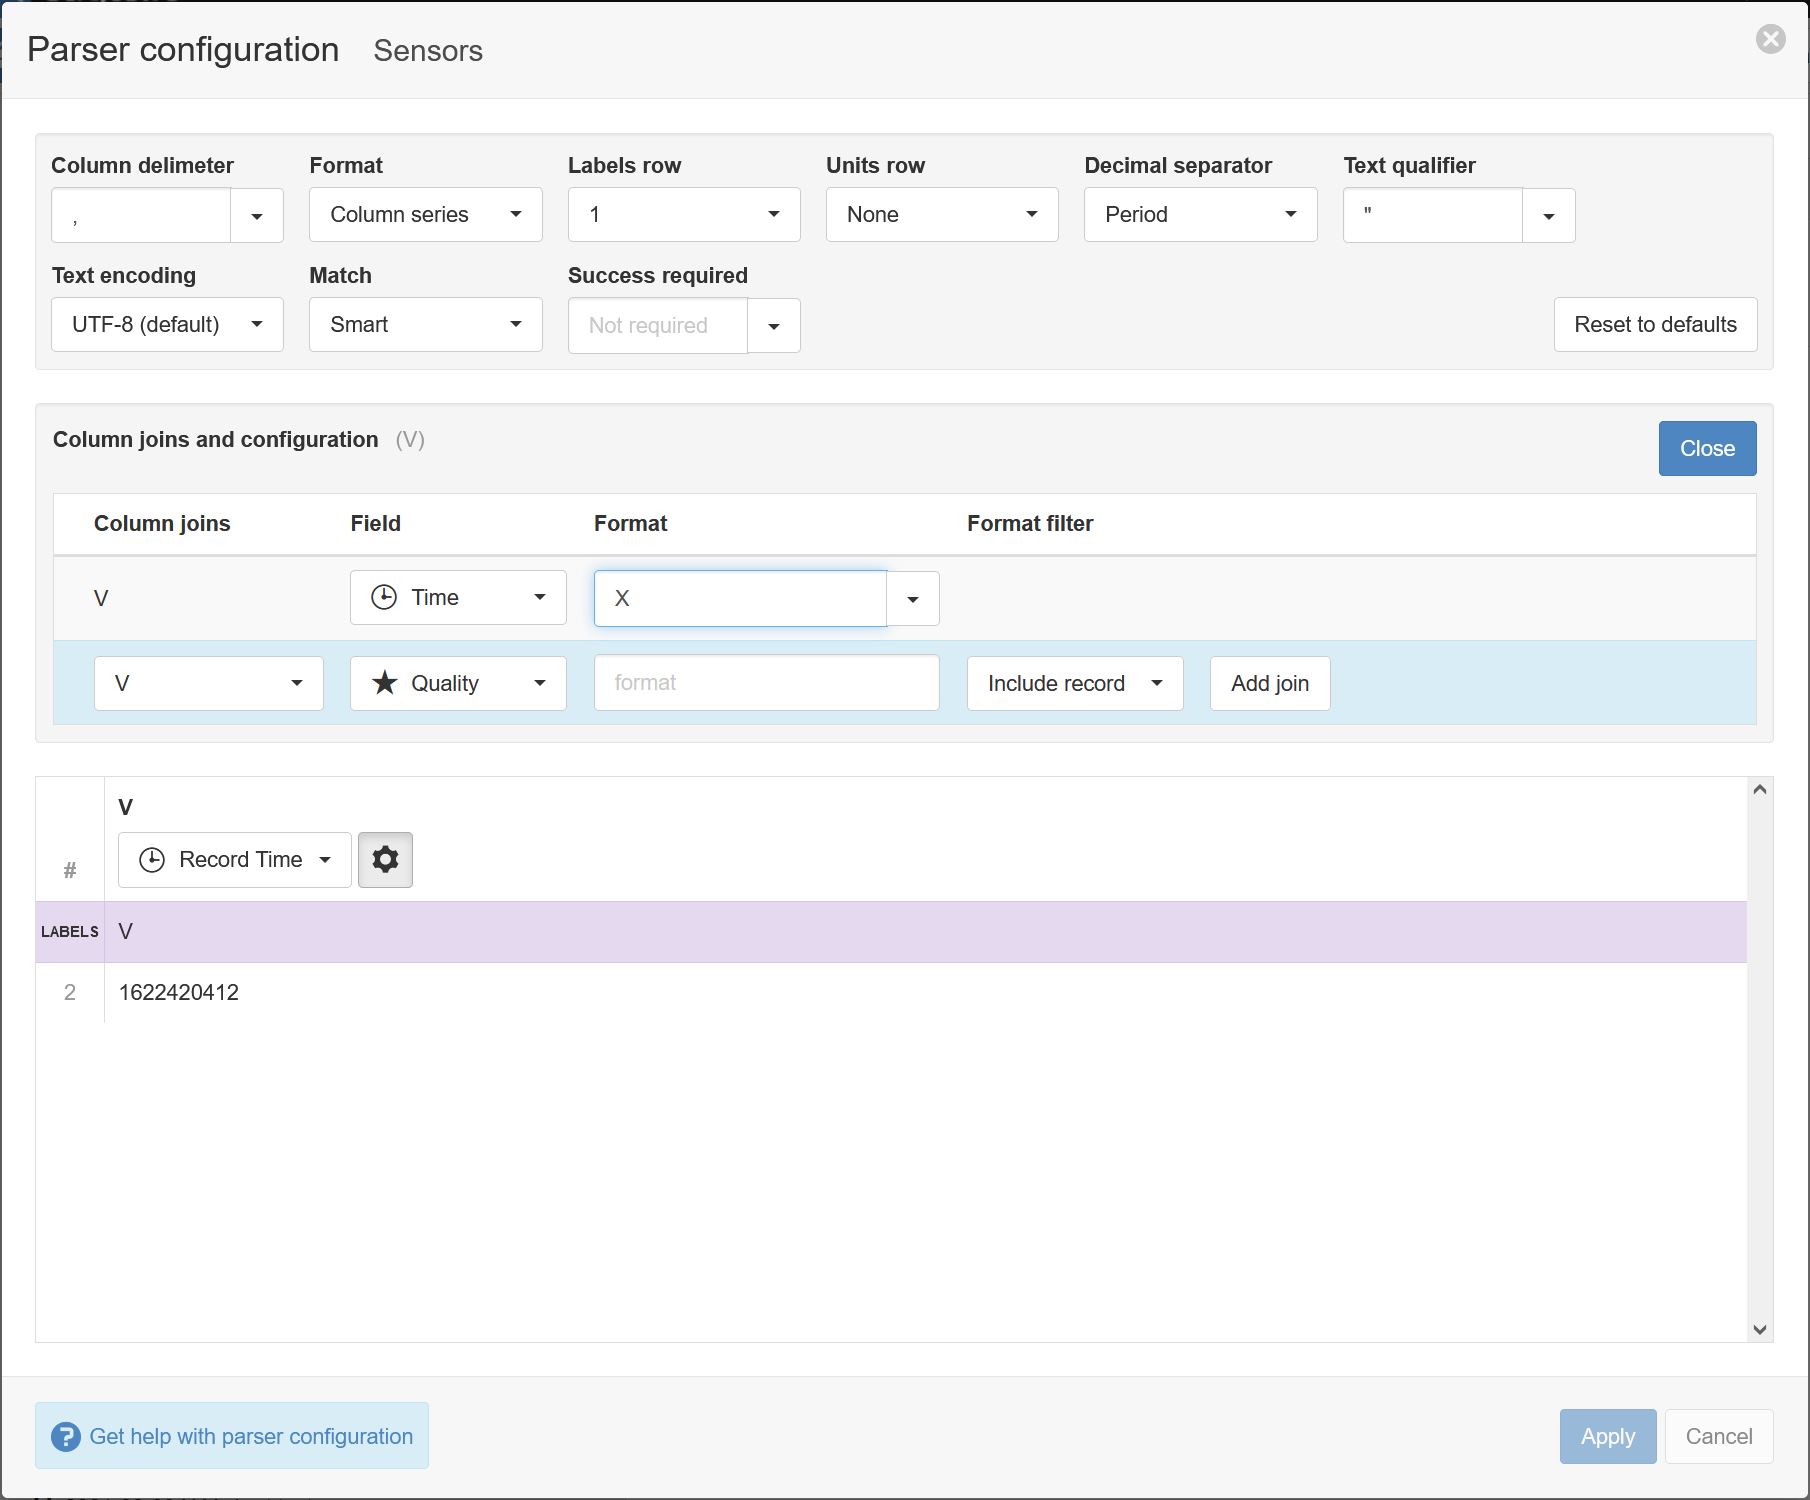
Click Close to return to the main parser, and click Apply to exit the parser. Click Next to move to step 4 in the data source wizard:
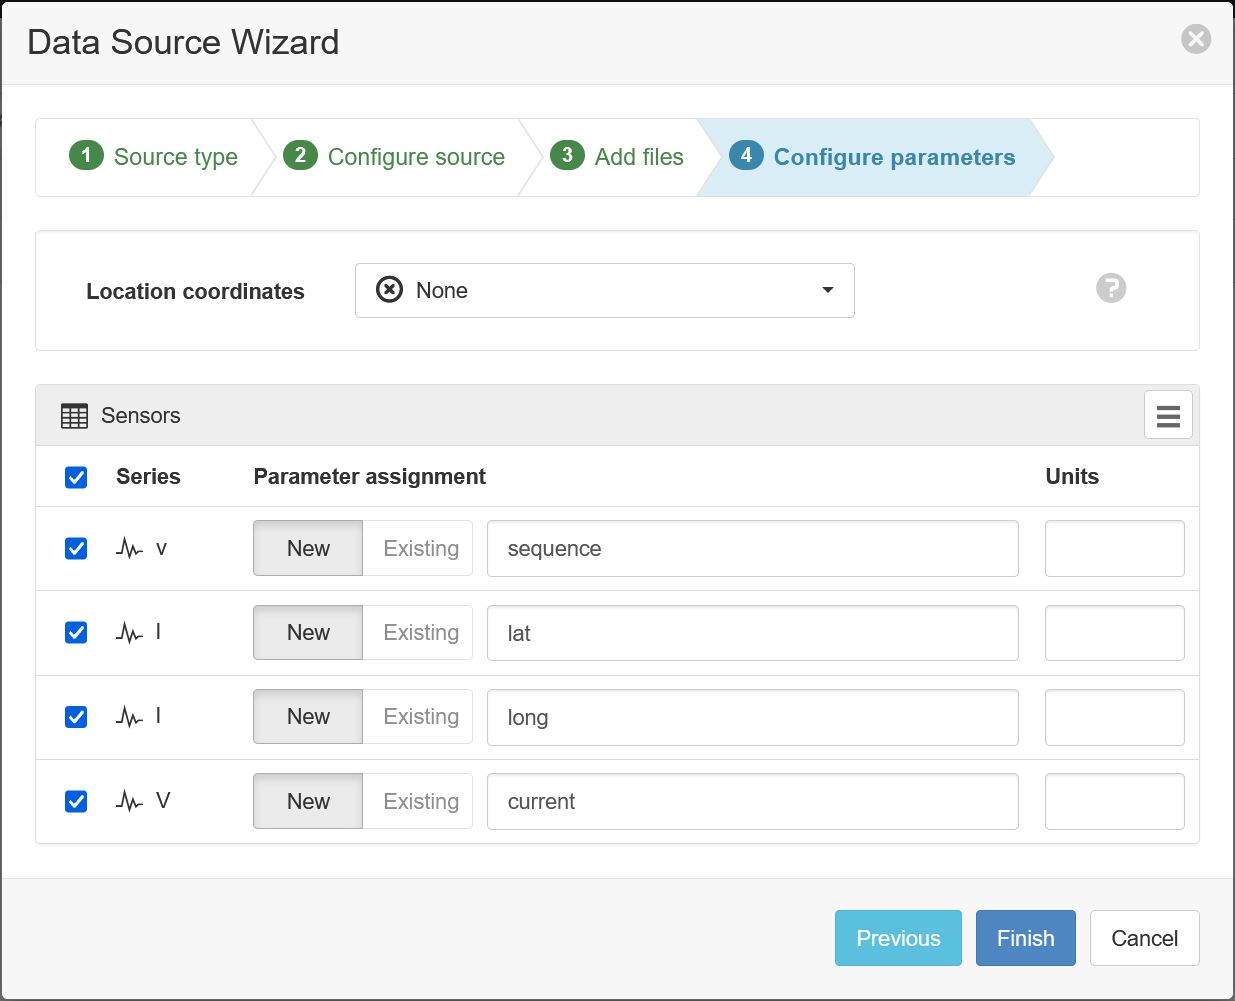
By default, the 4 parameter names will be based on the letters in the header row:
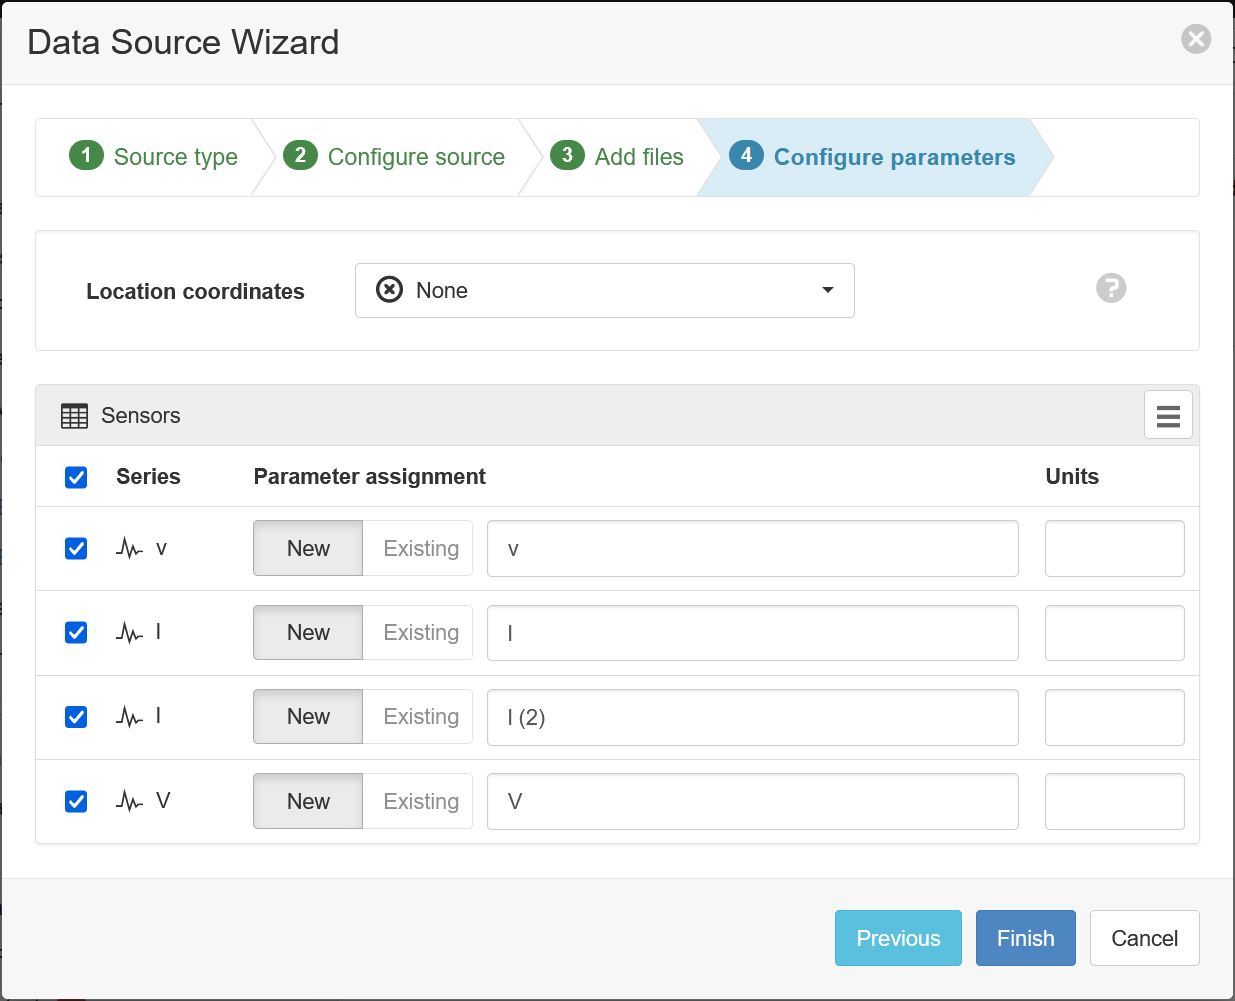
Change the defaults to the desired the parameter names (and optionally units) for each column defined in the parser configuration. Uncheck any series you do not want to create as parameters:
Click Finish to complete the setup.
Note
You can reconfigure the parser configuration and parameter assignment from the Data Source properties dialog after creation.
Note
If the Myriota message includes latitude and longitude, this can be configured to update a location map marker within eagle.io by using this process.