Workspace
 Workspaces are special container Nodes that can be shared with other users. All other Nodes are created within the Workspace. Workspaces can only be created by the Account Owner or Administrators.
Properties
 Configure properties via the Workspaces Tree context menu or List View properties icon. Requires configure permission.
Map layers
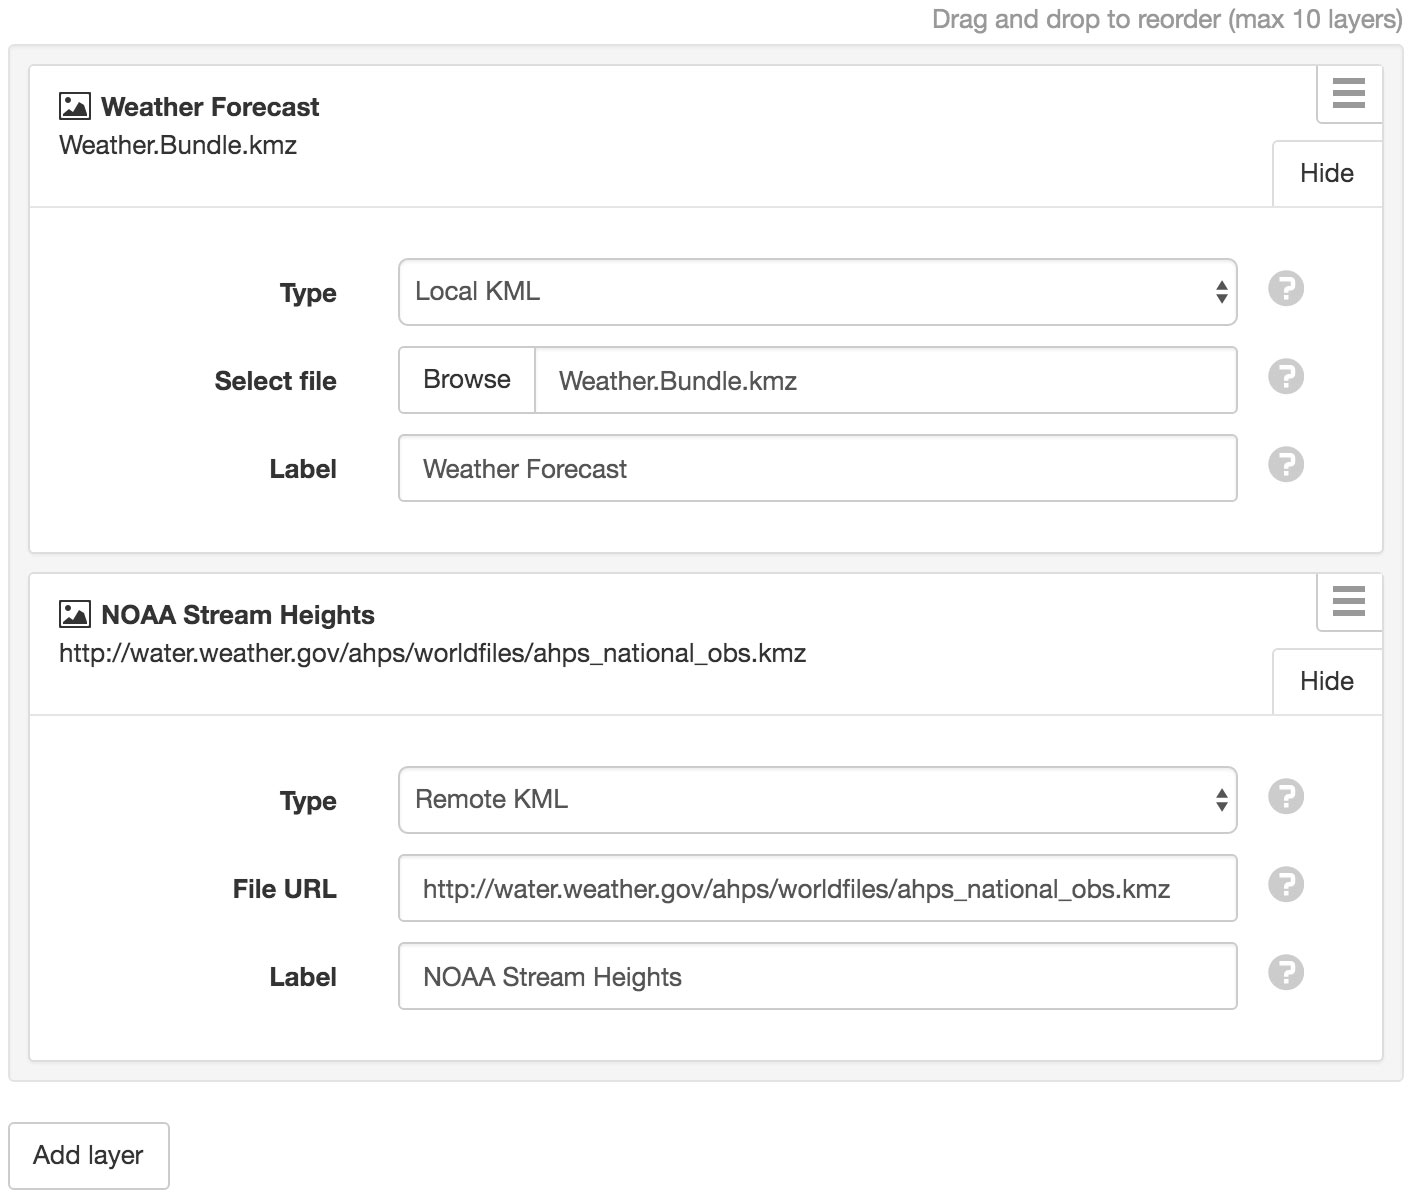
Use the Map layers section to add or remove KML (or KMZ) files to be displayed on the map when this workspace is selected in the Workspaces Tree. Click the Edit button to show and modify the configuration for each layer. Use the Add layer button to add a new layer to the list. The following configuration options are available:
- Type
Local KML allows you to upload a file from your computer.
Remote KML should be used when the file is located on a publically accessible web server. Remote KML files will be automatically reloaded every 5 minutes.
- Select file / File URL
- Select a file to upload or enter the full HTTP(S) URL to the file.
- Label
- The label is displayed in the layers menu on the map toolbar.
Layers can be removed via the dropdown menu (accessible by clicking the menu button on the top-right corner of the layer item).
Drag and drop layers in the list (or use the dropdown menu) to change their display order on the map.
Example URL: https://volcano.si.edu/ge/GVPWorldVolcanoes.kml
Note
Restrictions apply to map layers:
- Maximum fetched file size (raw KML compressed KMZ): 3MB
- Maximum uncompressed KML file size: 10MB
- Maximum number of Network Links: 10
- Maximum number of total document-wide features: 1,000
- Remote layers will be automatically refreshed every 5 minutes
Refer to the google developer documentation for a complete list of restrictions and supported KML elements.
Security
The Security section allows a user with security permission to share the Workspace with other users individually or as a group.
Note
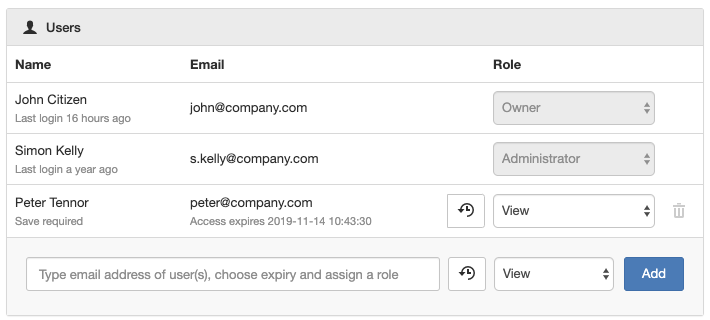
Workspace permissions do not expire by default. Temporary permissions can be granted by choosing an optional expiry time (this only applies to non-administrative users and groups).
Users can be individually added to the workspace by entering the email address of the new users (separate multiple email addresses with a comma), choosing an optional expiry time, assigning a security role and clicking Add. You can remove or modify security roles for existing Workspace users. You can also modify the expiry time for existing Workspace users. Click Save when complete.
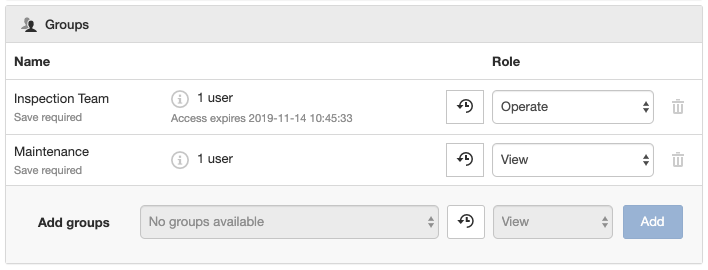
You can also Add a pre-configured group of users to the Workspace, choose an optional expiry time, and assign a security role which will be applied to all users in that group. The Add groups dropdown displays a list of all groups that have been configured in the account. To add a new group or assign users to the group refer to the section on group security.
An email notification will be sent to users when they are added or removed from the Workspace or when their security role is changed. New users will need to follow the instructions in the email to configure their user profile and log in. Existing users who are currently logged in and viewing the interface will notice the new settings take affect immediately.
You can restrict user/group access to any Node in the Workspace by opening the corresponding Node Security dialog.
Note
Administrators automatically receive unrestricted access to all Workspaces in the account.