WaterLog
The WaterLog Storm 3 series data logger can be configured to send data to eagle.io in a few easy steps.
Source configuration
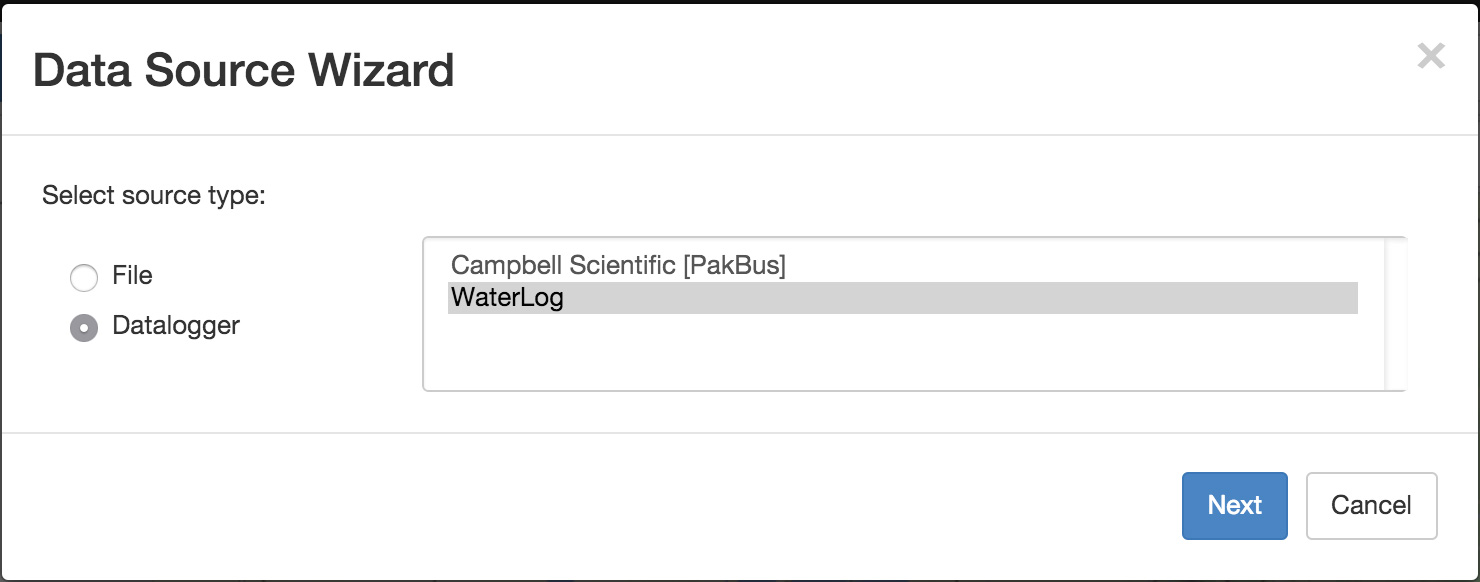
- Create a Data Source and select Data logger as the Source Type. Choose WaterLog from the list and click Next.
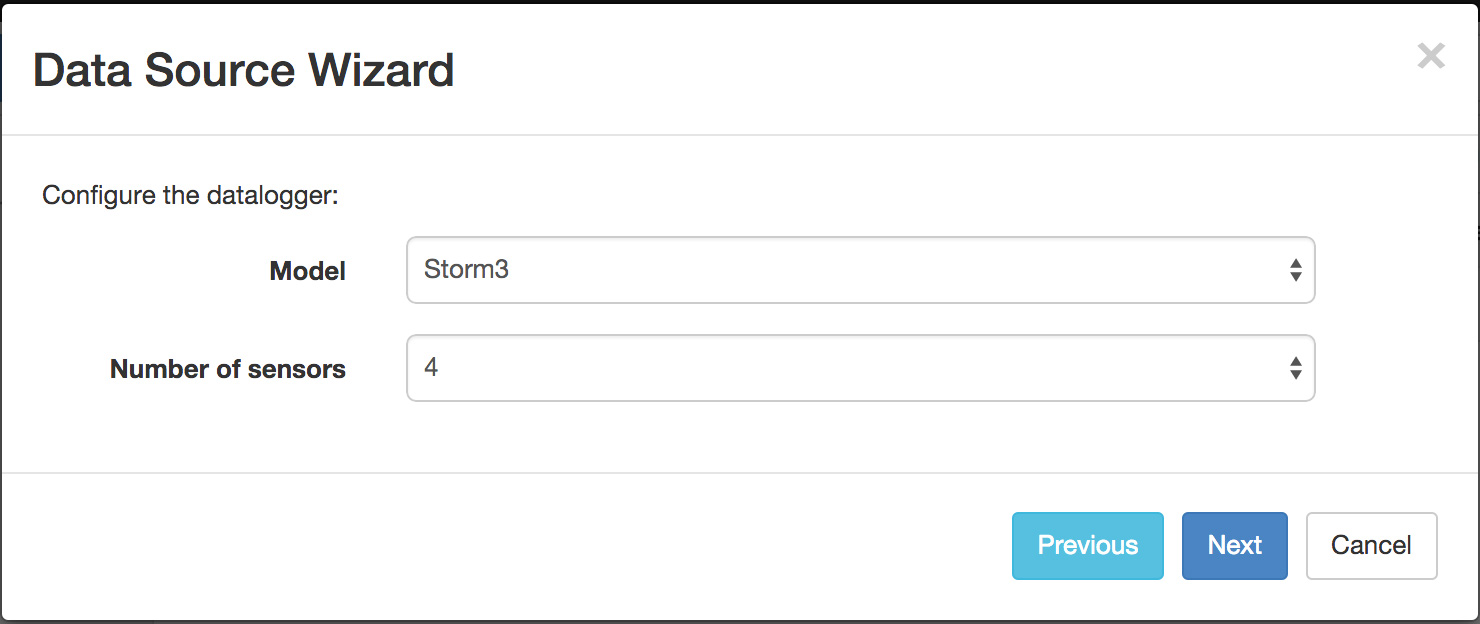
- Select the data logger Model and specify the number of sensors connected (this can be changed later). Click Next.
- Select TCP Server as the transport type and a Site Id will be automatically generated. Select the timezone of the logger’s clock and click Next.

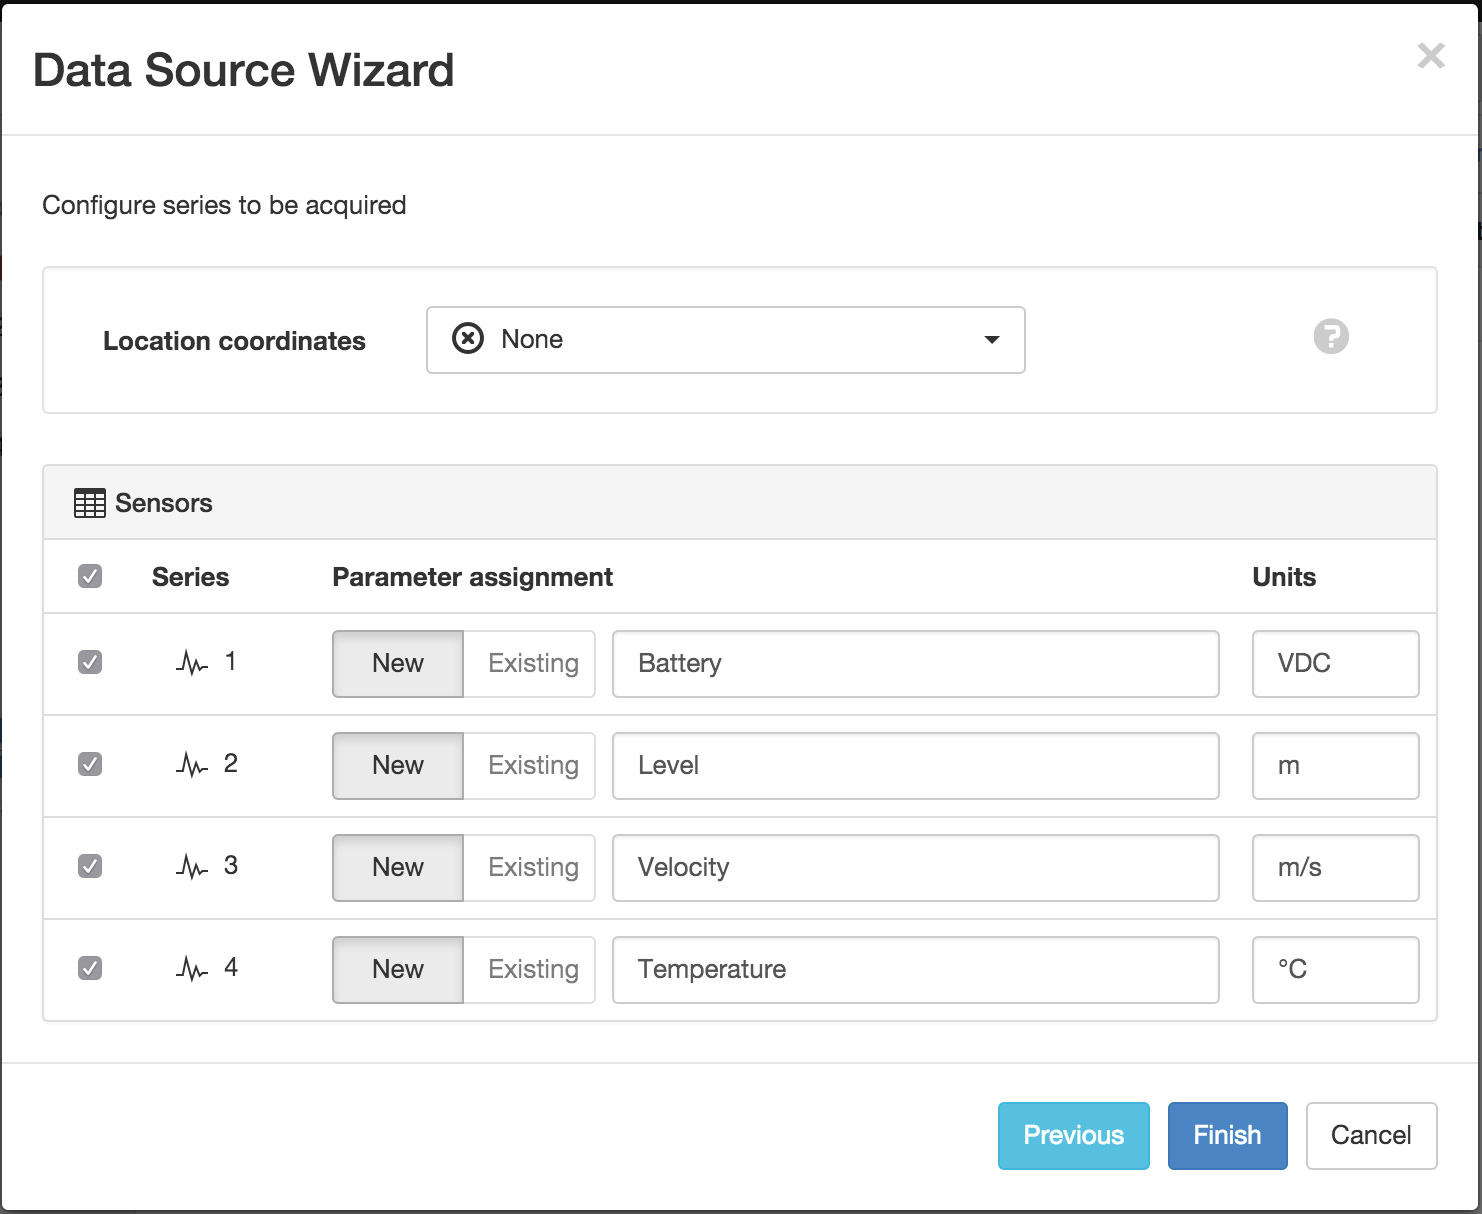
- Specify the parameter names for each connected sensor and optionally assign units. Click Finish to complete the setup.
Note
You can reconfigure the number of sensors, ordering of sensors and Site Id from the Data Source properties dialog after creation.
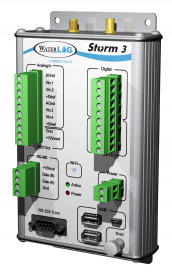
Device settings
Use the WaterLog Storm3 configuration software to setup your Storm3 data logger for communication with eagle.io.
Overview
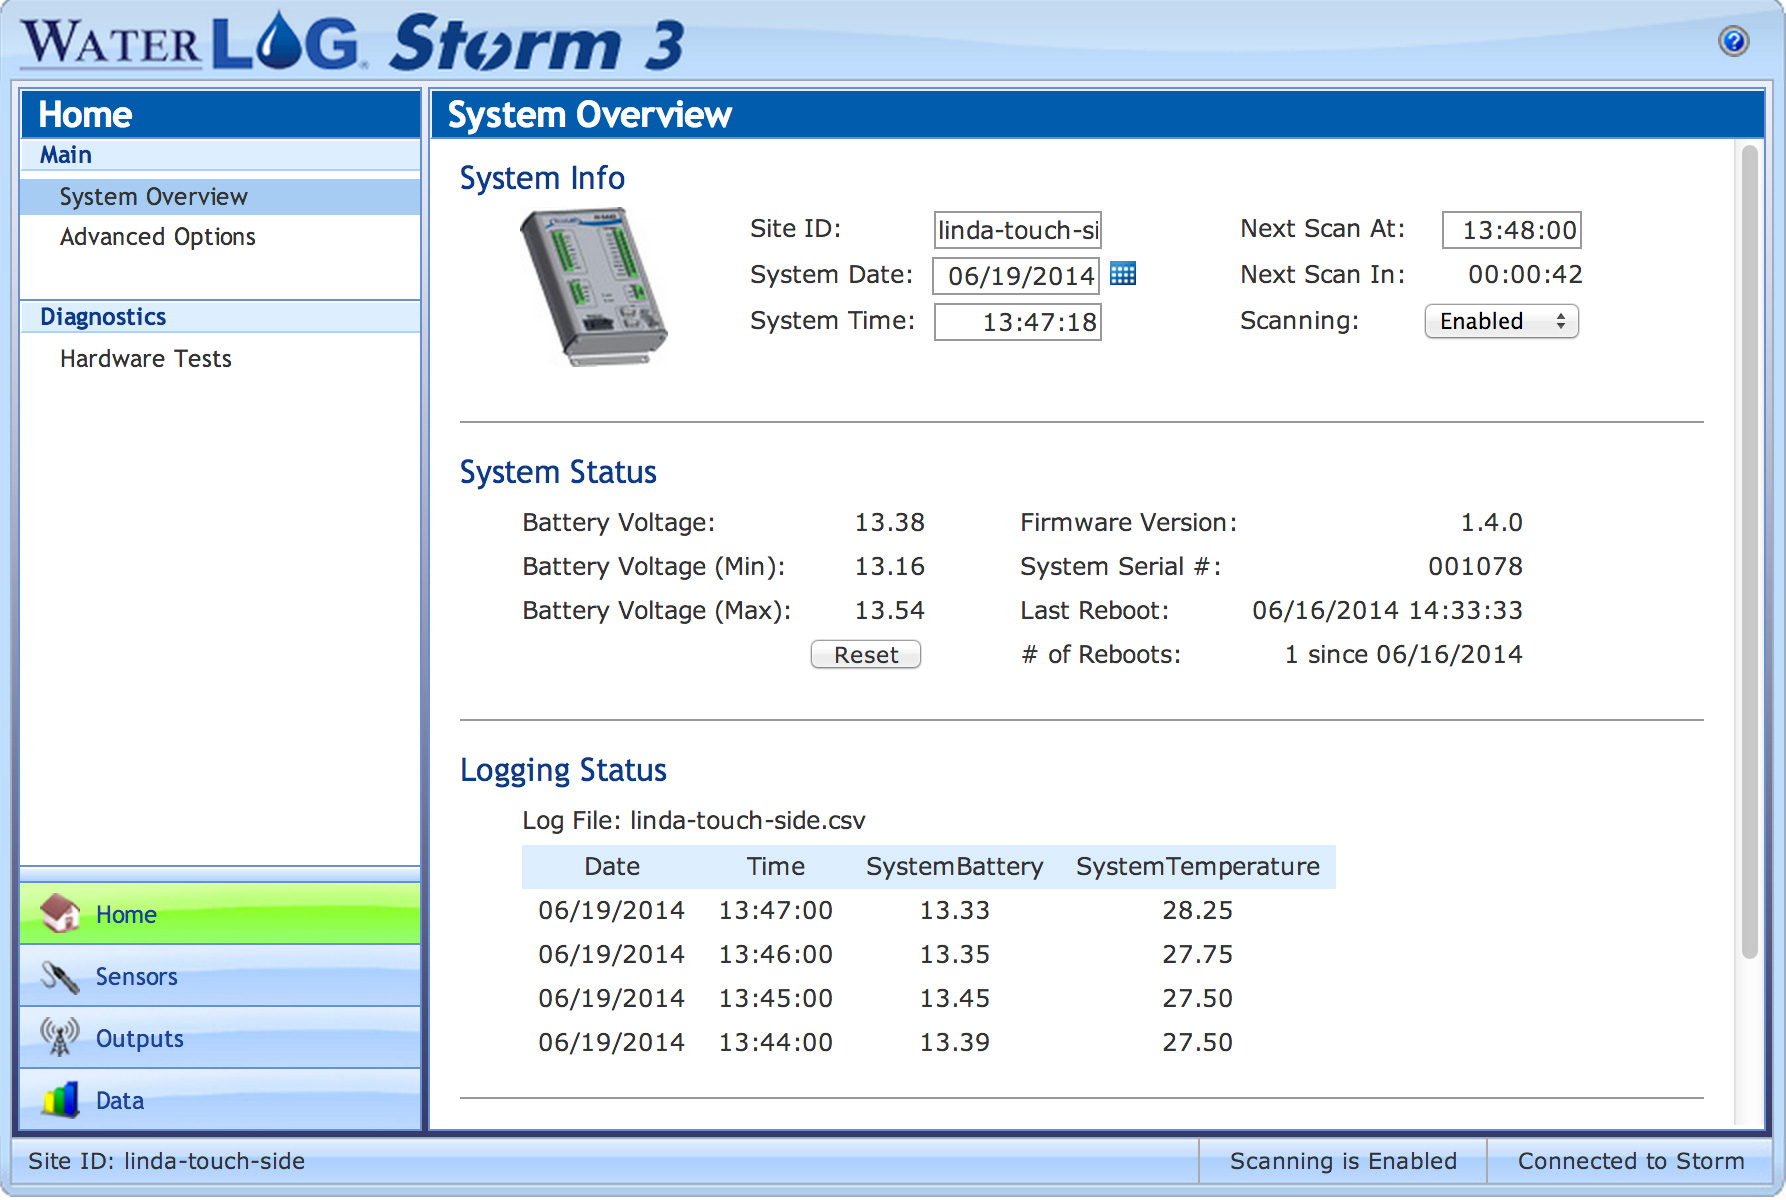
The System Overview section accessible from the Home menu requires the following settings to be applied:
- Site ID
- Use the unique Site Id identification code generated during Data Source creation.
- System Date/Time
- Ensure the correct local time is set in the device. You should set the timezone of the Data Source to match your local timezone.
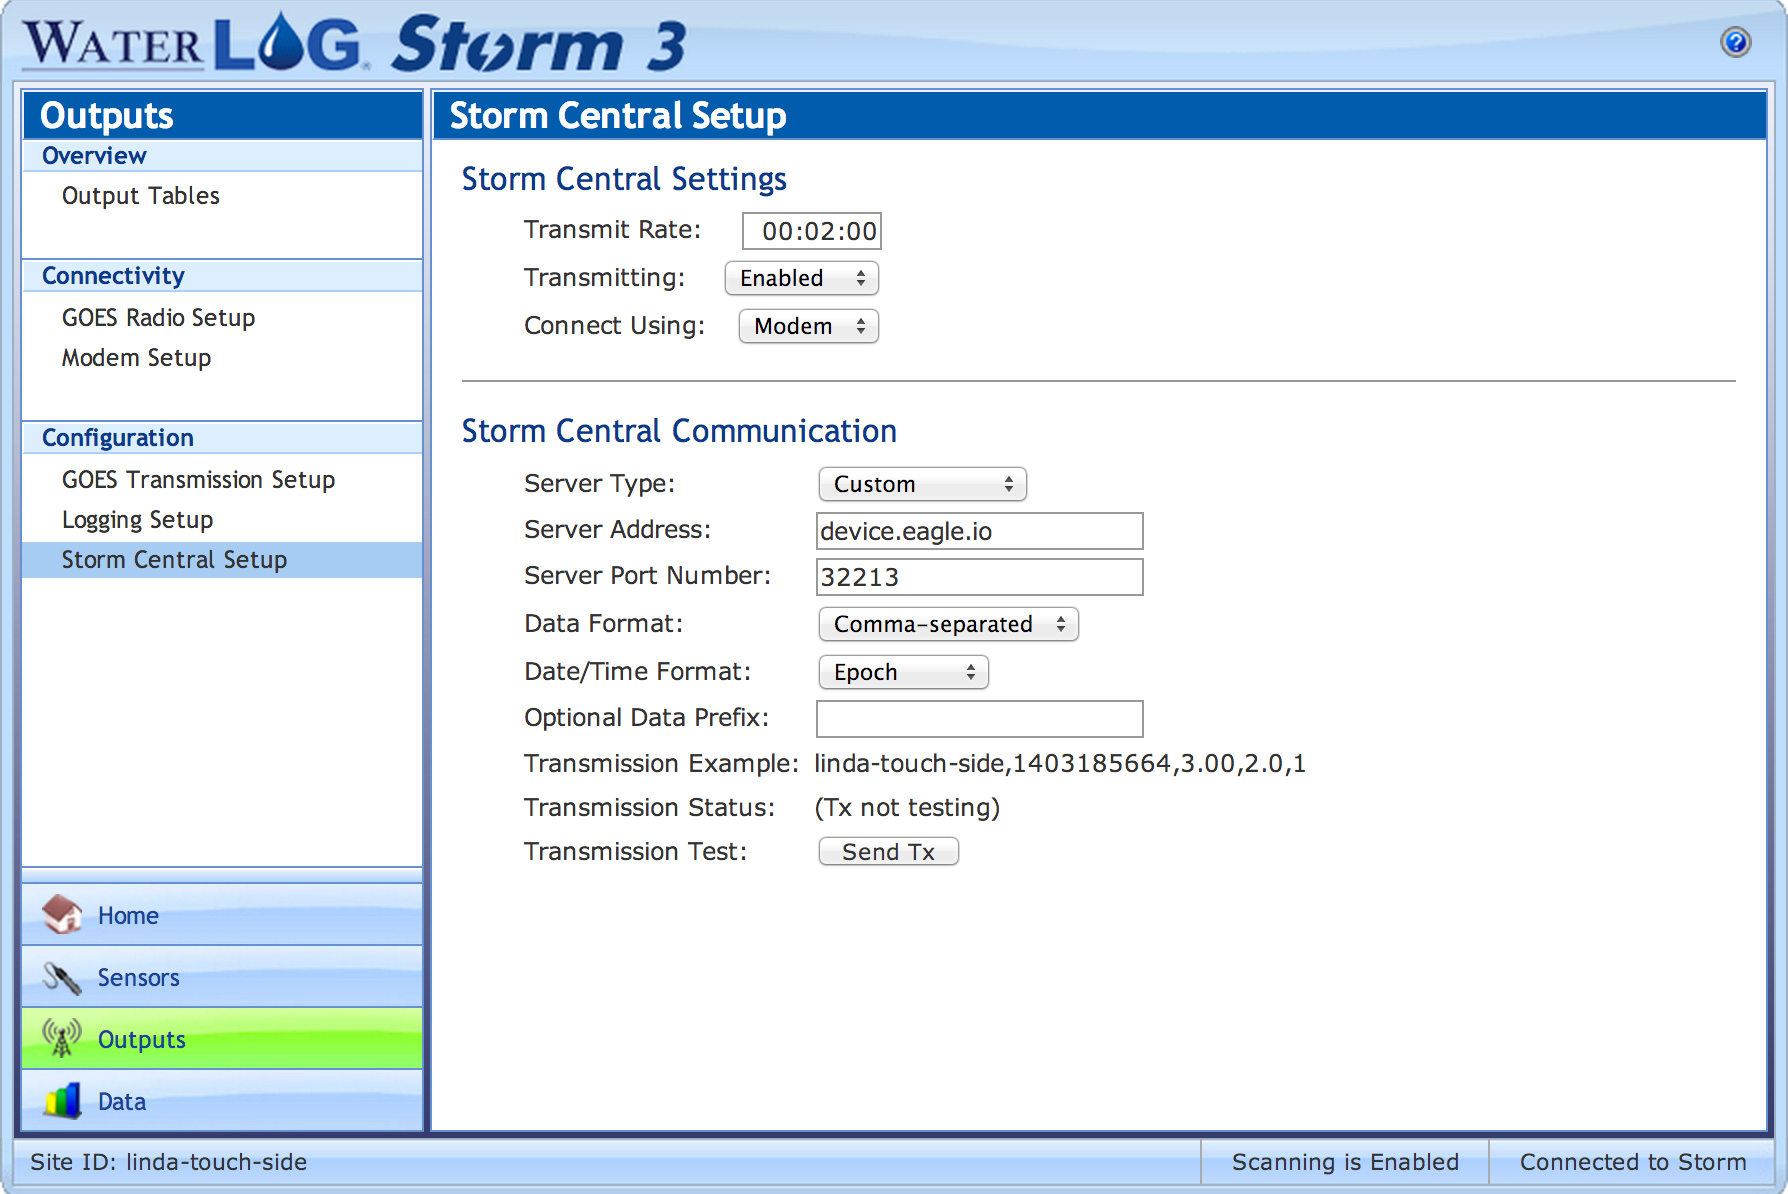
Storm Central Setup
The Storm Central Setup section accessible from the Outputs menu requires the following settings to be applied:
- Server Type
- Custom
- Server Address
- device.eagle.io
- Server Port Number
- 32213
- Data Format
- Comma-separated
- Date/Time Format
- Epoch
Note
Use the Events view with the detail level set to Debug for reviewing communication history and diagnosing configuration issues.