NNNco
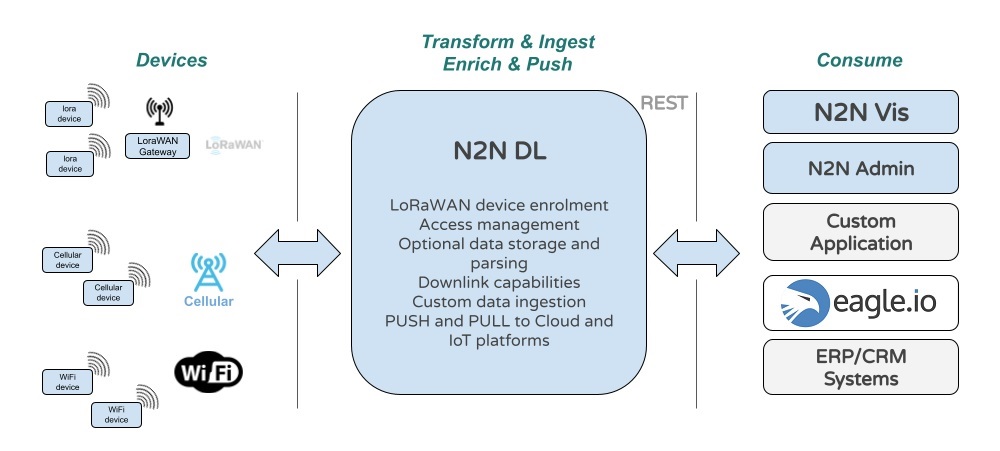
The N2N DL platform is designed to offer programmatic access to a multitude of IoT devices from multiple networks (LoraWAN / Cellular & Internet enabled). This platform allows eagle.io to use the Download via HTTP transport to acquire the data.
Getting an API key for access
An NNNco API key will be required for eagle.io to access data on your NNNco devices. API keys can be obtained from NNNCo by getting in touch with one of their sales reps or emailing n2n-dl-support@nnnco.com.au.
Read more about getting API access.
Getting a device ID
A device ID will be required for each data source you create in eagle.io. Read more about getting a list of devices that belong to your accounts.
Once you have your API key and at least one device ID, you are ready to create a new data source in eagle.io.
The following documentation and images will use an example NNNco API key of 8a0892e3aedbe2f2ade4bd727d4725e0c639d021 and an example NNNco device ID of 393435376A377906.
Source configuration
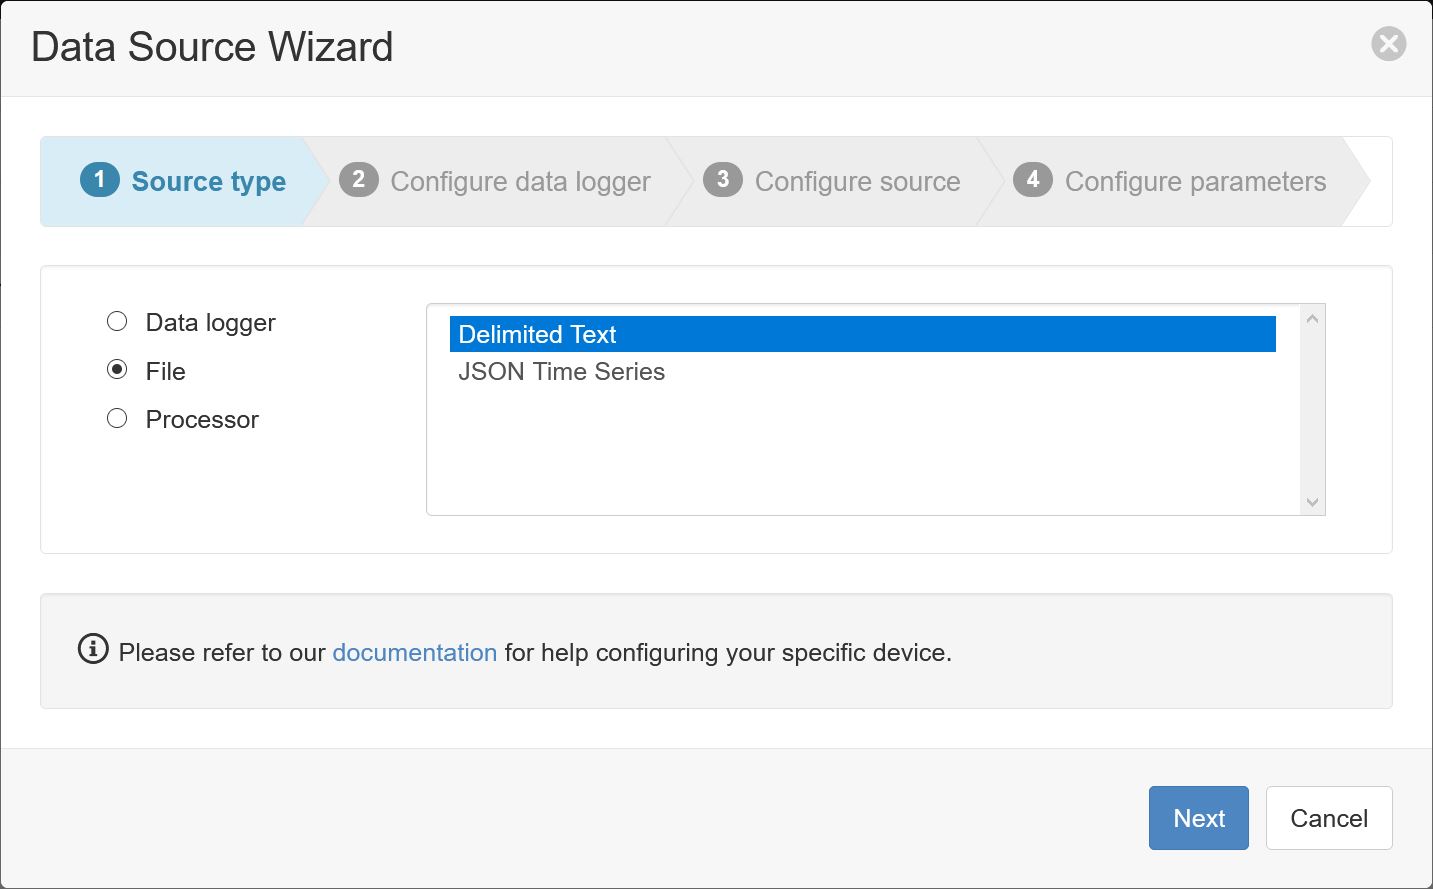
- Create a Data Source and select File as the Source Type. Choose Delimited Text from the list and click Next.
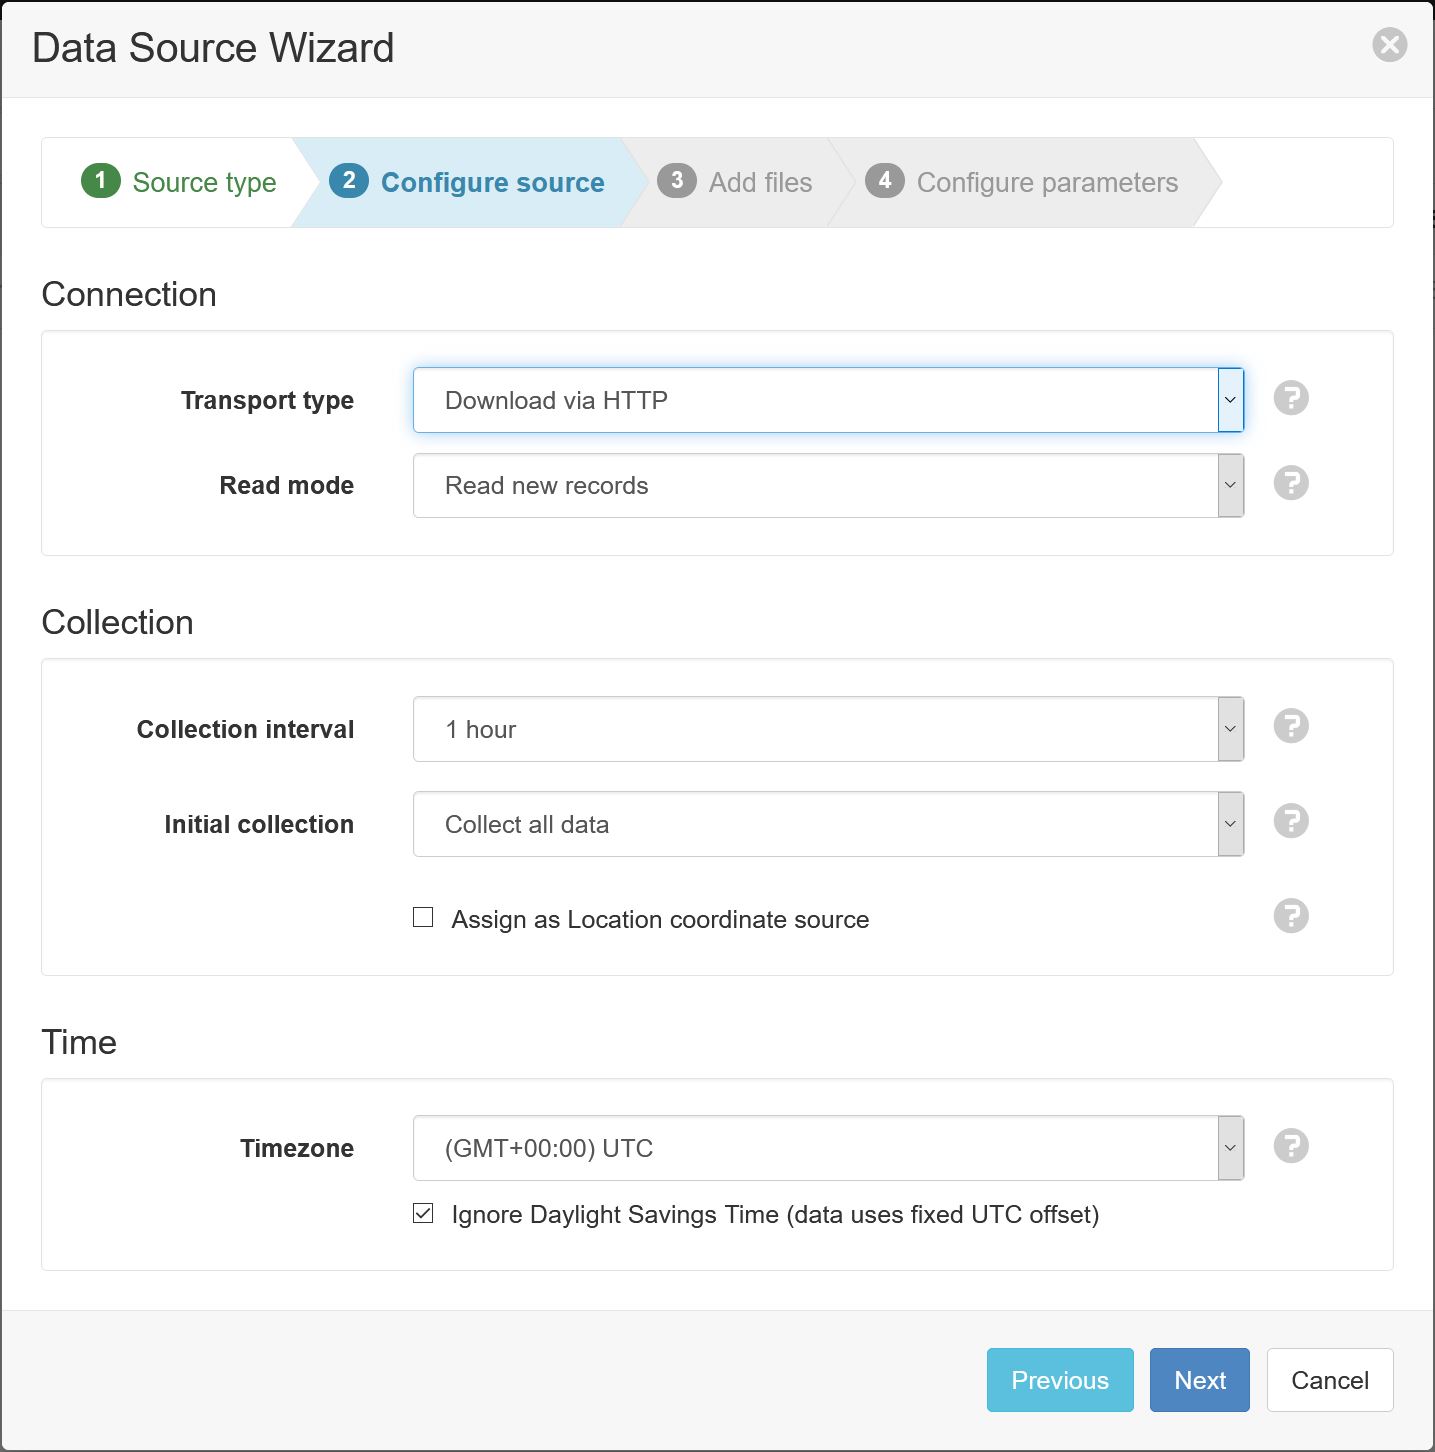
- Select Download via HTTP as the transport type. The read mode should be left as Read new records. Choose a desired collection interval, for example 1 hour. The timezone of the data source should be set to (GMT+00:00) UTC, then click Next.
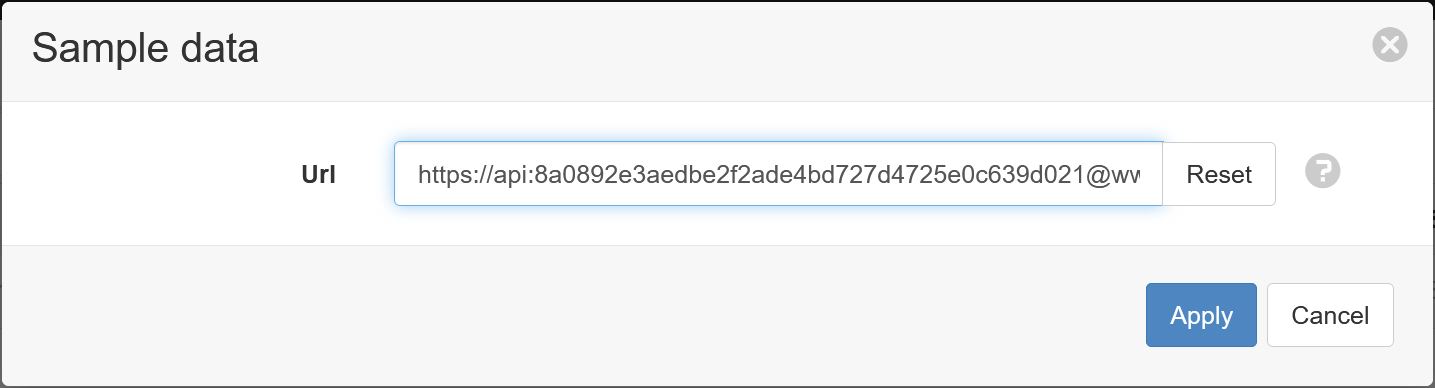
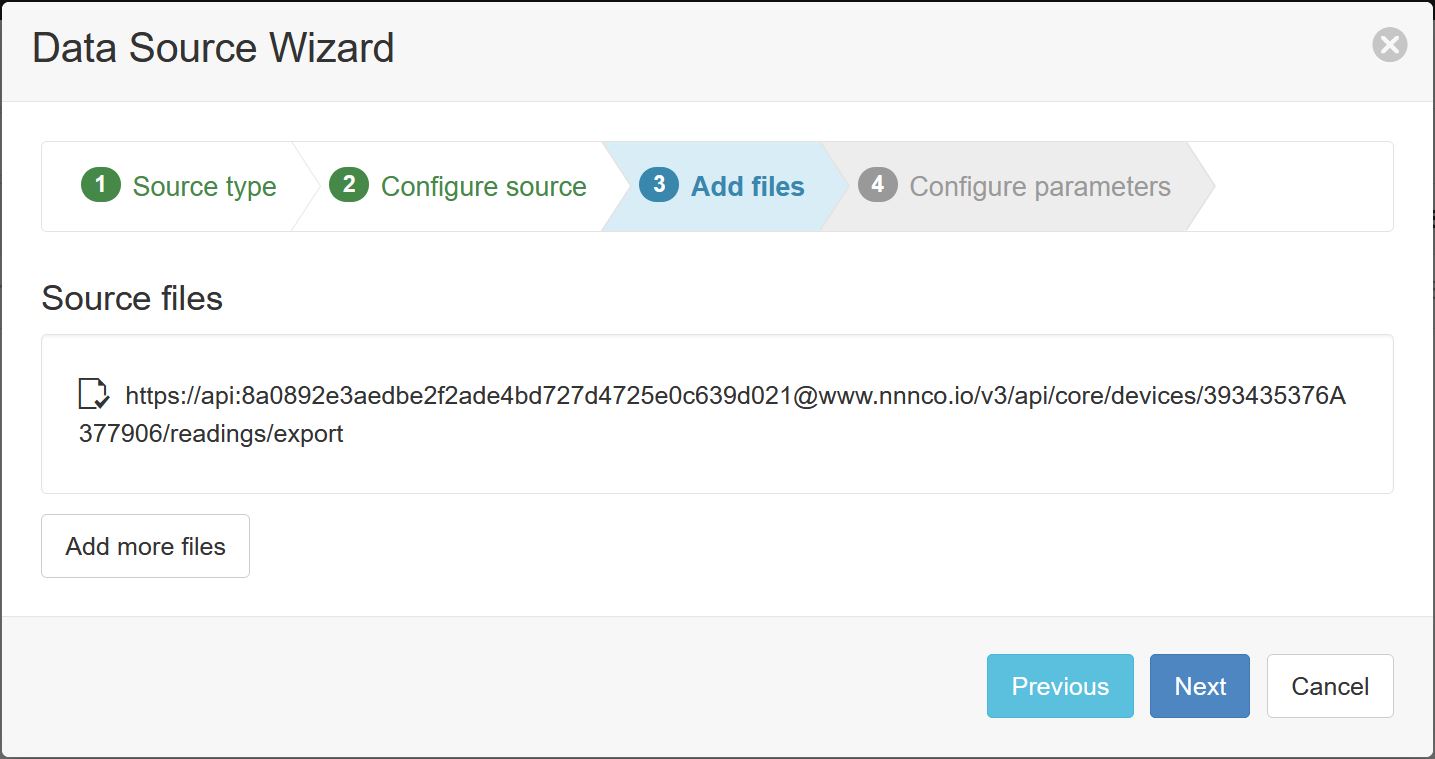
- Enter the URL of the device in the following format, where <key> is your API key and <deviceId> is your device ID:
https://api:<key>@www.nnnco.io/v3/api/core/devices/<deviceId>/readings/export
For example, if your API key is 8a0892e3aedbe2f2ade4bd727d4725e0c639d021 and your device ID is 393435376A377906, then the URL would be:
https://api:8a0892e3aedbe2f2ade4bd727d4725e0c639d021@www.nnnco.io/v3/api/core/devices/393435376A377906/readings/export
After entering the URL in the wizard, click Apply.
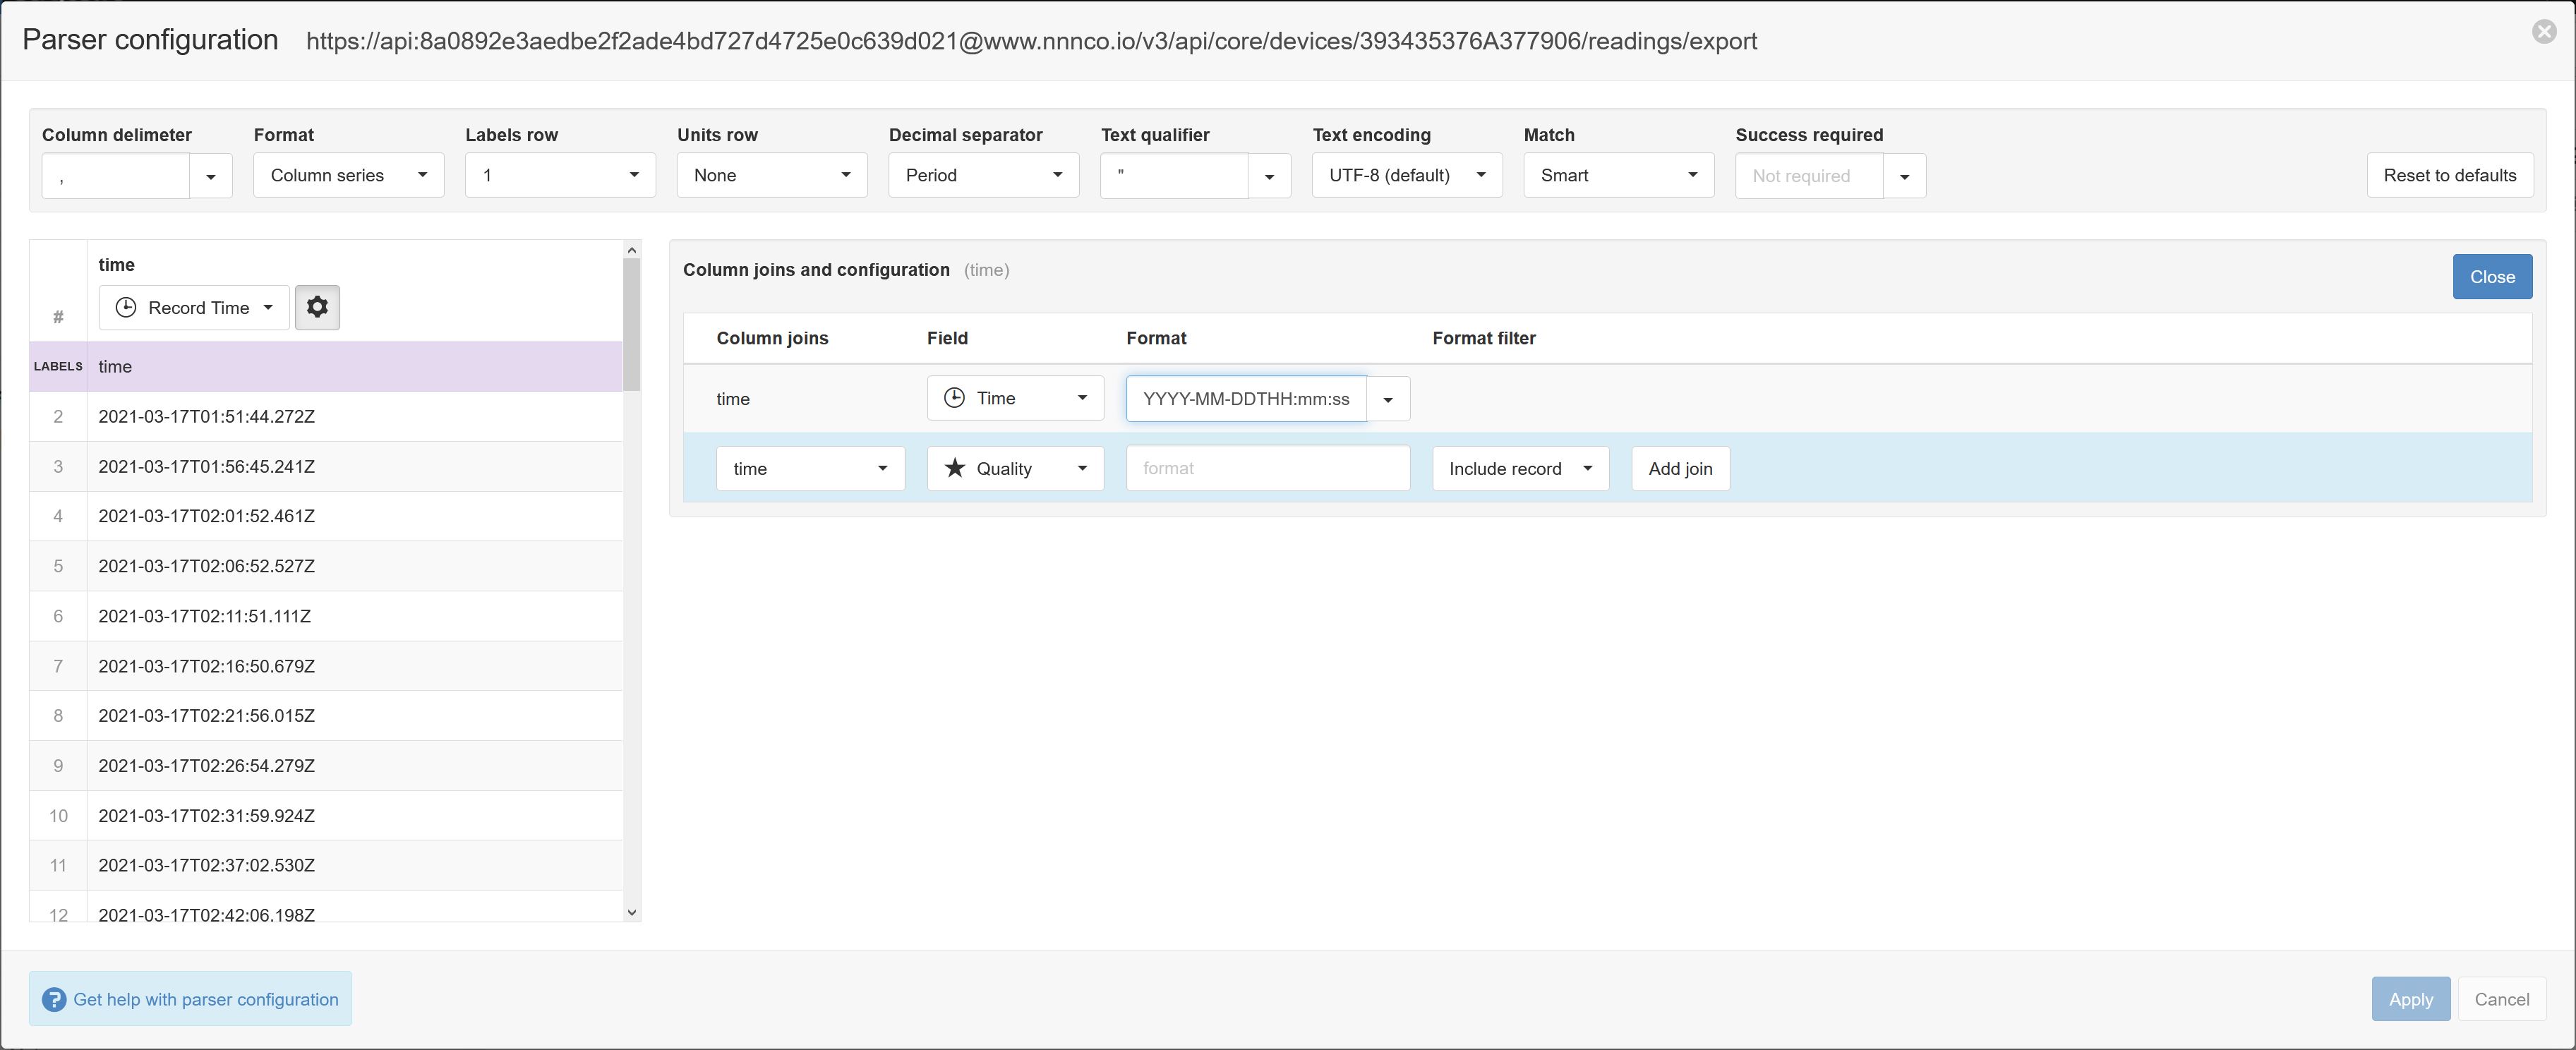
- The Parser configuration screen allows the user to describe the structure and format of the sample data file so it can be correctly interpreted by the system during subsequent data collection. Refer to Text Parser Configuration for full details. First you will need to change the labels row to be 1.

You will need to set the correct time format by clicking the gear icon in Column 1 (Record time).

Set the time format to be YYYY-MM-DDTHH:mm:ss.SSSZ then click Close twice.
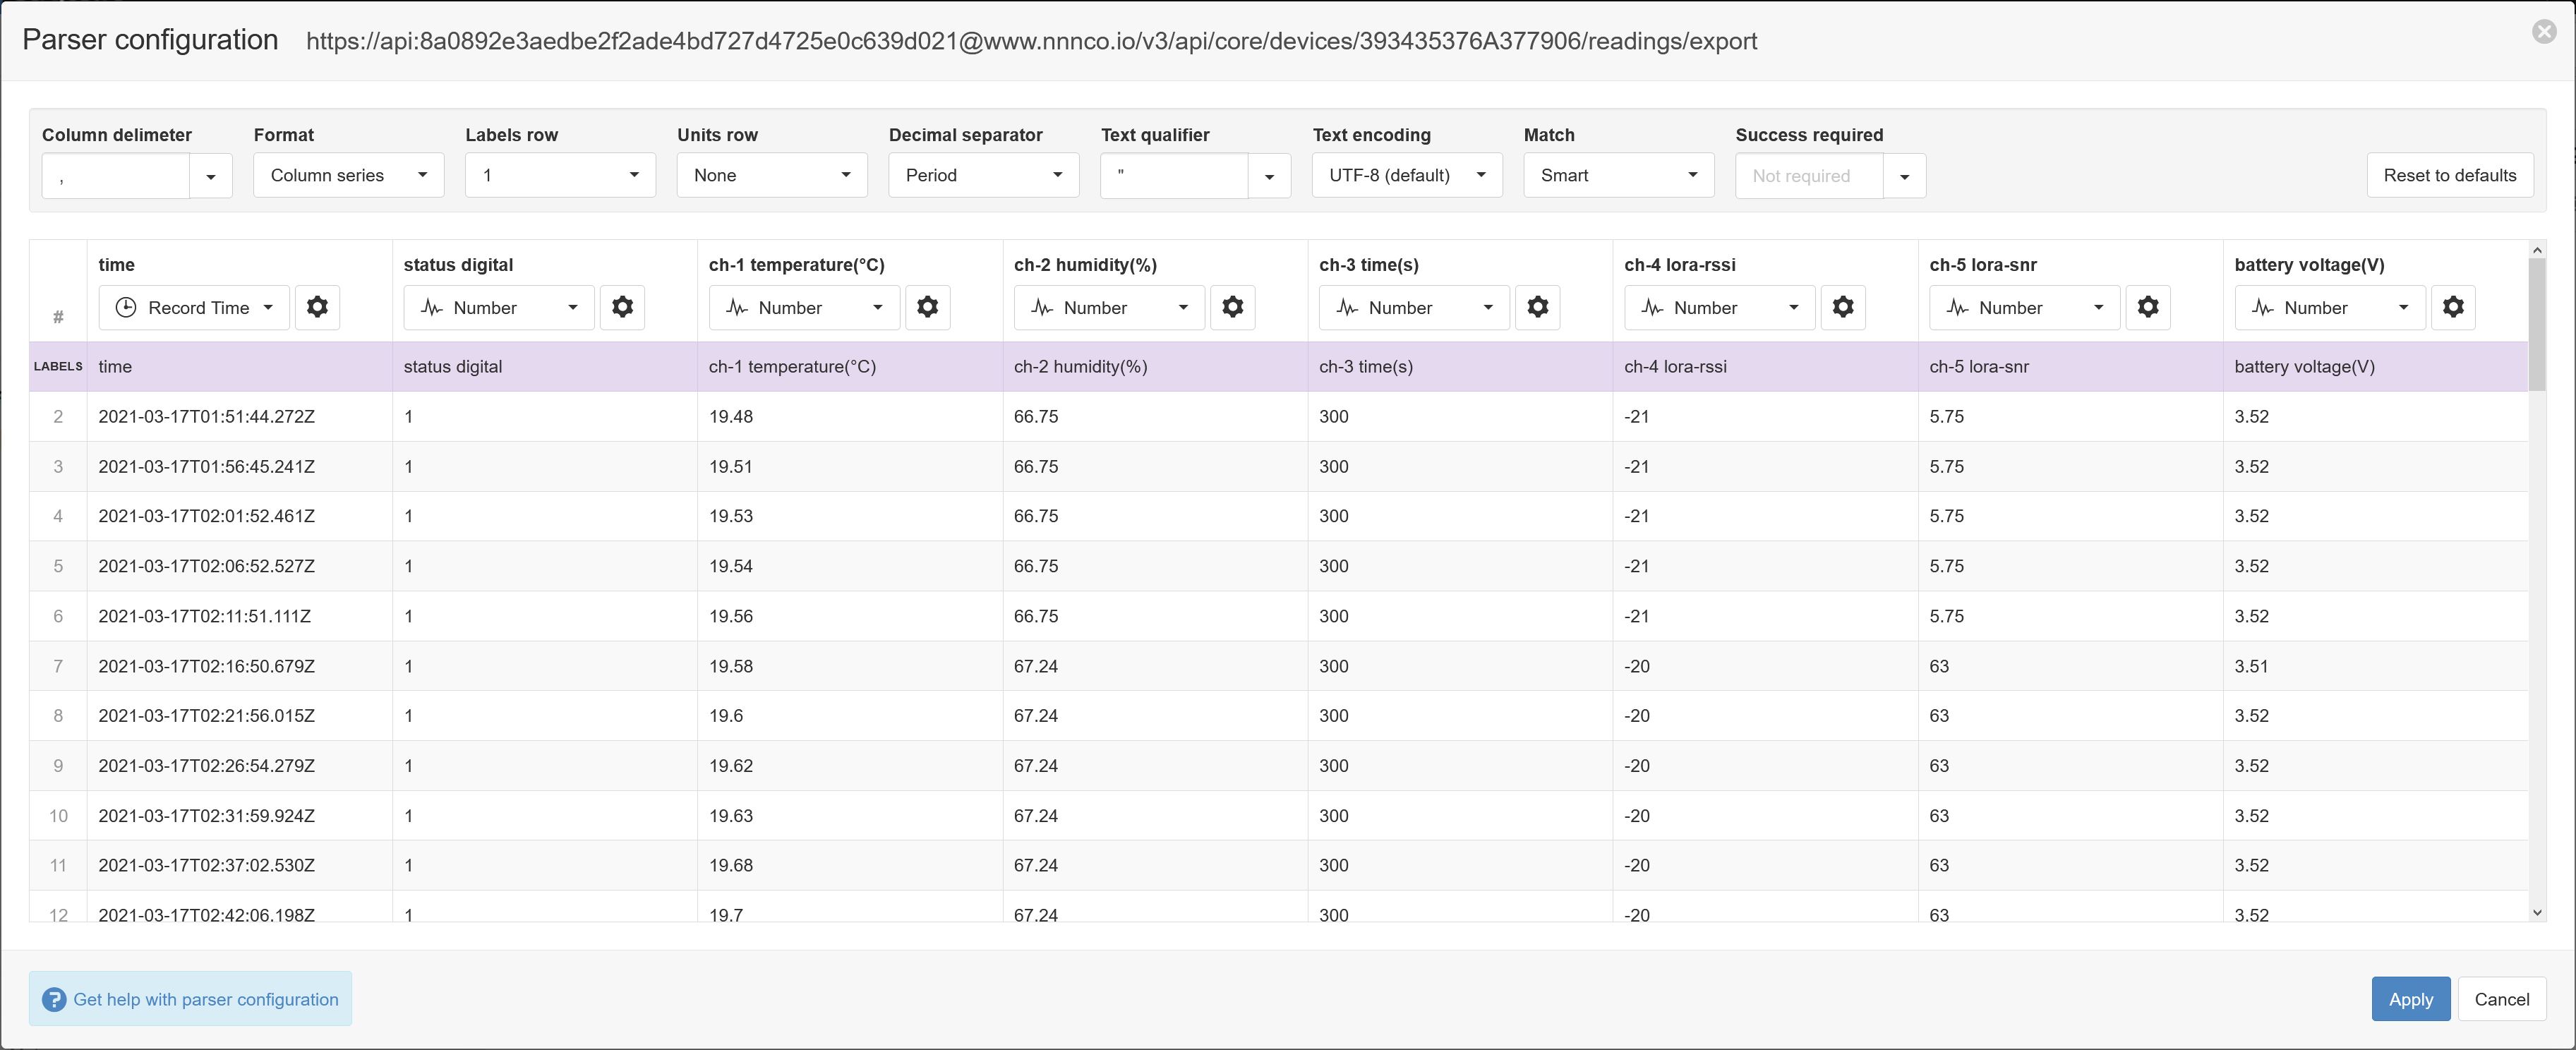
Ensure the data in each column matches the expected column data type and format. Validation errors are shown in red. Any columns not required for collection can optionally be Disabled. In the following example, the labels row has now been set to 1 (row background is purple), the record time has been set to the correct format (column background is not red), and the 7 data columns are all of type Number. Click Apply to close the parser and continue.
- Click Next to continue.
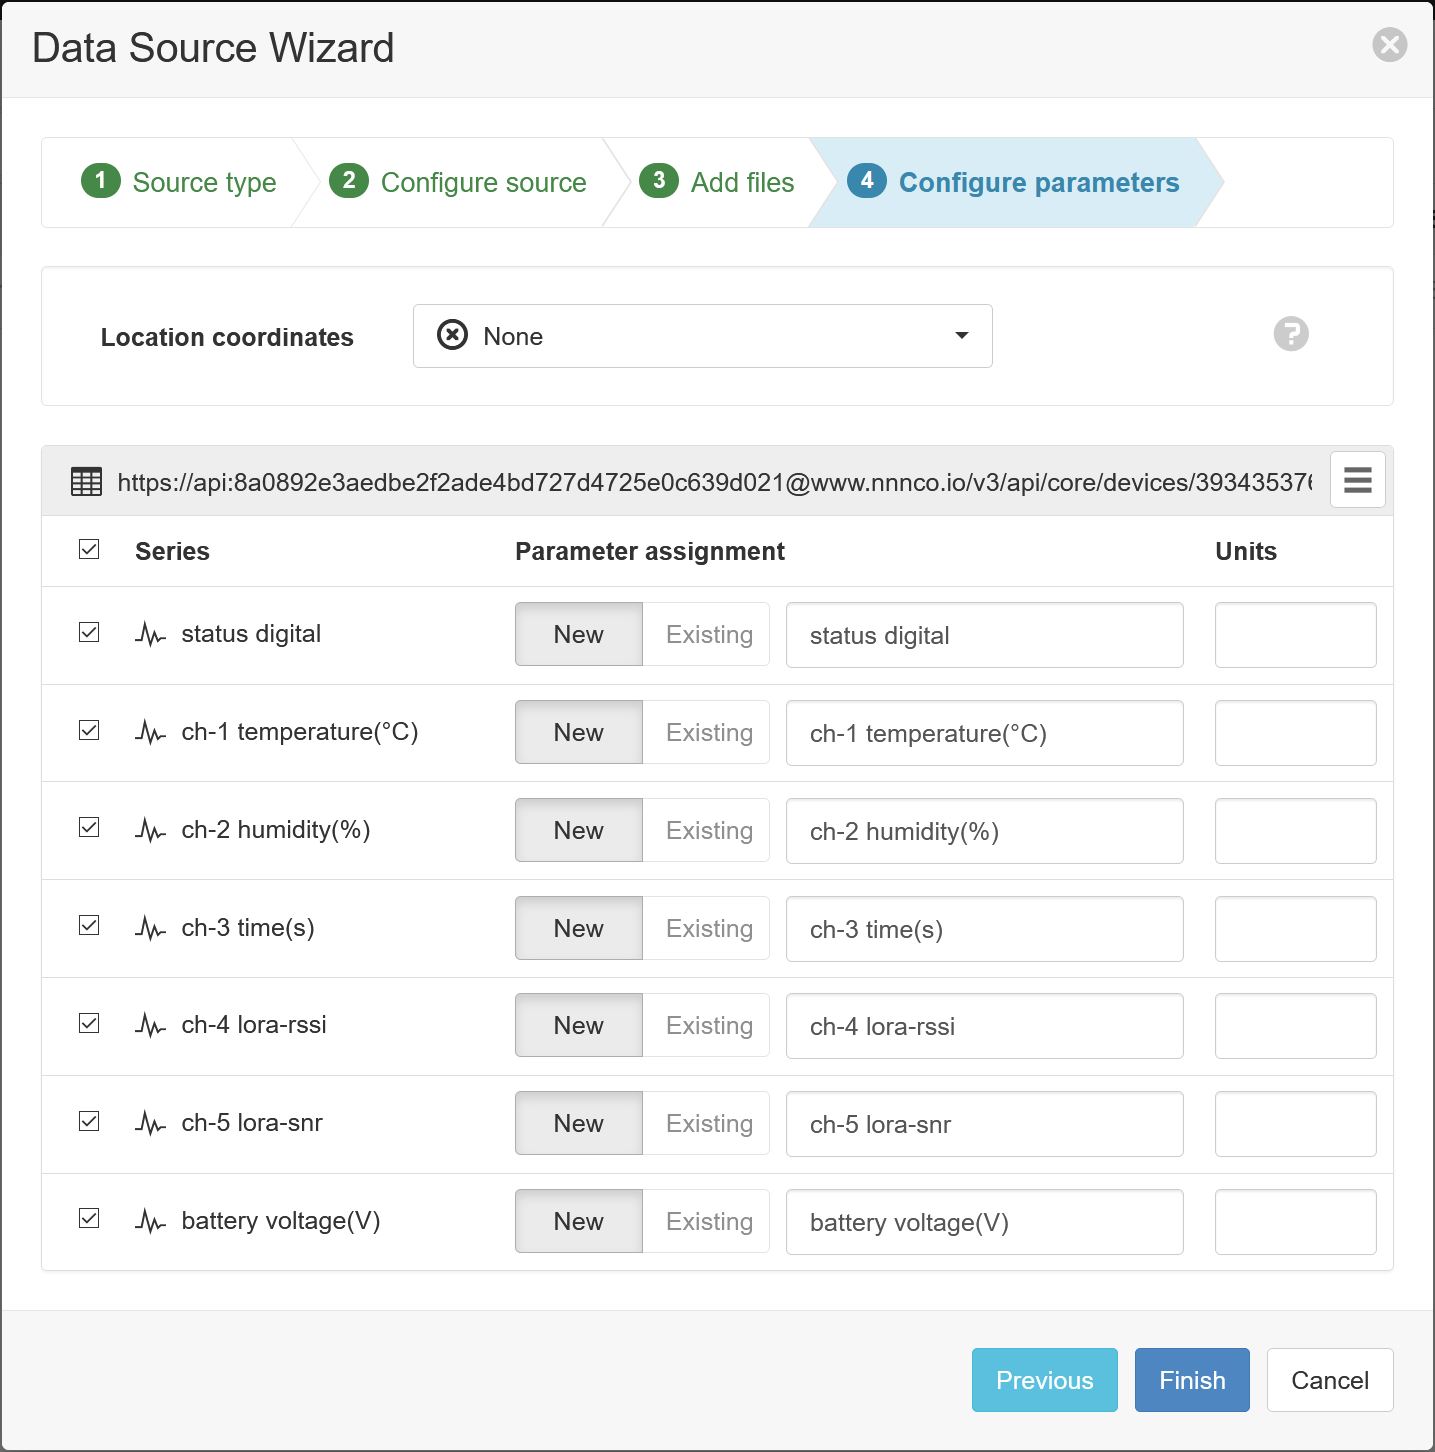
- Specify the parameter names (and optionally units) for each series/column defined in the Parser configuration. Uncheck any series you do not want to create as parameters. Click Finish to complete the setup.
Note
You can reconfigure the device URL, parser configuration and parameter assignment from the Data Source properties dialog after creation.
Note
Use the Events view with the detail level set to Debug for reviewing communication history and diagnosing configuration issues.