Workspaces Tree
The Workspaces Tree is the place to go for organising, configuring and managing your Nodes. This sections provides an overview of the common Workspaces Tree functions. Depending on the Selected Node type and your security permissions, not all options may be available.
Note
Most operations require you to display the Context Menu. Right-click or long-press on a Node in the Workspace Menu to display its Context Menu.
Create
 New Nodes can be created using the Create Menu or from the Context Menu.
Create Menu
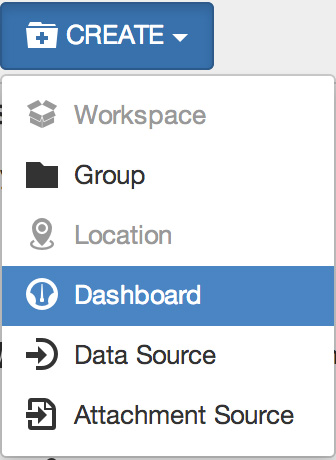
The Create Menu displays a list of the types of Nodes that can be created inside the currently Selected Node. Items that are disabled can not be created inside the Selected Node - either a restriction on the type of Node or you do not have the required security permissions.
Create using Context Menu
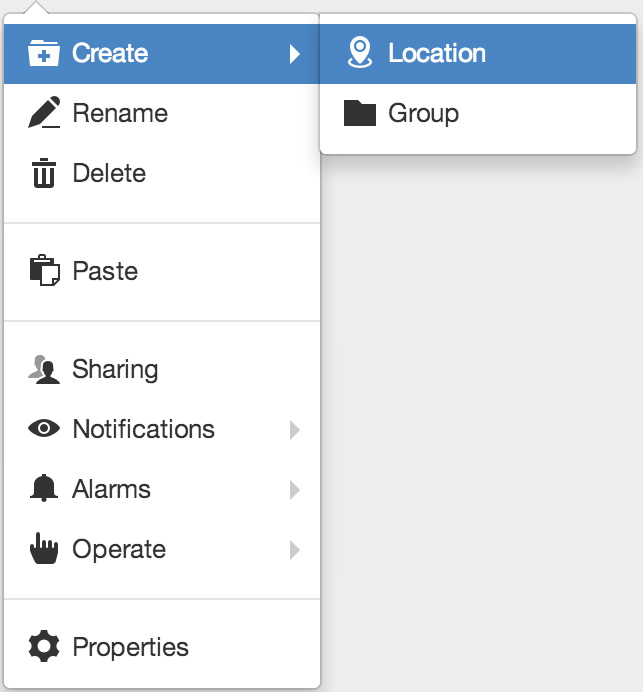
The Context Menu has a Create submenu which offers the same options as the Create Menu.
Rename
 Rename a Node from the context menu or press the F2 key after selecting a Node.

The Node will be selected and you can type in a new name and press enter/return or click anywhere outside the Node to apply.
Note
Nodes must be uniquely named within the current container Node and must not exceed 120 characters in length. Restricted characters include forward slash ‘/’, underscore ‘_’, semicolon ‘;’ and curly braces ‘{’ and ‘}’.
Delete
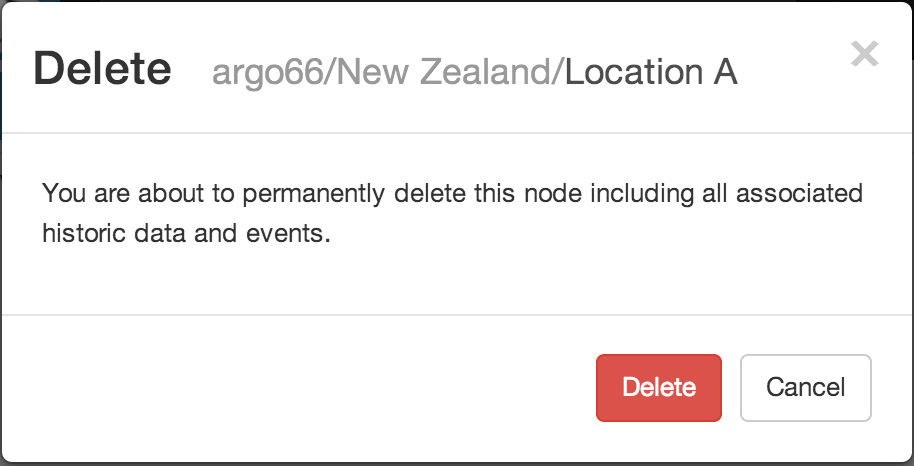
 Permanently delete a Node using the Context menu or press the delete key after selecting the Node. A confirmation message will be displayed.
Note
Deleting a Node will also delete any of the Nodes it contains including any associated historic data, events, attachments and configuration. This operation is NOT reversible.
Copy and Paste
Copy (Ctrl+C) and Paste (Ctrl+V) is the quickest and easiest way to duplicate a Node including all Nodes it contains. You must have configuration permission for the Node you intend to copy and the destination Node where you intend to paste.
 Copy a Node
 Paste a Node anywhere in the Workspaces Tree that accepts the copied Node type.
Note
The copy operation is done at the time of pasting. The original Node being copied must exist or the paste operation will be aborted.
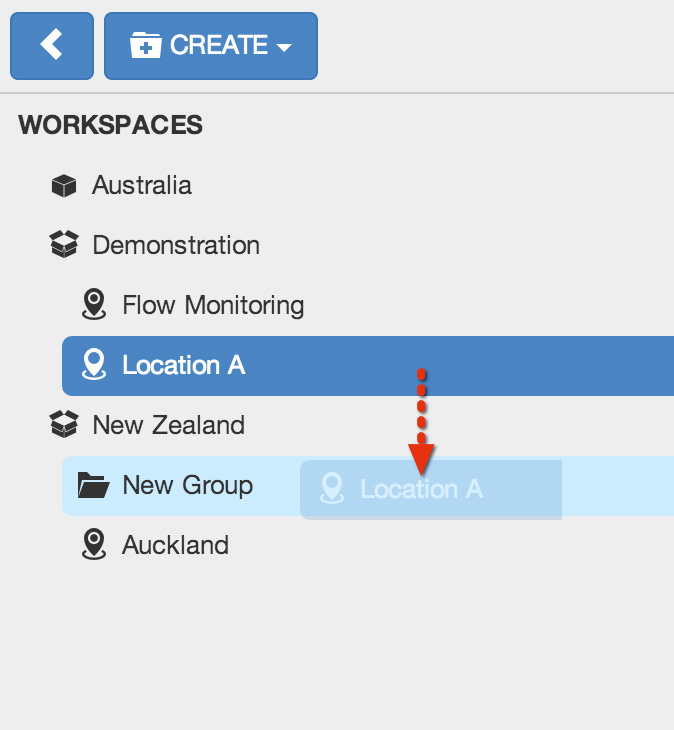
Move
 Move a Node (including all Nodes it contains) within a Workspace or between Workspaces. You can also move Workspaces between accounts that you have permission to access.
Select Move from the Context Menu to open the Move dialog and select a destination node for the move operation.
Alternatively Click and Drag a Node in the Workspaces Tree to the destination Node and release the mouse button when you see the destination node highlighted. Nodes will automatically expand when hovered.
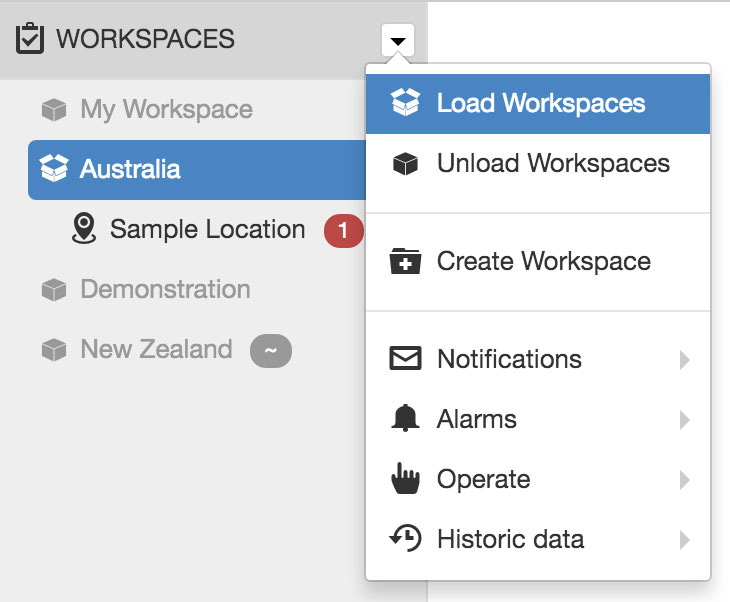
Workspace Loading On-demand
If you have access to more than one Workspace you may notice some of the Workspaces are GRAYED out in the Workspaces Tree when you first login. Click on the Workspace or select Load Workspace from the Workspace context menu to load its assets.
You can load all Workspaces by selecting Load Workspaces from the top-level WORKSPACES context menu.
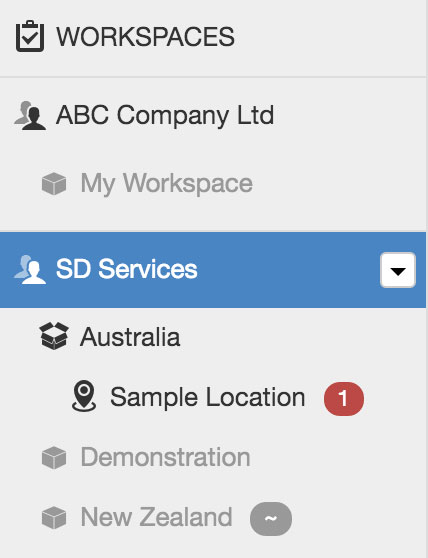
Workspace Grouping by Account
If you have access to more than one account you will notice Workspaces are automatically grouped under the associated account in the Workspaces Tree.
Selecting an account will display content related to all Loaded Workspaces you have access to for that account.
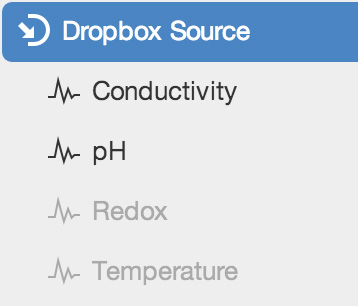
Disabled Nodes
You may notice GREY Nodes within a Workspace.
Sources being configured for the first time will be shown as disabled until they have been fully configured. Parameters that had been created and then unchecked (or unavailable) for collection will also be shown as disabled in the Workspaces Tree, List and Map Views.