Import
 Historic Import is accessible from the Data Source context menu in the Workspaces Tree. You can upload/import historic data from a locally accessible file, into New or Existing Parameters, or update the historic coordinate data for Locations.
For automatic collection of your data you should configure the Connection and Collection properties of a file Data Source.
The Historic Import Wizard will guide you through the following steps to successfully import your time series data:
Select a file
Select a file to import from your computer or device and configure import options.
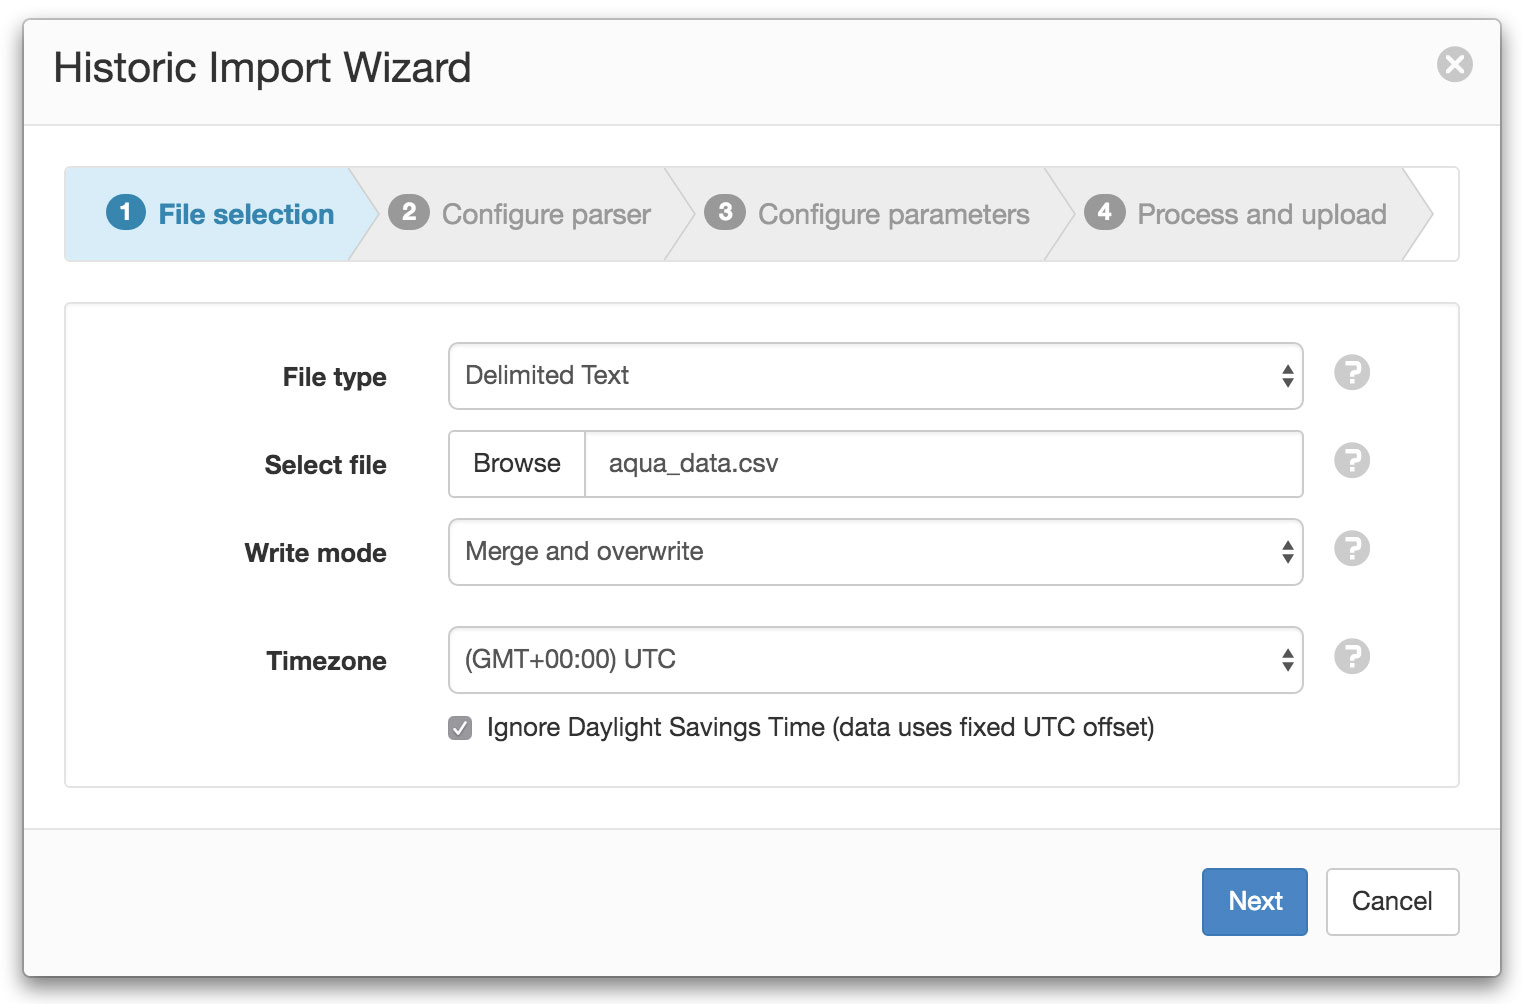
- File type
Select the type of file you would like to import:
Delimited Text
Data is stored as rows of values separated with a specific delimiter character.JSON Time Series
Data is stored in the JSON Time Series format. Note: JTS files to be imported must contain a columns header that specifies name and dataType of each column included in the data.- Select file
- Click or touch the Browse button to select a file from your computer or device. There is a 250MB file size limit per import. To import a file exceeding the size limit you should split it into smaller chunks (< 250MB) and import separately.
- Write mode
Select how the new data will be imported:
Merge and overwrite [API: MERGE_OVERWRITE_EXISTING]
Insert the imported data into the existing historic data and overwrite the existing values when timestamps match.Merge and preserve [API: MERGE_PRESERVE_EXISTING]
Merge the imported data into the existing historic data and do not overwrite existing values when timestamps match.Replace [API: INSERT_DELETE_EXISTING]
Remove all existing historic data within the range of data being imported and replace with imported data.[API: MERGE_UPDATE_EXISTING]
Merge the imported data into the existing historic data and and update specific record attributes when timestamps match.[API: MERGE_FAIL_ON_EXISTING]
Merge the imported data into the existing historic data but fail if timestamps match.[API: INSERT_FAIL_ON_EXISTING]
Insert new data only if there is no existing historic data within the range being imported.[API: DELETE_RANGE]
Delete historic data encapsulated by the range of the imported data.[API: DELETE]
Delete historic data that matches the timestamps of the imported data.- Timezone
- Select the timezone of the data being imported. This is generally the location of the sensor or device, but can be adjusted as required.
- Ignore Daylight Savings Time
- Check this option if the Source does not offset the data timestamps to account for DST.
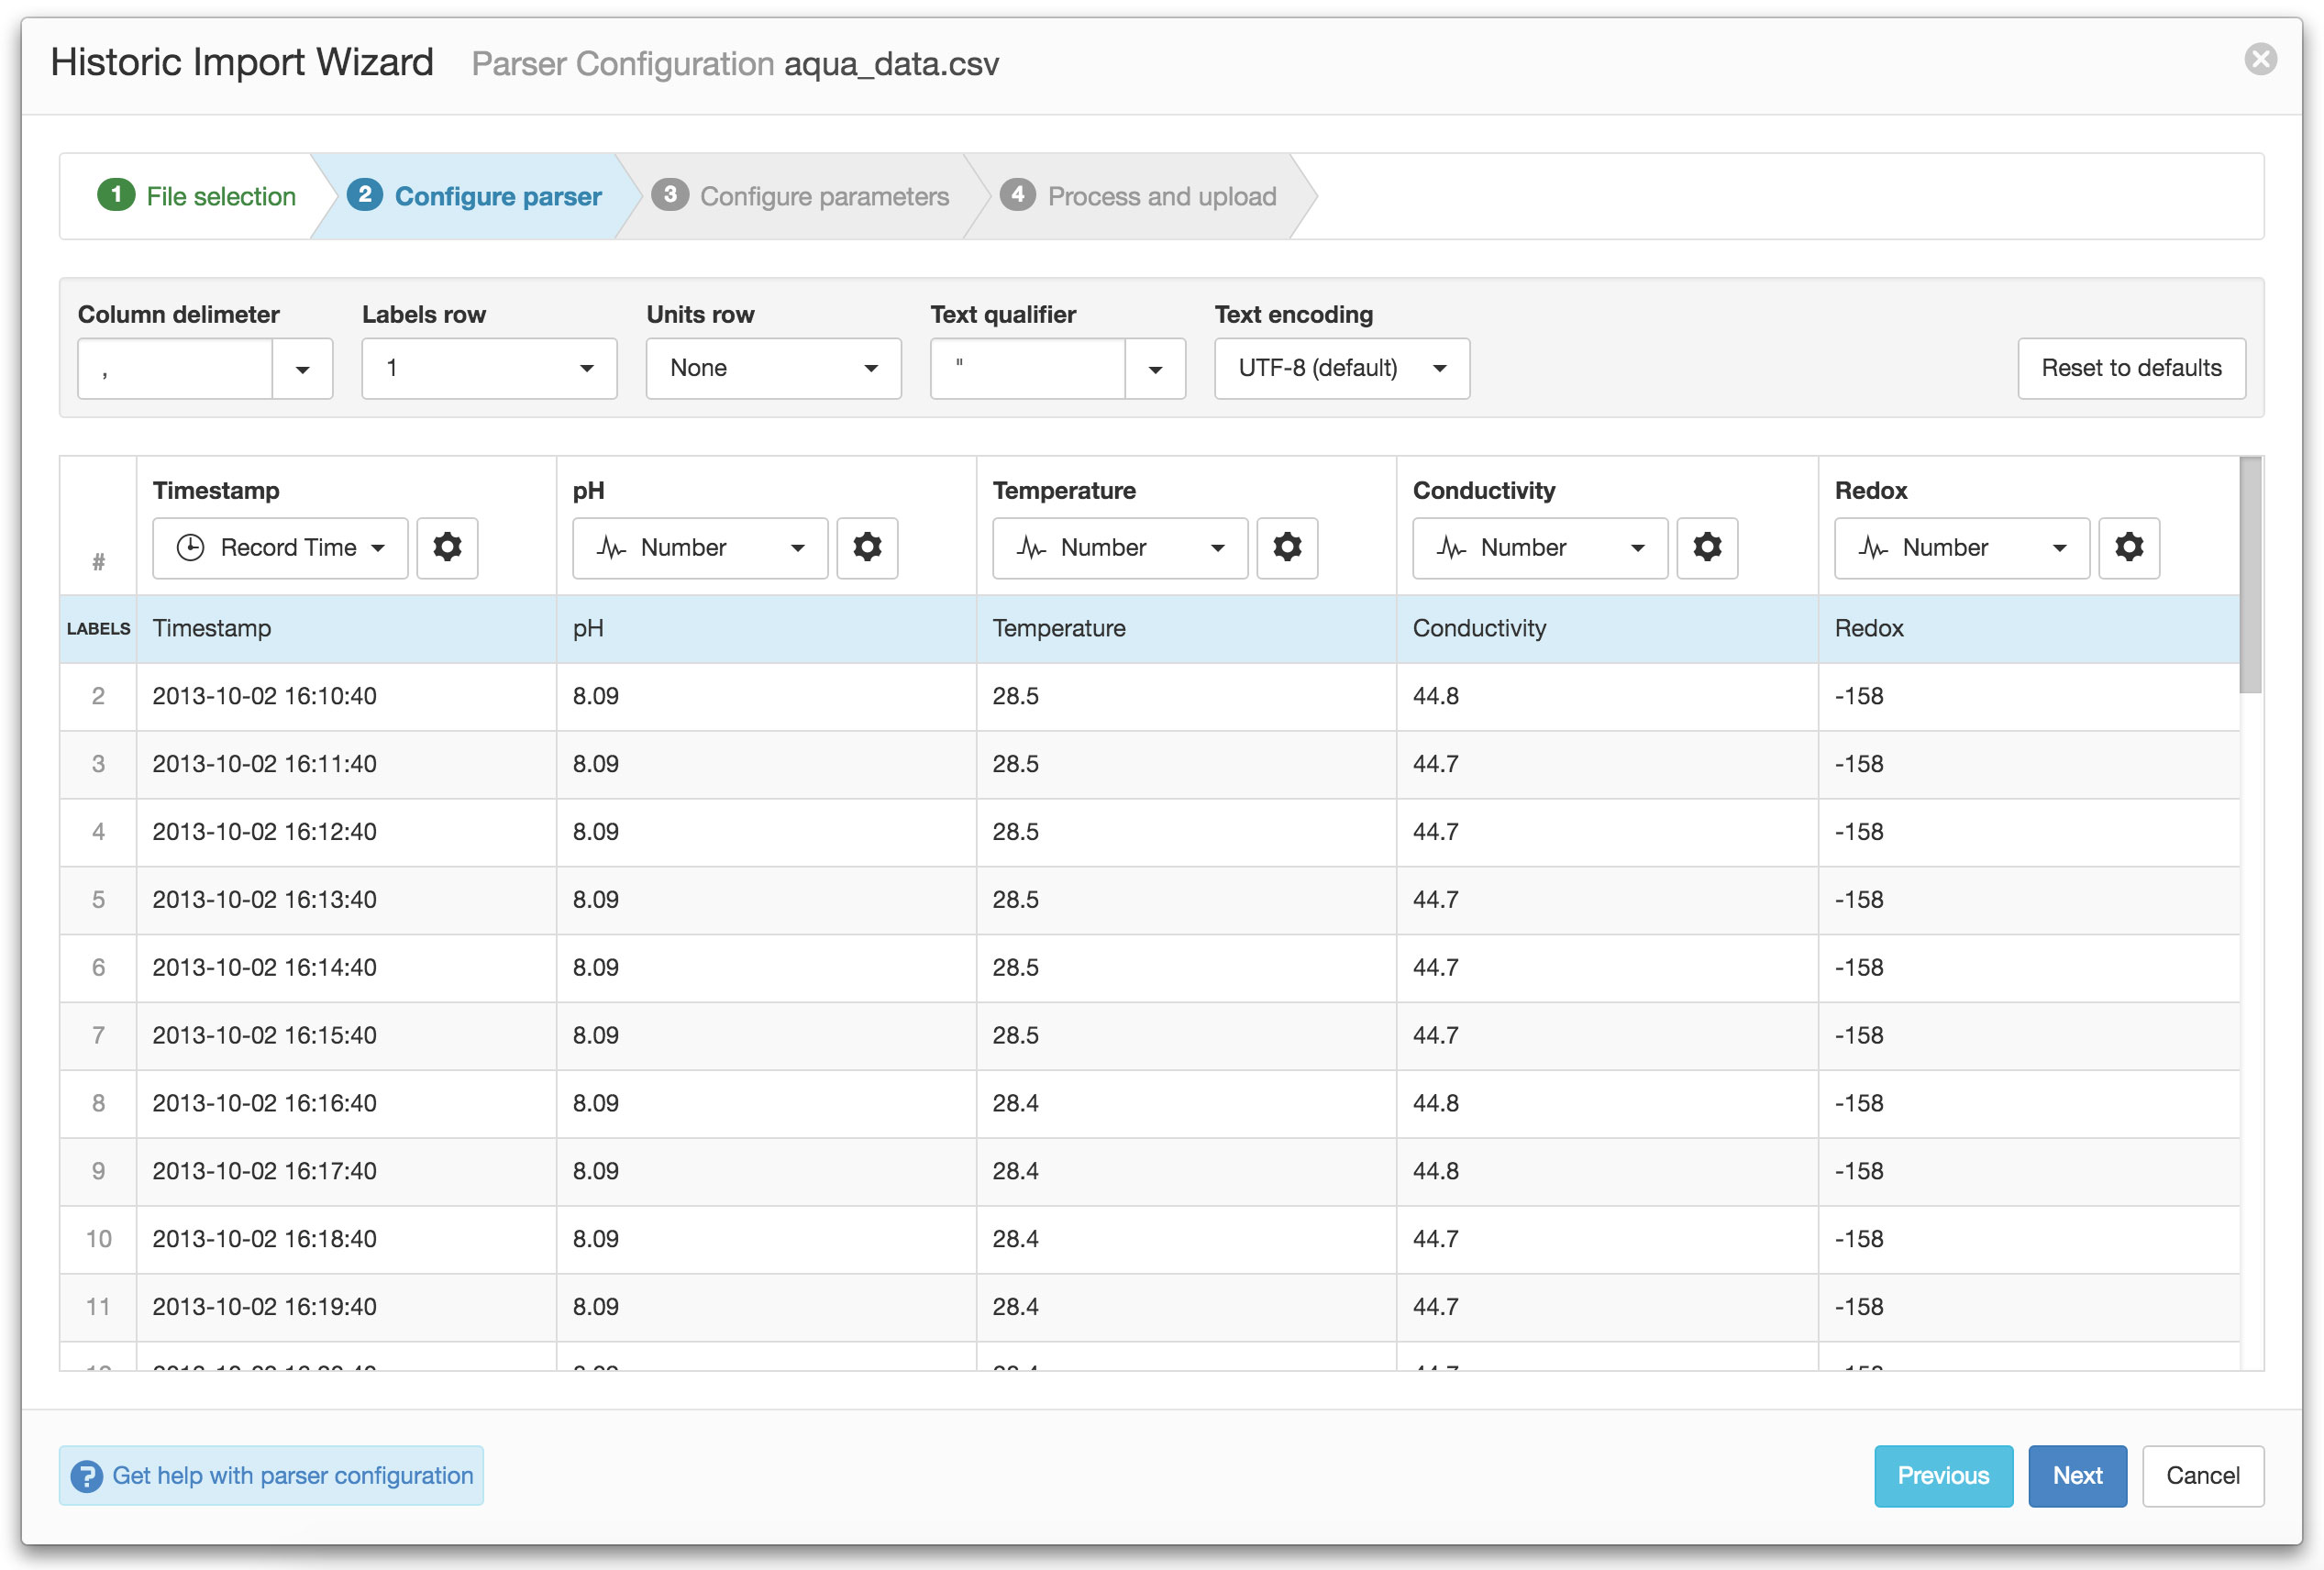
Use the Text Parser to define Series
The Text Parser allows you to define how the delimited text file being imported should be processed including defining series to be assigned to Parameters. See Text Parser Configuration for a detailed guide to using the Text Parser.
Assign Series to Parameters and Location
Assign the newly defined Series to New or Existing Parameters. You can also assign the series to the Source’s Location for the import of historic coordinate data.
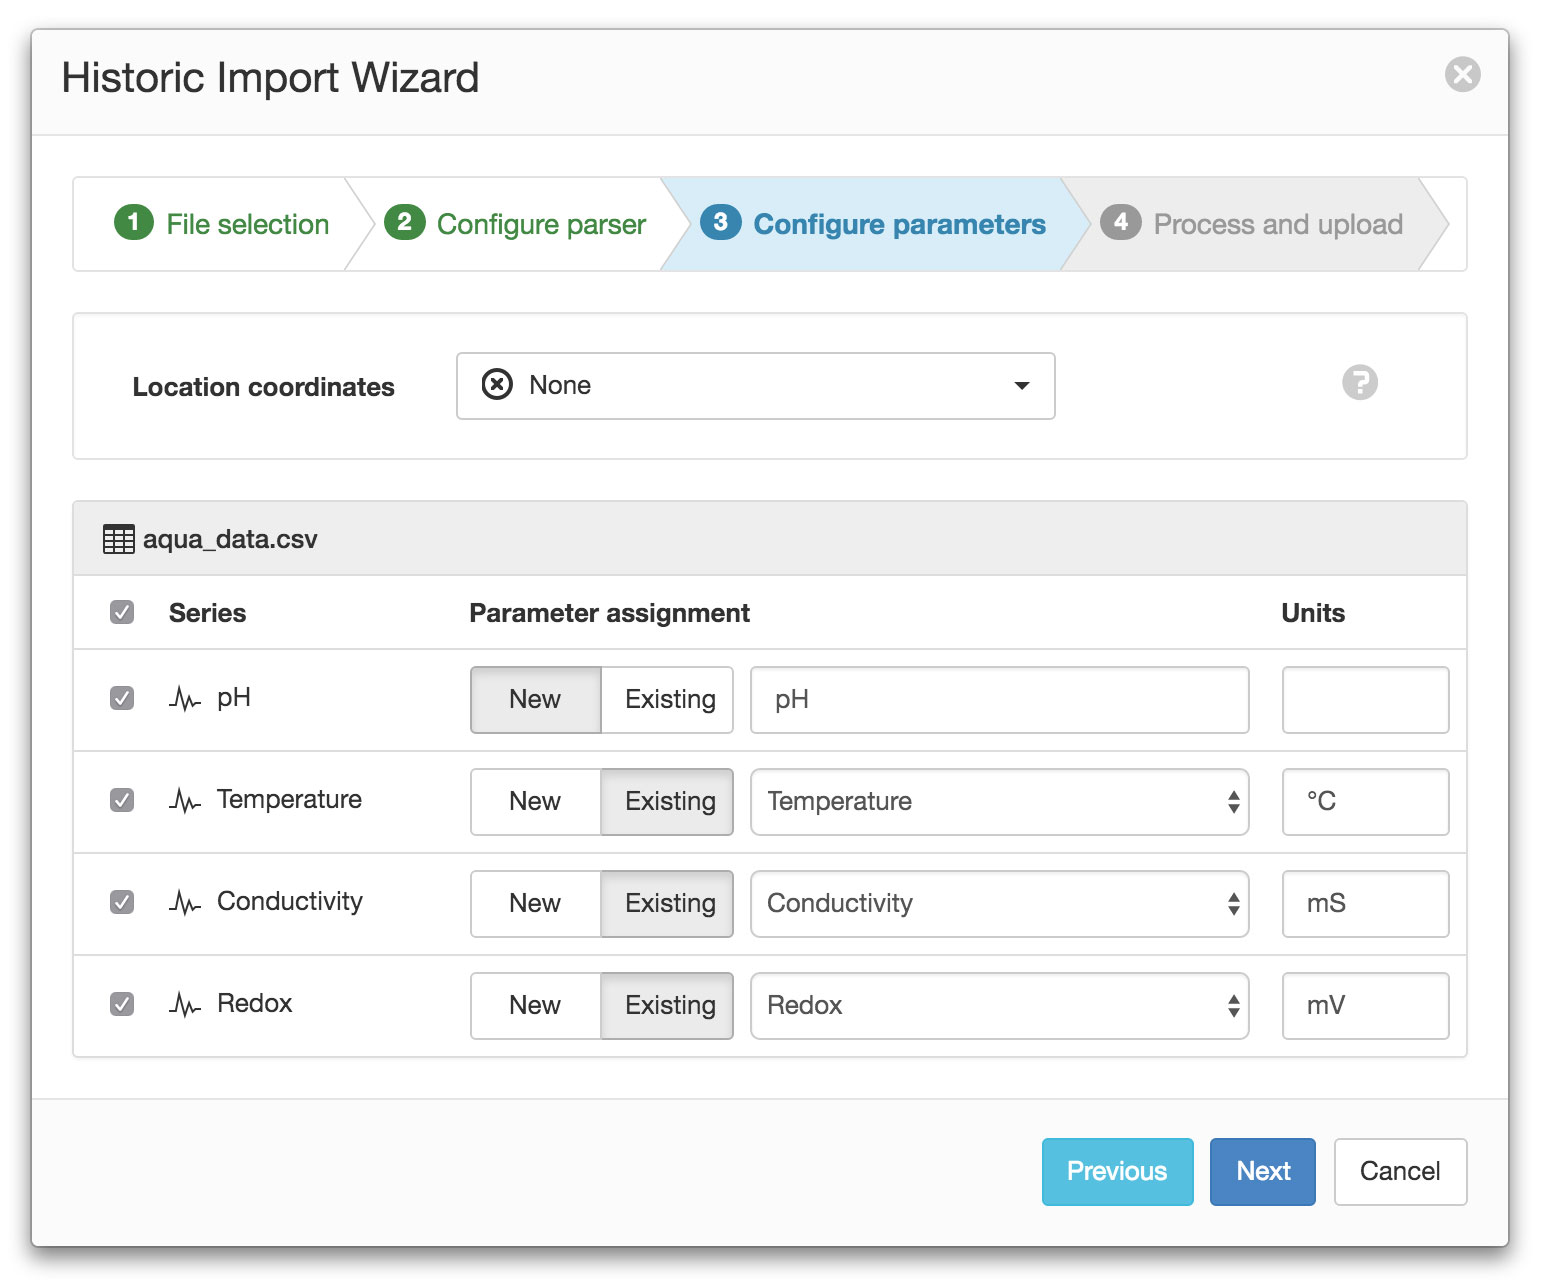
- Location Coordinates
- The imported file can optionally provide Location Coordinates from a coordinate series or a pair of numeric series (lat/lng) and will import the data into the Location Node this Source is contained within.
- Parameter Assignment
Assign Series to New or Existing parameters by toggling the New/Existing button (only enable when there are existing Parameters matching the data type of the Series). Uncheck any Series you do not want want to import.
Any newly created parameters will be created within the Source and shown as GREYED out in the Workspaces Tree and Content Views to distinguish them from parameters assigned to series being automatically collected by the Data Source.
Parameters can be re-assigned to new Series at any time without loosing existing historic data.
The series icon indicates the type of parameter that can be assigned to the Series.
Process and Upload
The Process and Upload screen displays a progress bar and status information about the current operation. If any problem is encountered an error message and Retry button will be displayed, otherwise the Successfully Completed status message will be shown. Click Finish to close the import wizard.
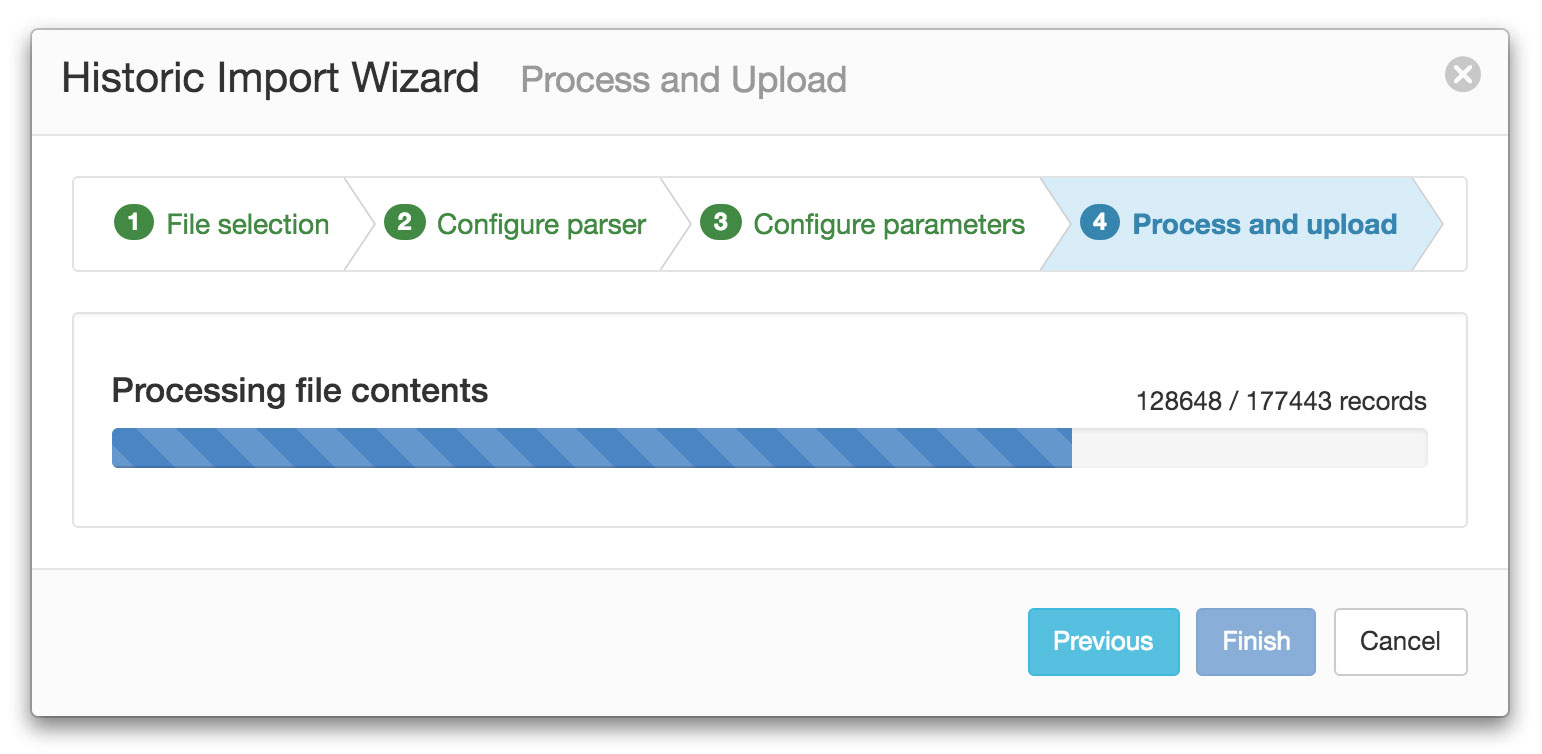
Note
Files containing a large number of records may be time consuming to process. Some browsers/devices may also enforce certain limits which prevent successful import of large files even if they are smaller than the 250MB limit.