Sigfox
The Sigfox network can be configured to send data to eagle.io in CSV format embedded in an email in a few easy steps.

Source configuration
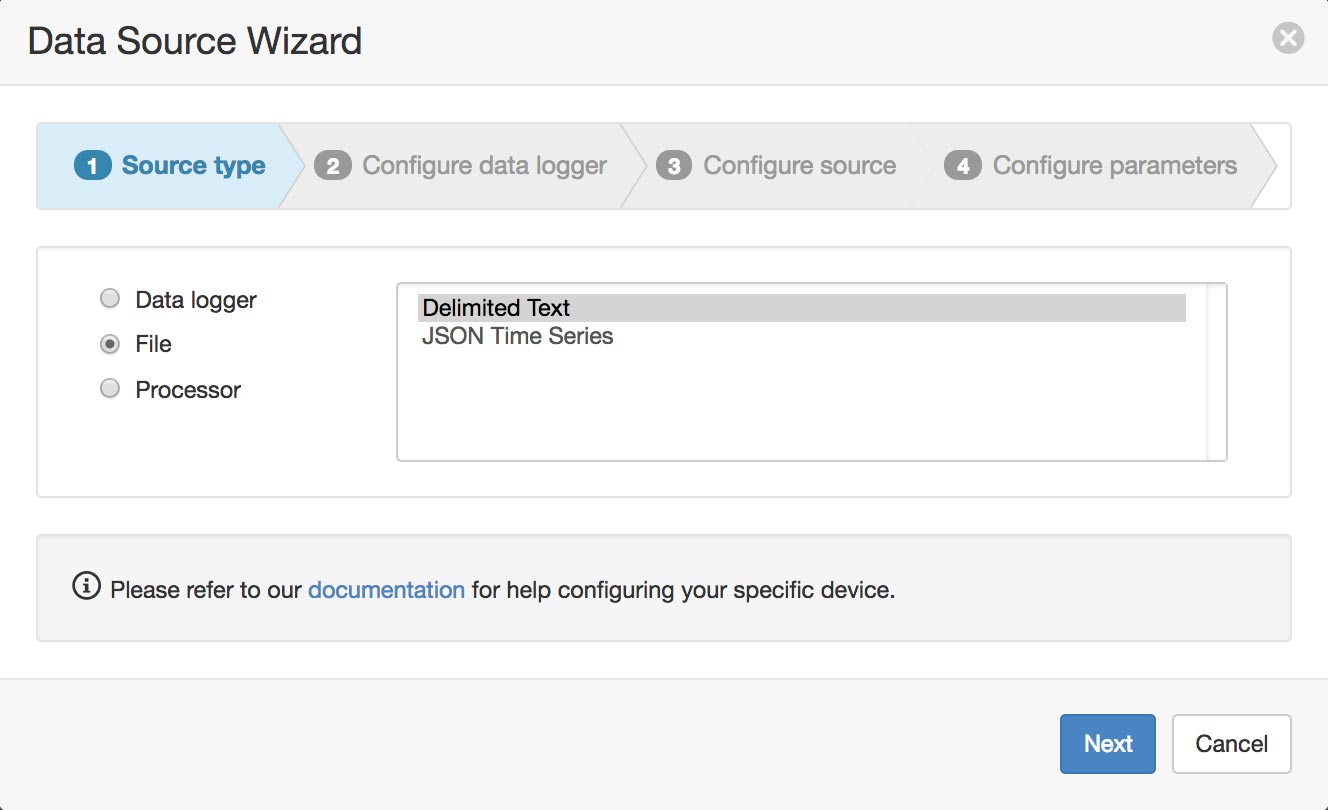
- Create a Data Source and select File as the Source Type. Choose Delimited Text from the list and click Next.
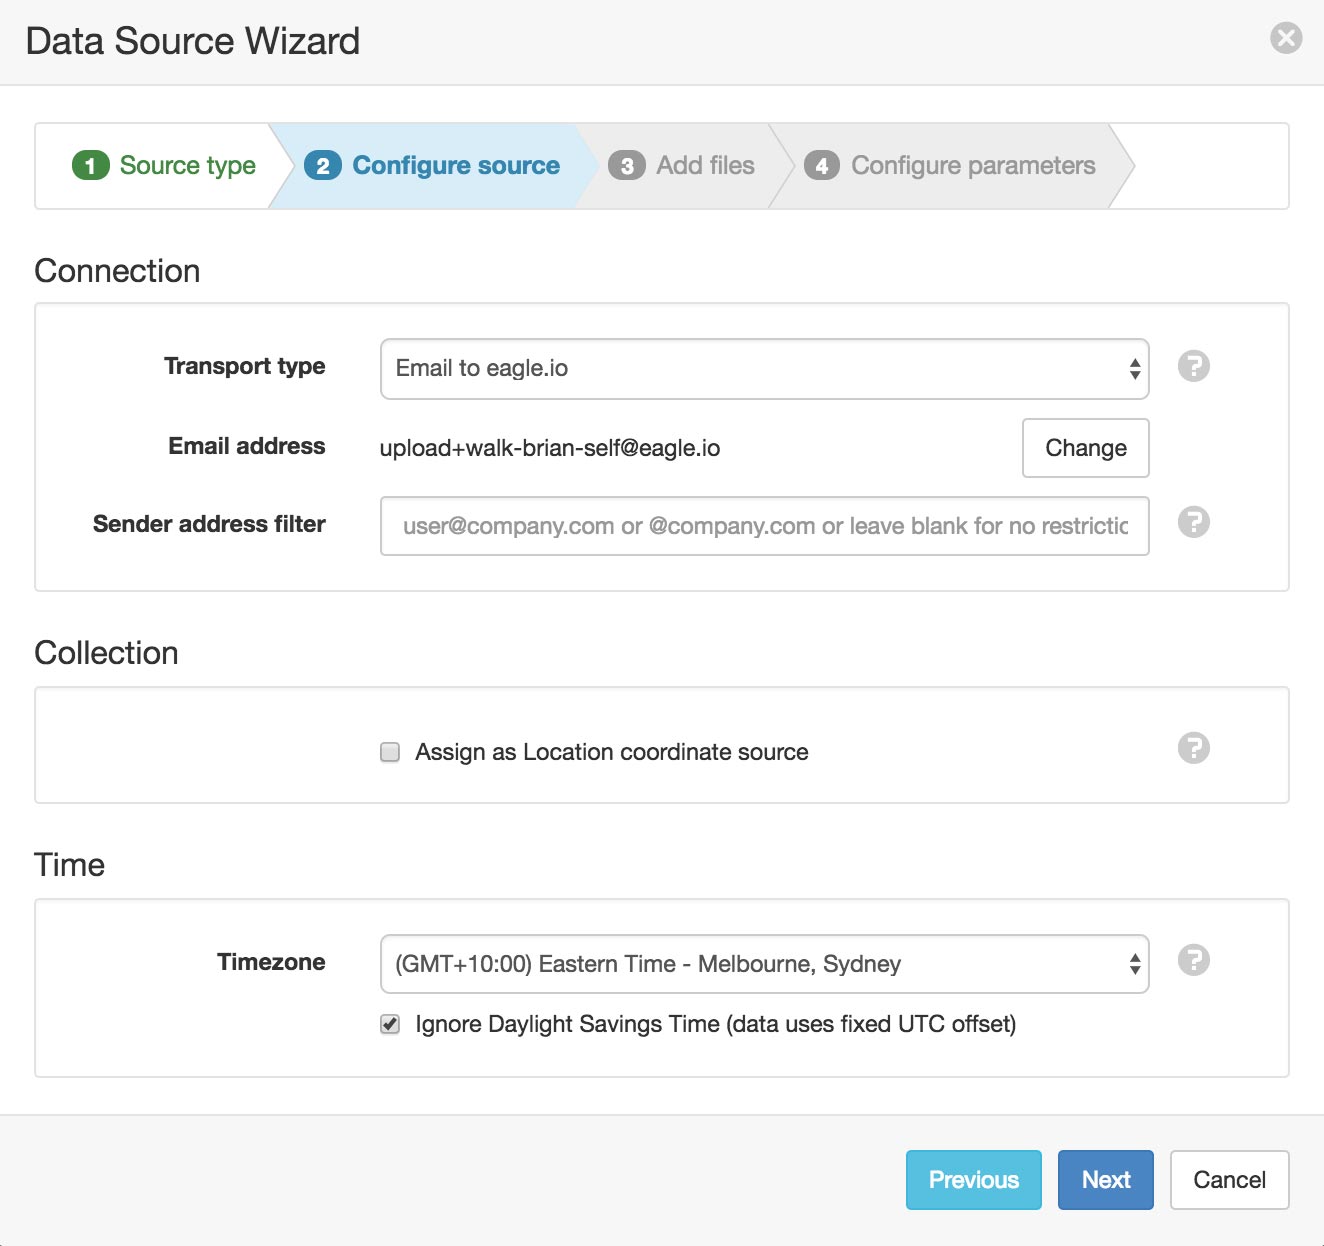
- Select Email to eagle.io as the transport type. A unique email address will be automatically generated per Data Source. Click Next to continue.
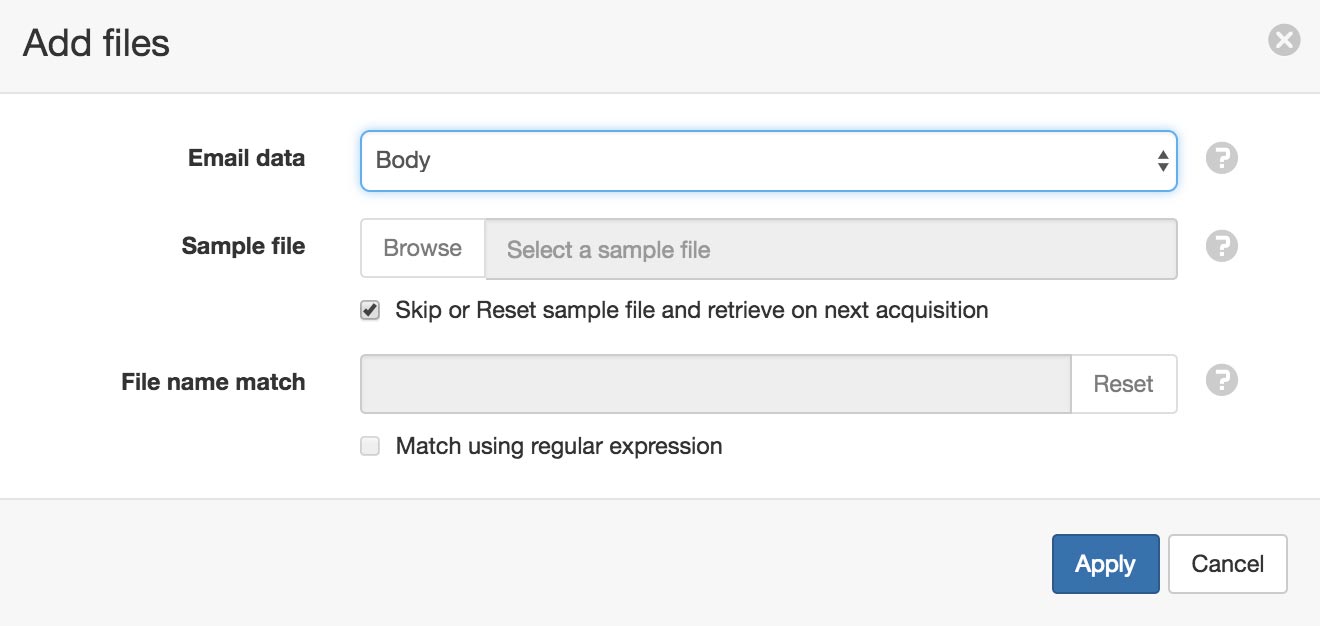
- Select Body for the Email data and click the Skip or Reset sample file and retrieve on next acquisition checkbox.
Note
If you do not have a sample available, click the Skip checkbox and click finish on the next screen. A sample will be saved automatically on the initial upload from the data logger and you will need to open the Data Source properties dialog and configure the series to create parameters.
- The Parser configuration screen allows the user to describe the structure and format of the data file so it can be correctly interpretted by the system in subsequent uploads. Refer to Text Parser Configuration for full details.
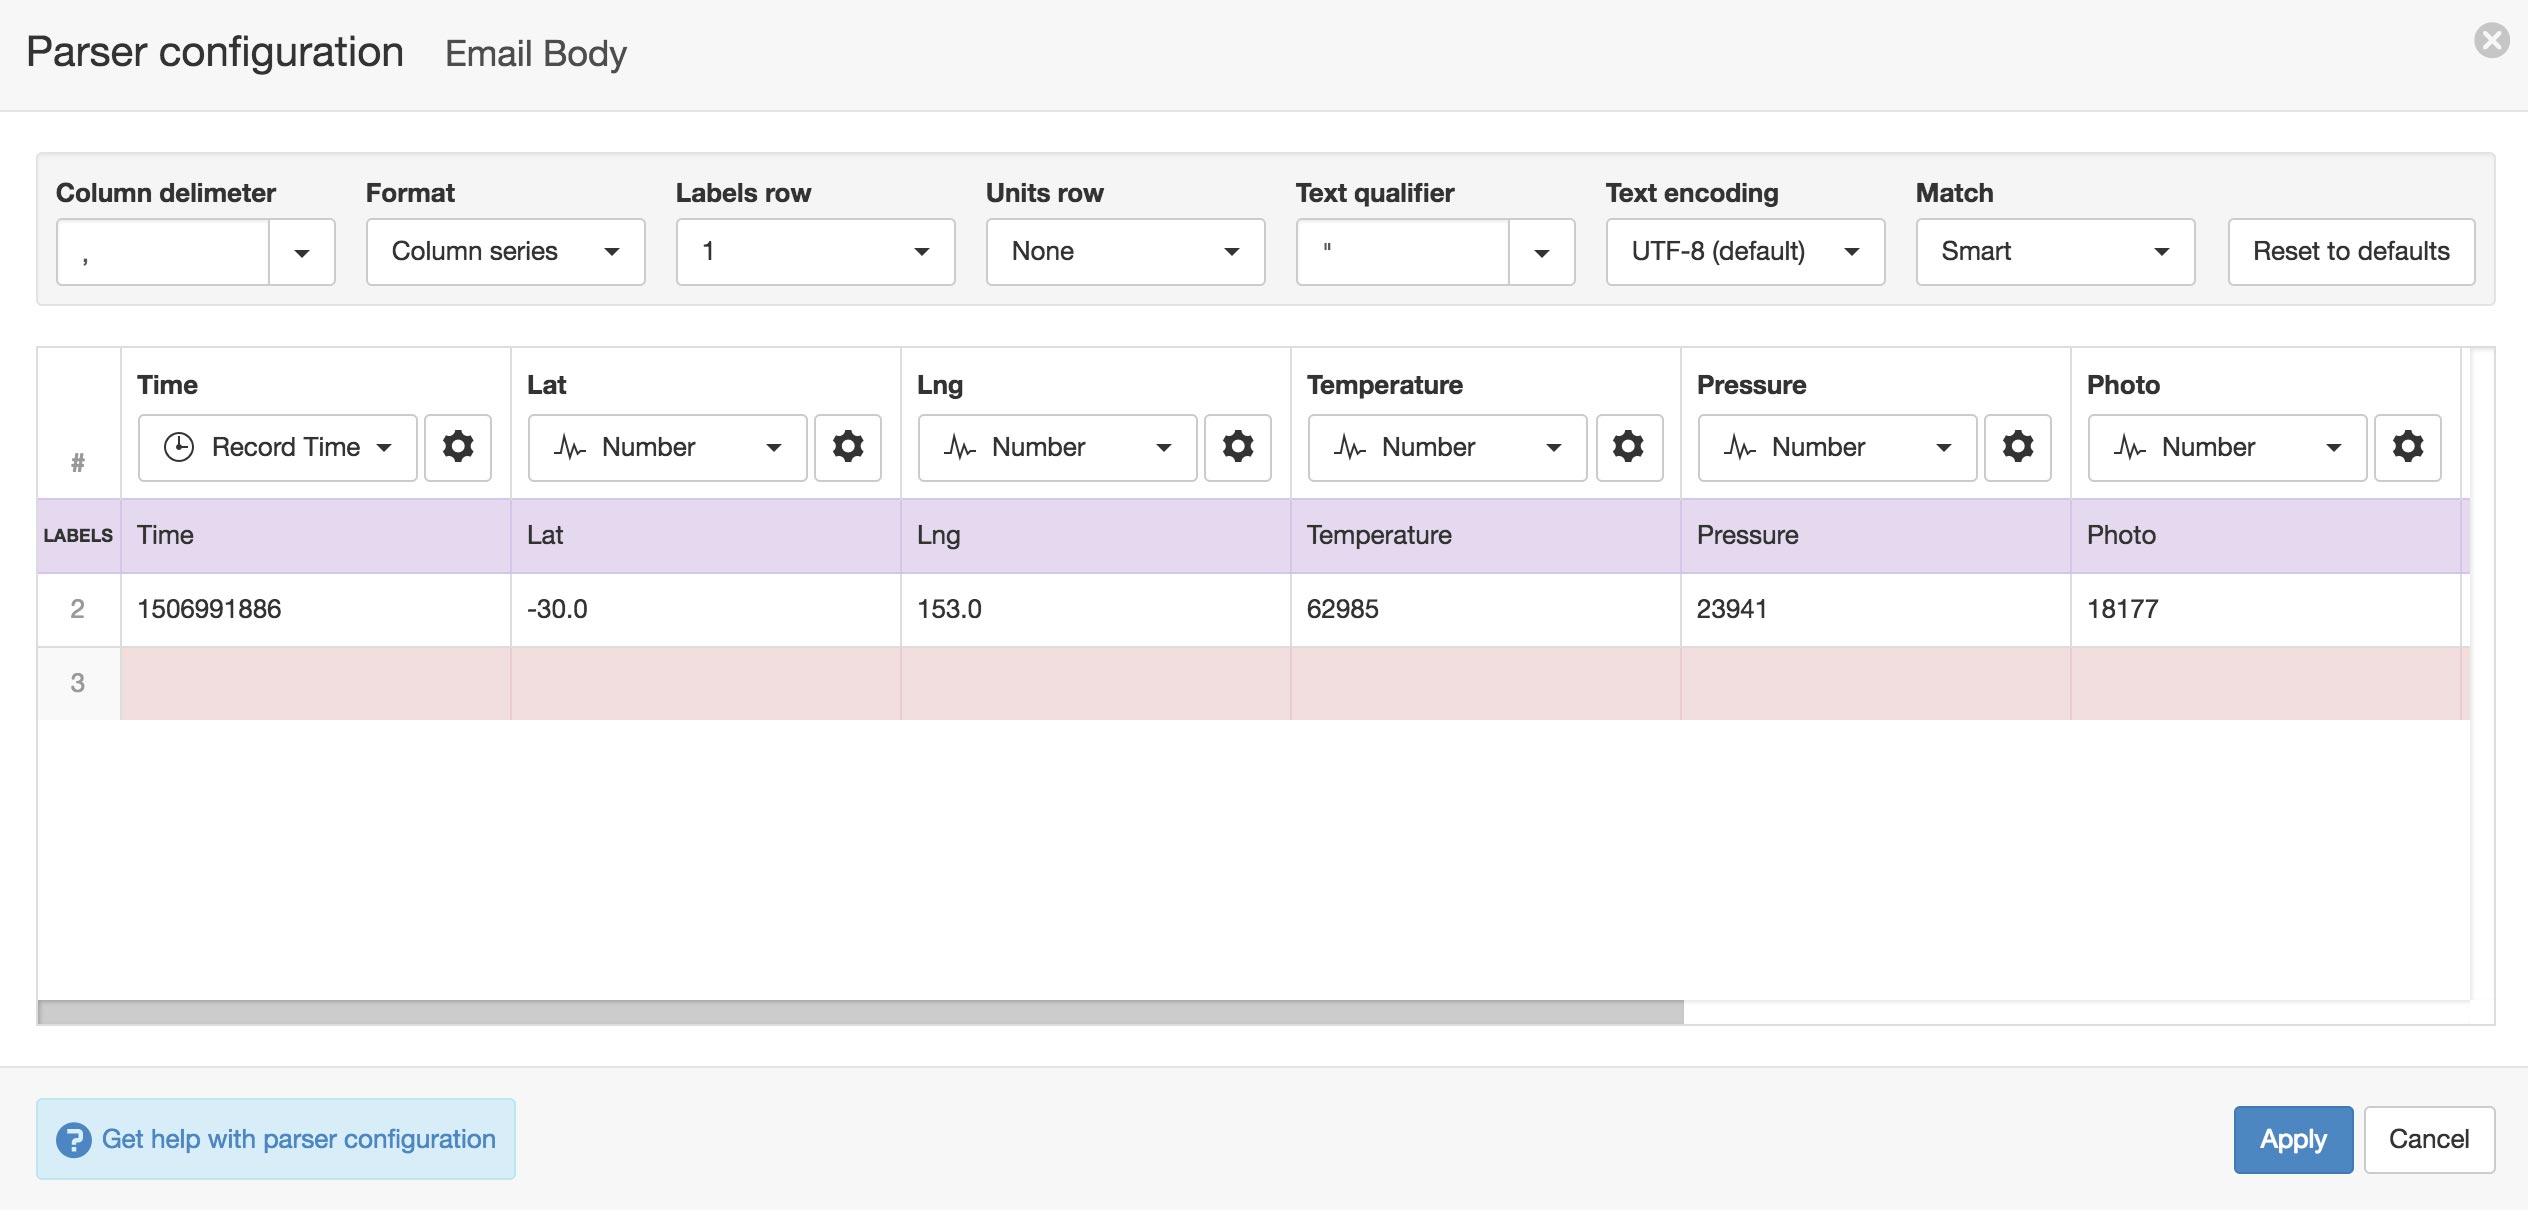
If the data embedded in the email contains a header row, set the Labels row control to the corresponding row number (1 by default) which will assign default labels for parameter creation.
Ensure the data in each column matches the expected column data type and format. Validation errors are shown in red. Any columns not required for collection can optionally be Disabled.
You will need to use the drop-down menu above the columns to assign the Record Time data type to the column containing the record timestamp. Click the configure button to change the Format field to use the time format X (Unix Timestamp).
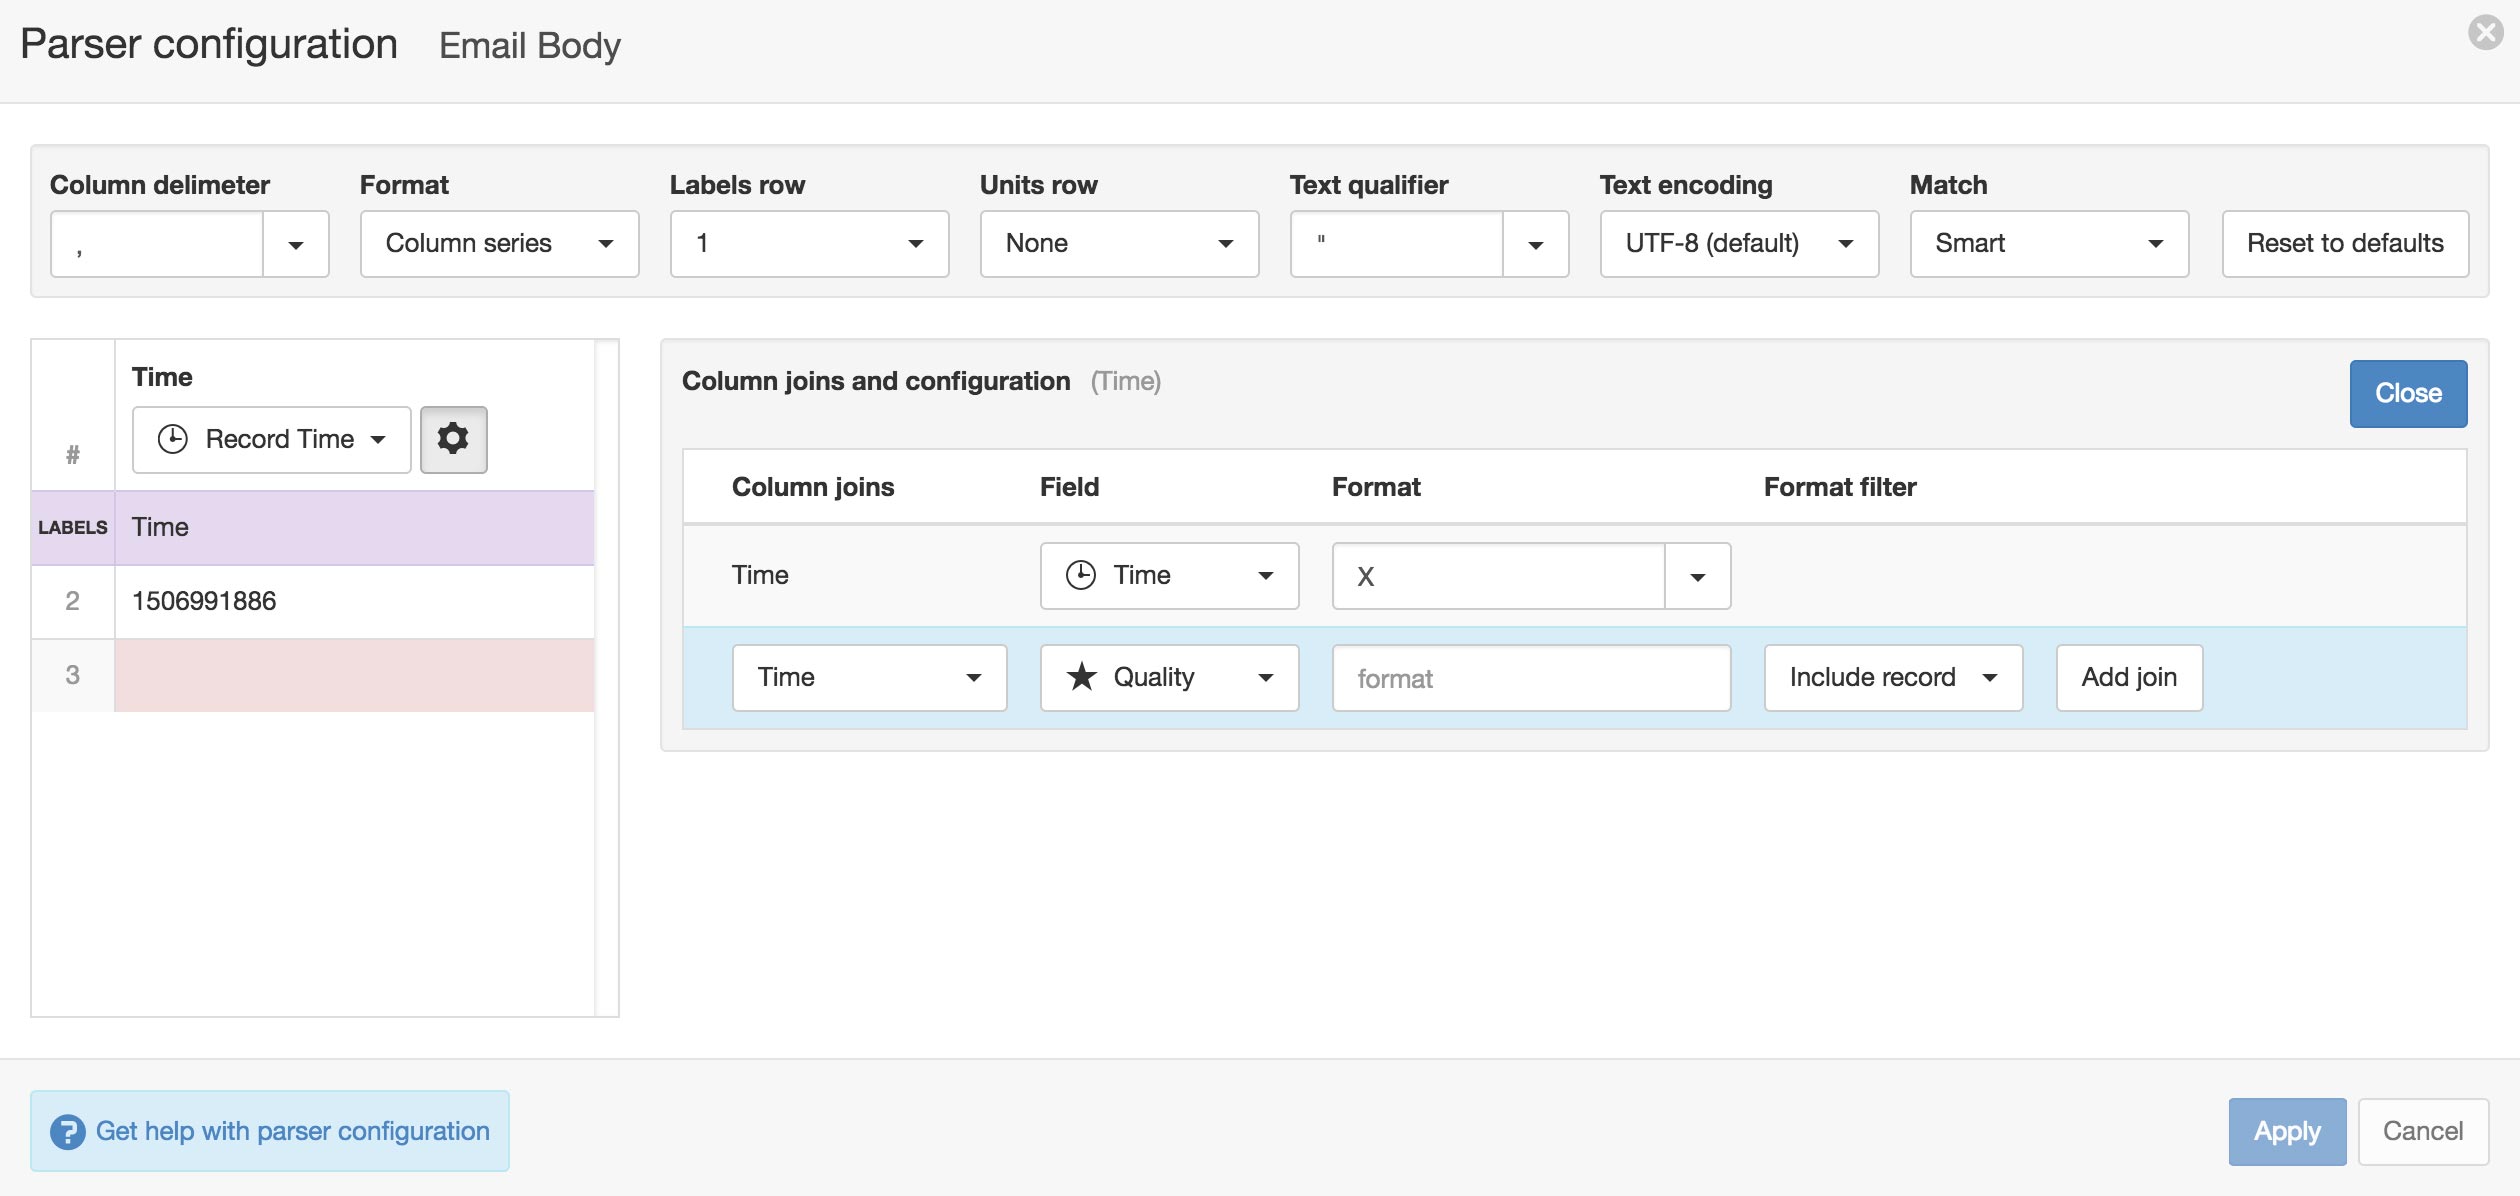
Click Apply and Next.
Note
You can reconfigure the parser configuration and parameter assignment from the Data Source properties dialog after creation.
- Specify the parameter names (and optionally units) for each series/column defined in the Parser configuration. Uncheck any series you do not want to create as parameters. Click Finish to complete the setup.
Device settings
Configure the Sigfox Network to send data to eagle.io:
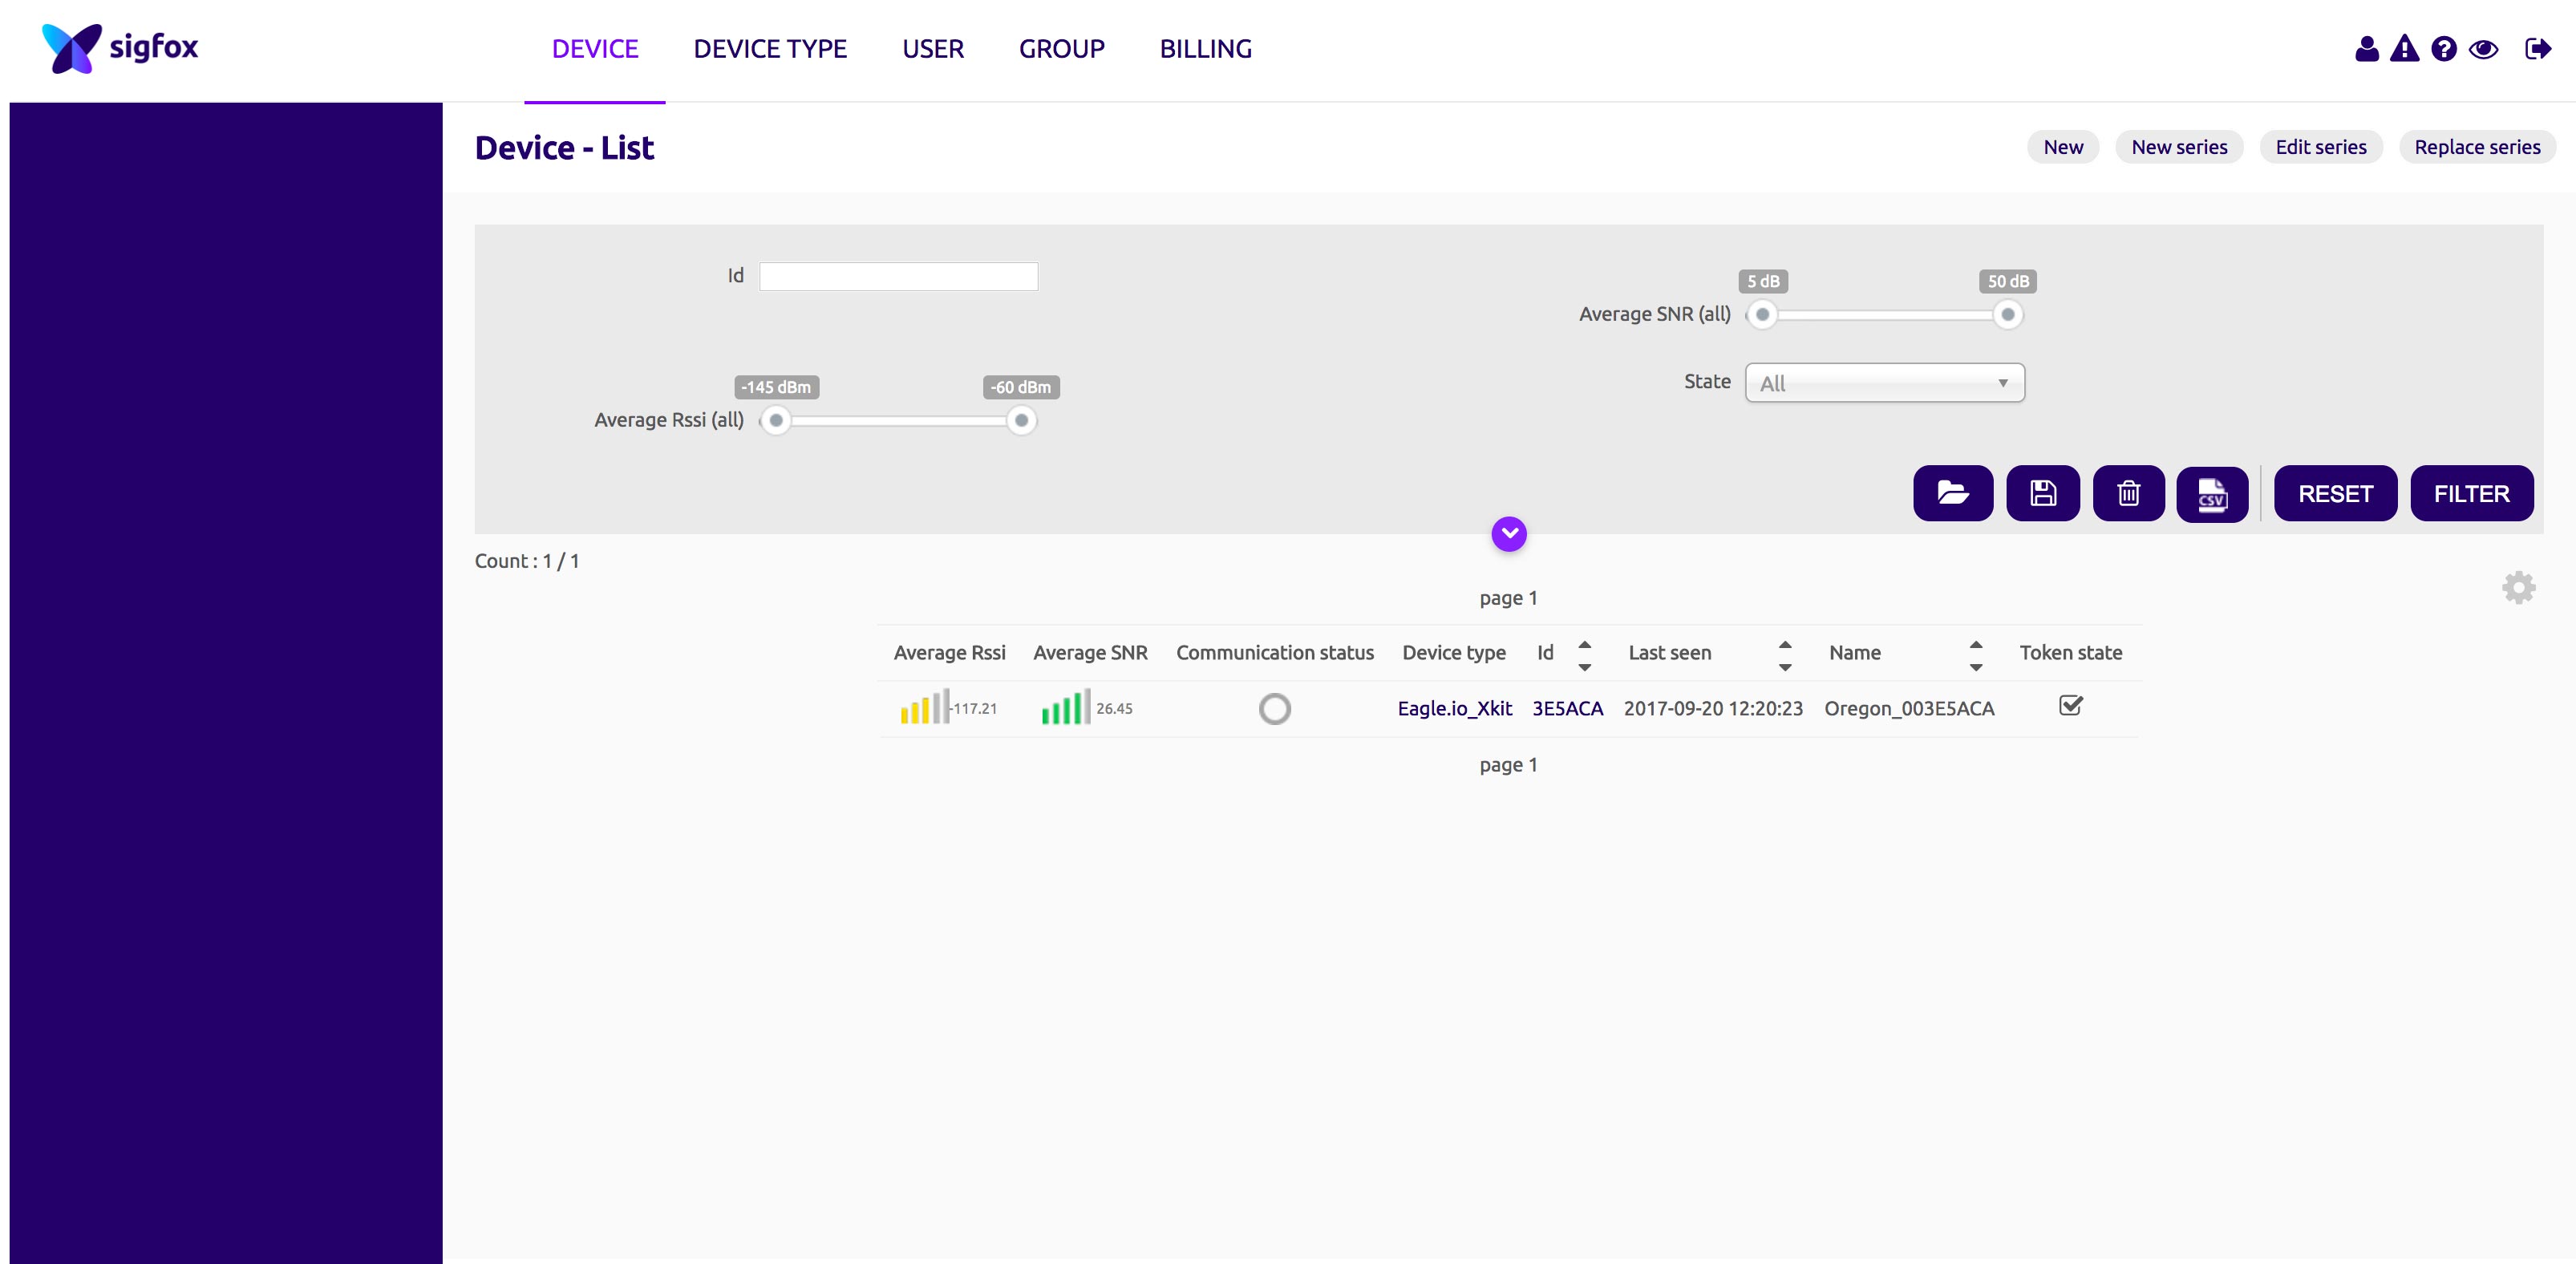
- Login into your account and ensure your device is activated and registered with the Sigfox network.
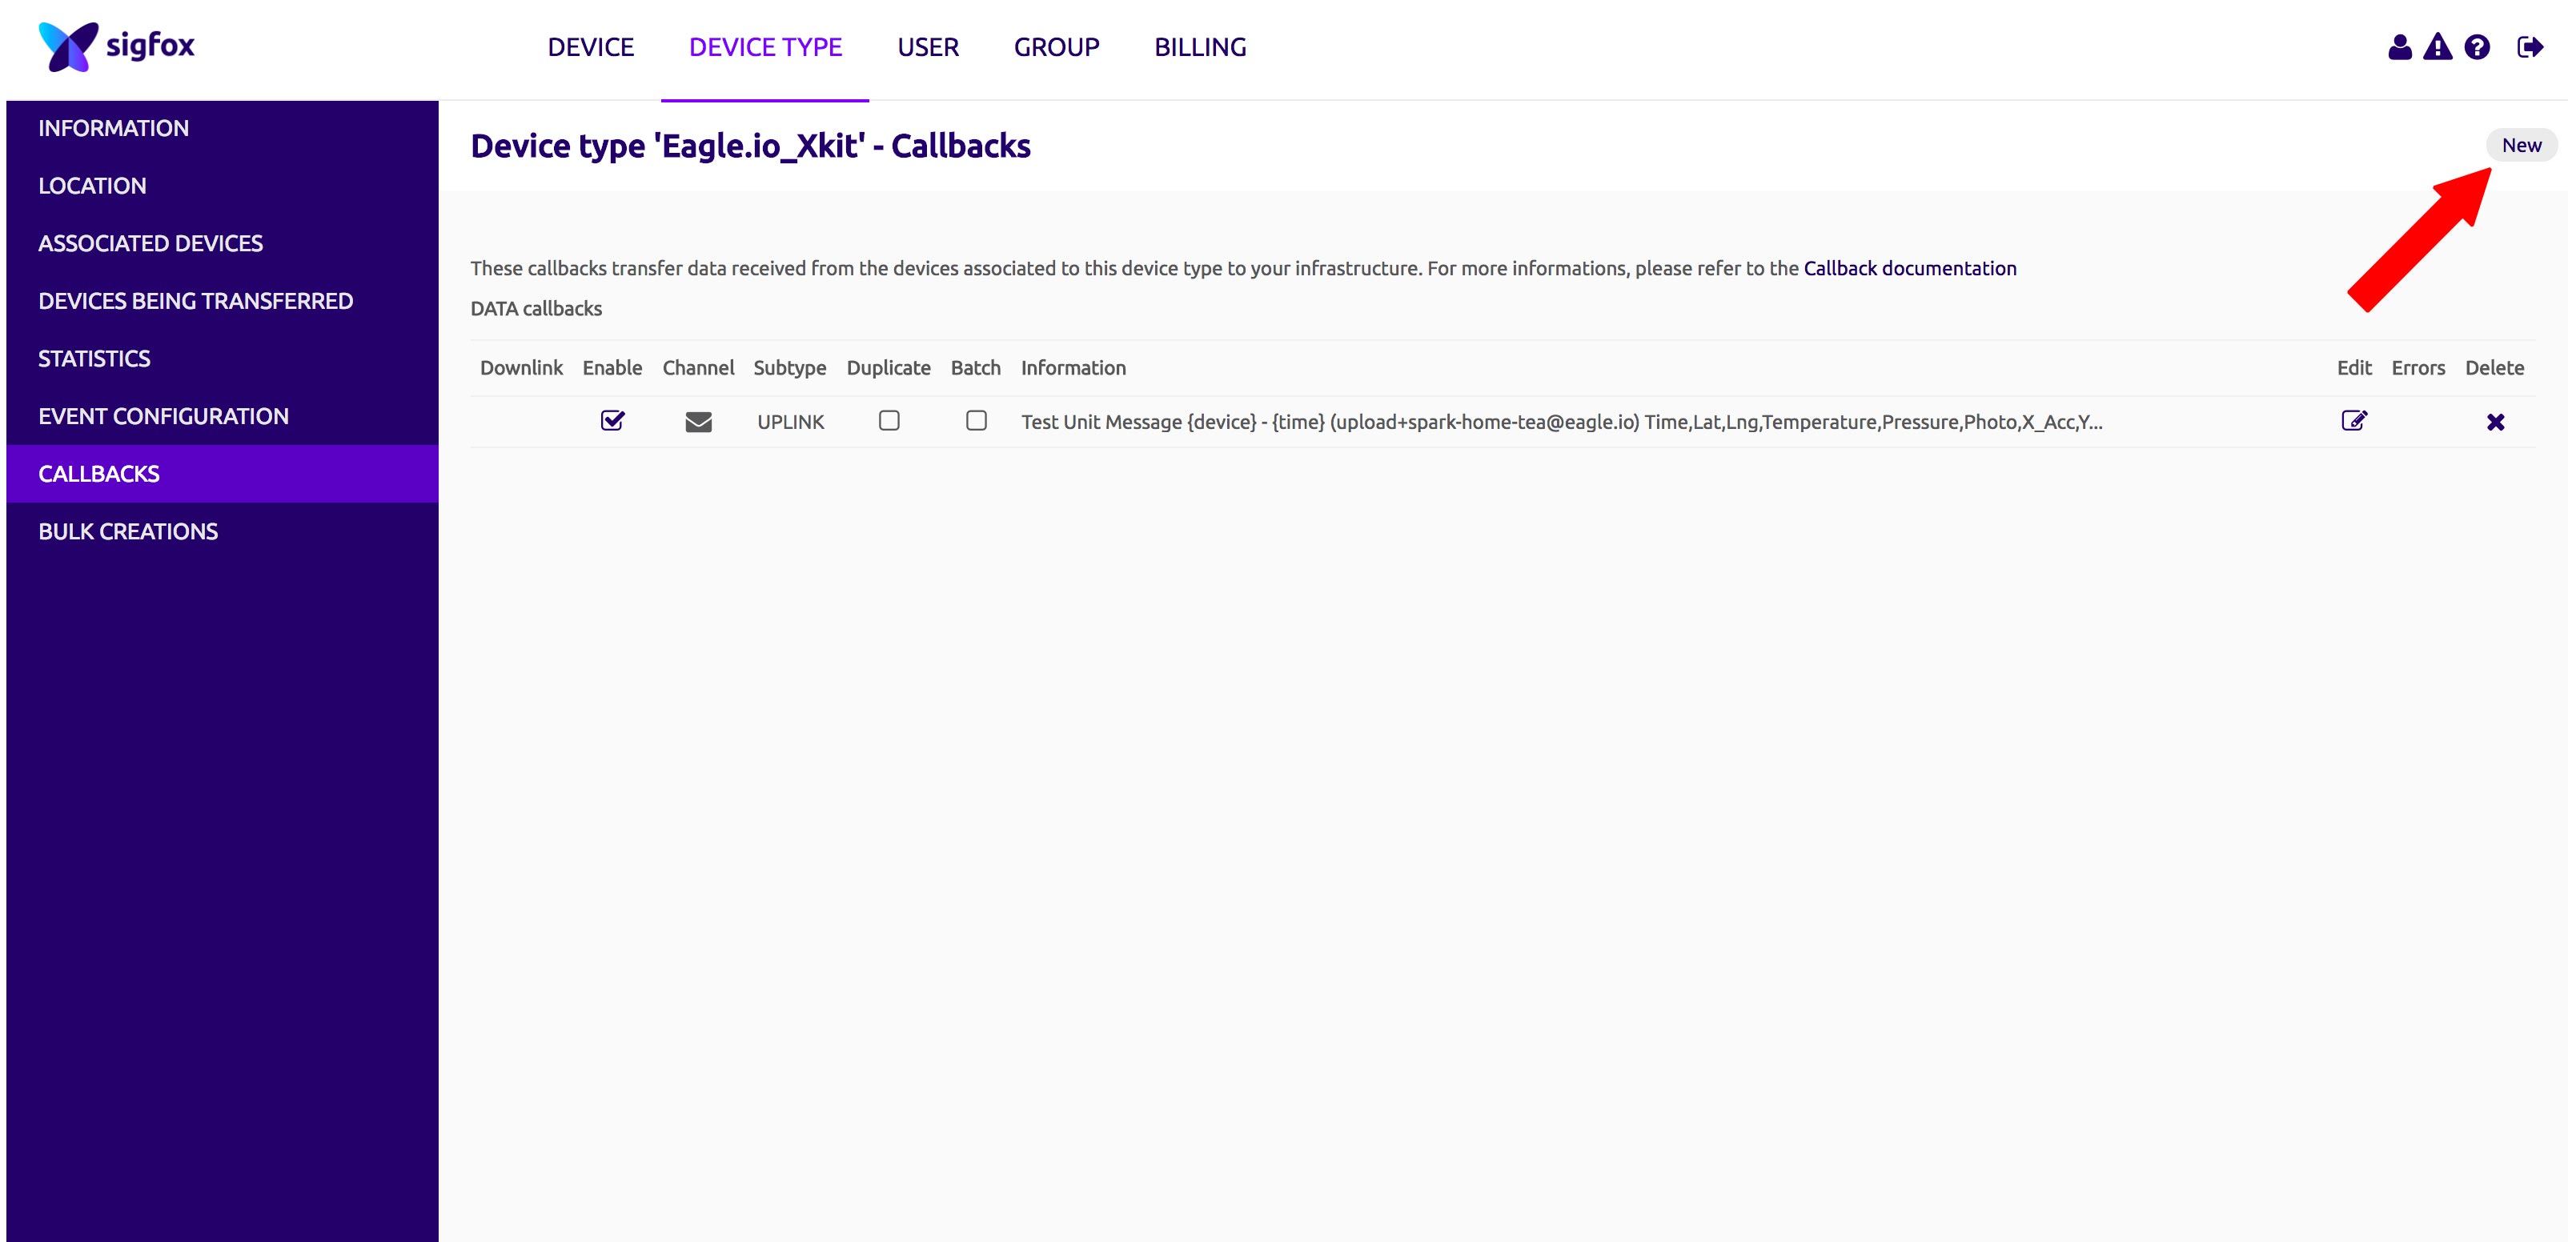
- Select Device Type from the top navigation bar and select Callbacks from the menu on the left. Click the New button in the top-right of the Callbacks screen.
- Create the Callback.
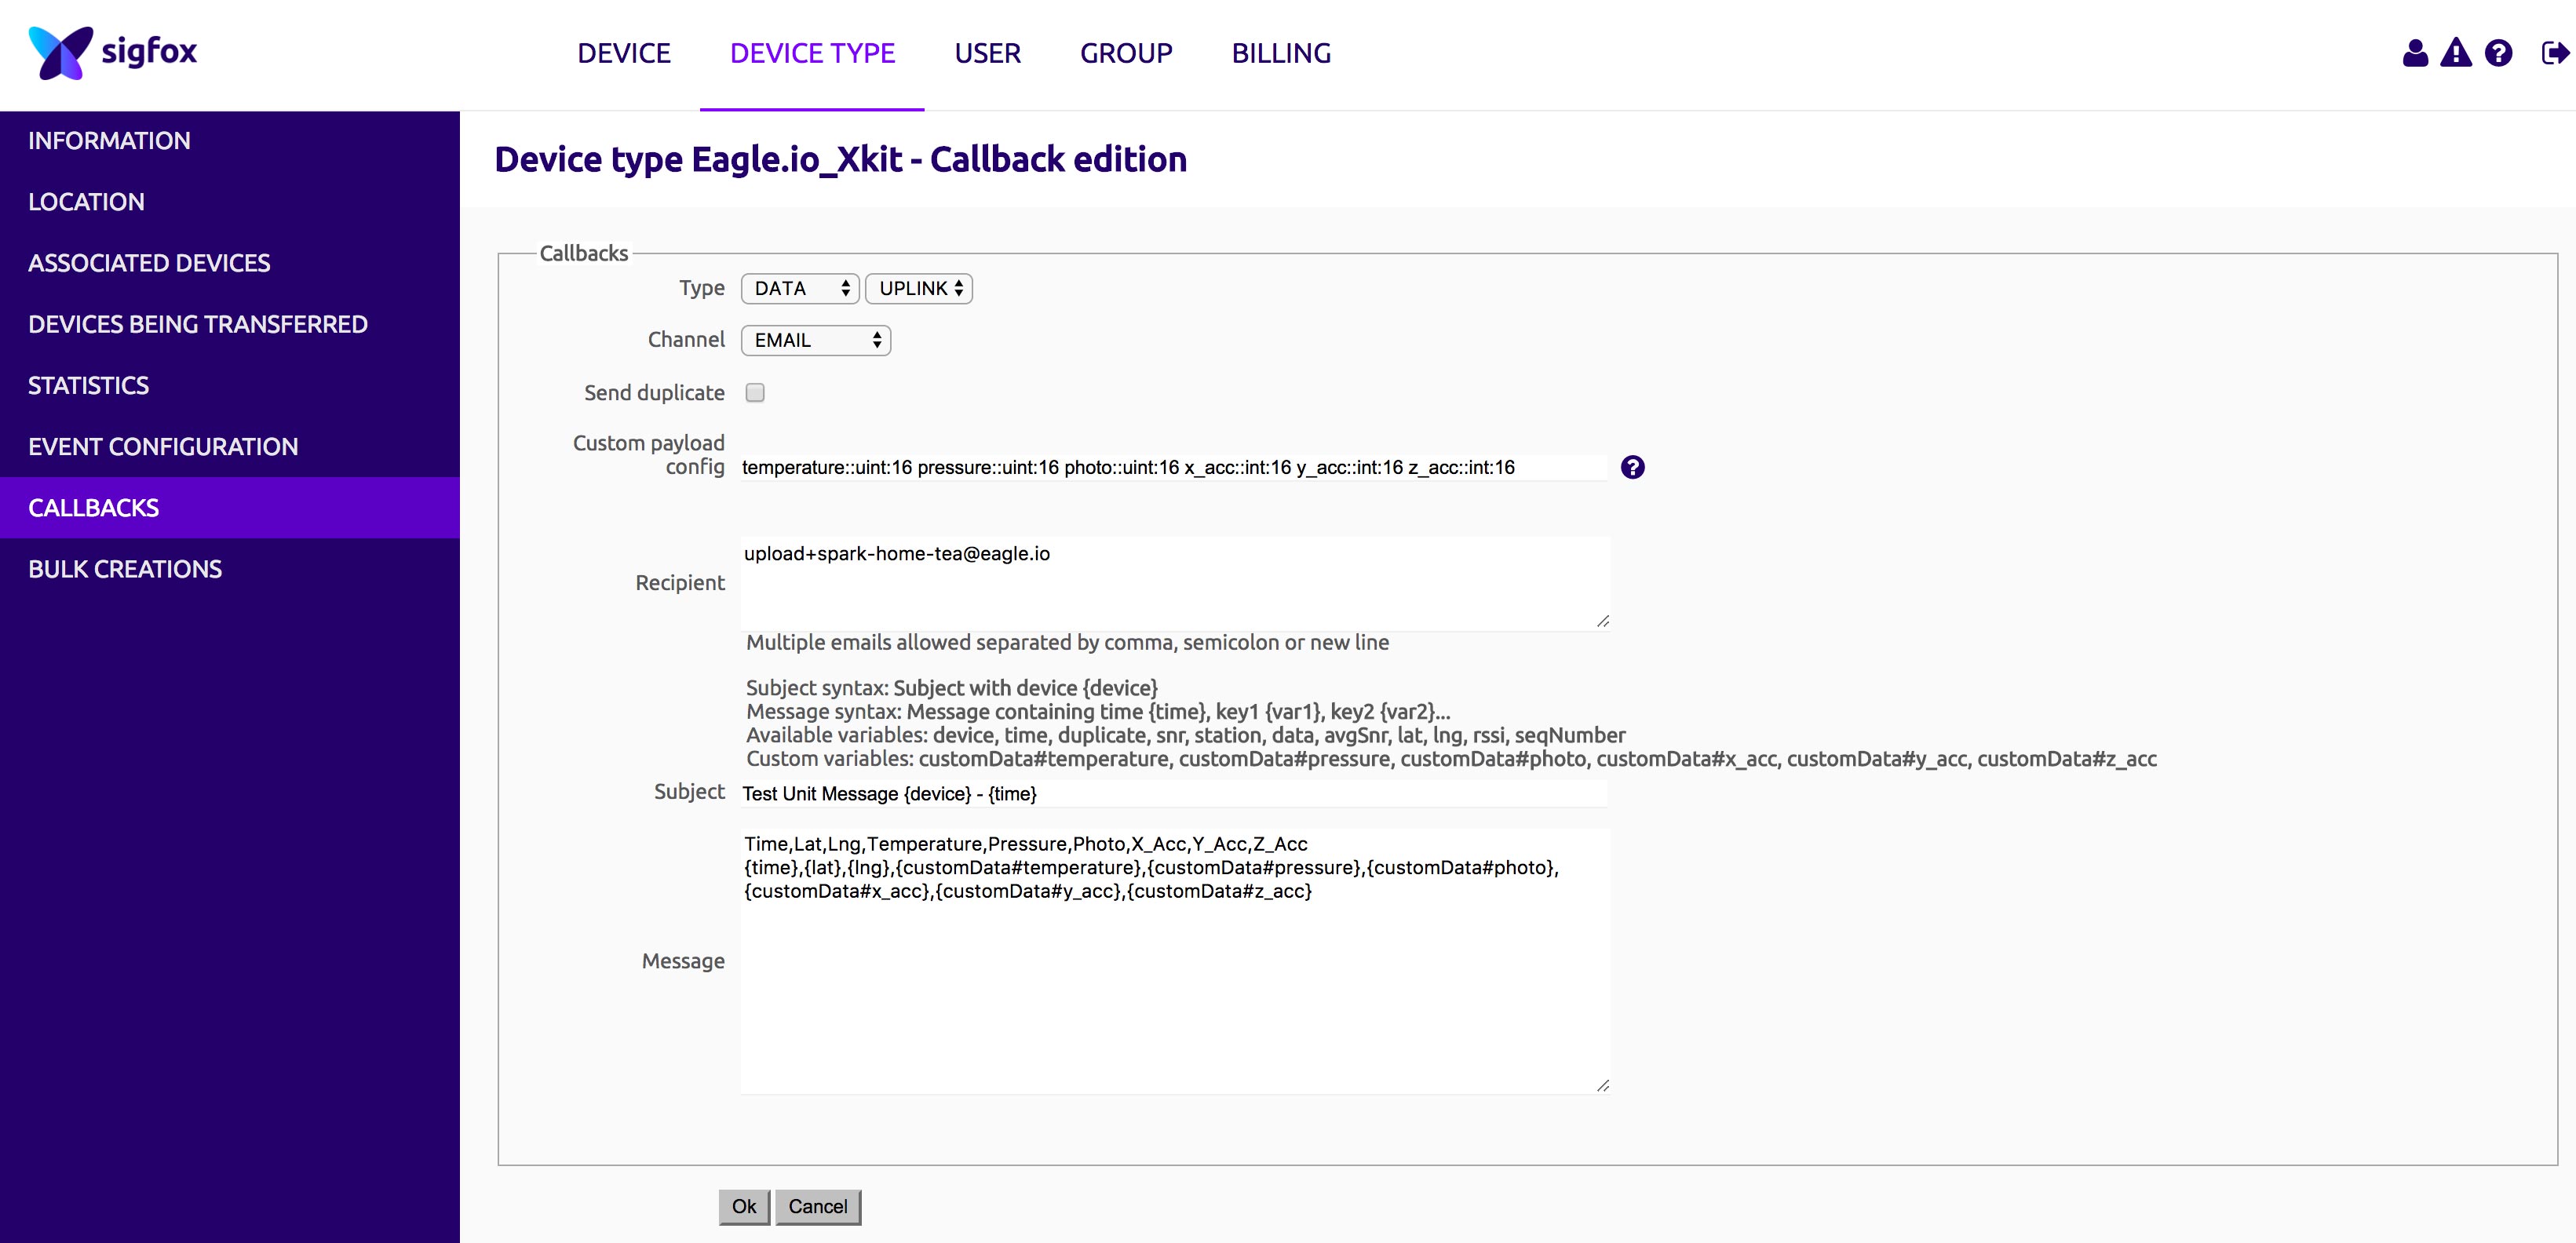
The following settings should be assigned:
- Type
- DATA
- Channel
- Custom payload config
You will need to set your own custom message type to decode your sigfox payload data into individual sensor values. Refer to Sigfox Callbacks for help. Example:
temperature::uint:16 pressure:uint:16
- Recipient
- Use the unique Email address generated during Data Source creation. eg. upload+walk-brian-self@eagle.io
- Subject
- Any text can be used.
- Message
Use the Sigfox built-in and custom fields for CSV output optionally including a header labels row. In the example below time, lat & lng are build-in fields. temperature and pressure are custom fields defined in the Custom payload config
Time,Lat,Lng,Temperature,Pressure
{time},{lat},{lng},{customData#temperature},{customData#pressure}
Note
Use the Events view with the detail level set to Debug for reviewing communication history and diagnosing configuration issues.