Report
 Report nodes generate PDFs and can be scheduled for delivery to subscribed users and groups via email.
Please refer to the Reports documentation for a quick start guide on using the reporting feature.
Report nodes generate PDFs and can be scheduled for delivery to subscribed users and groups via email.
Please refer to the Reports documentation for a quick start guide on using the reporting feature.
Note
The reporting feature is currently a pre-release version that is subject to change without notice and is only available to limited accounts. This documentation will also be updated prior to final release to expand on reporting features with examples.
Properties
 Configure properties via the Workspaces Tree context menu or List View properties icon. Requires configure permission.
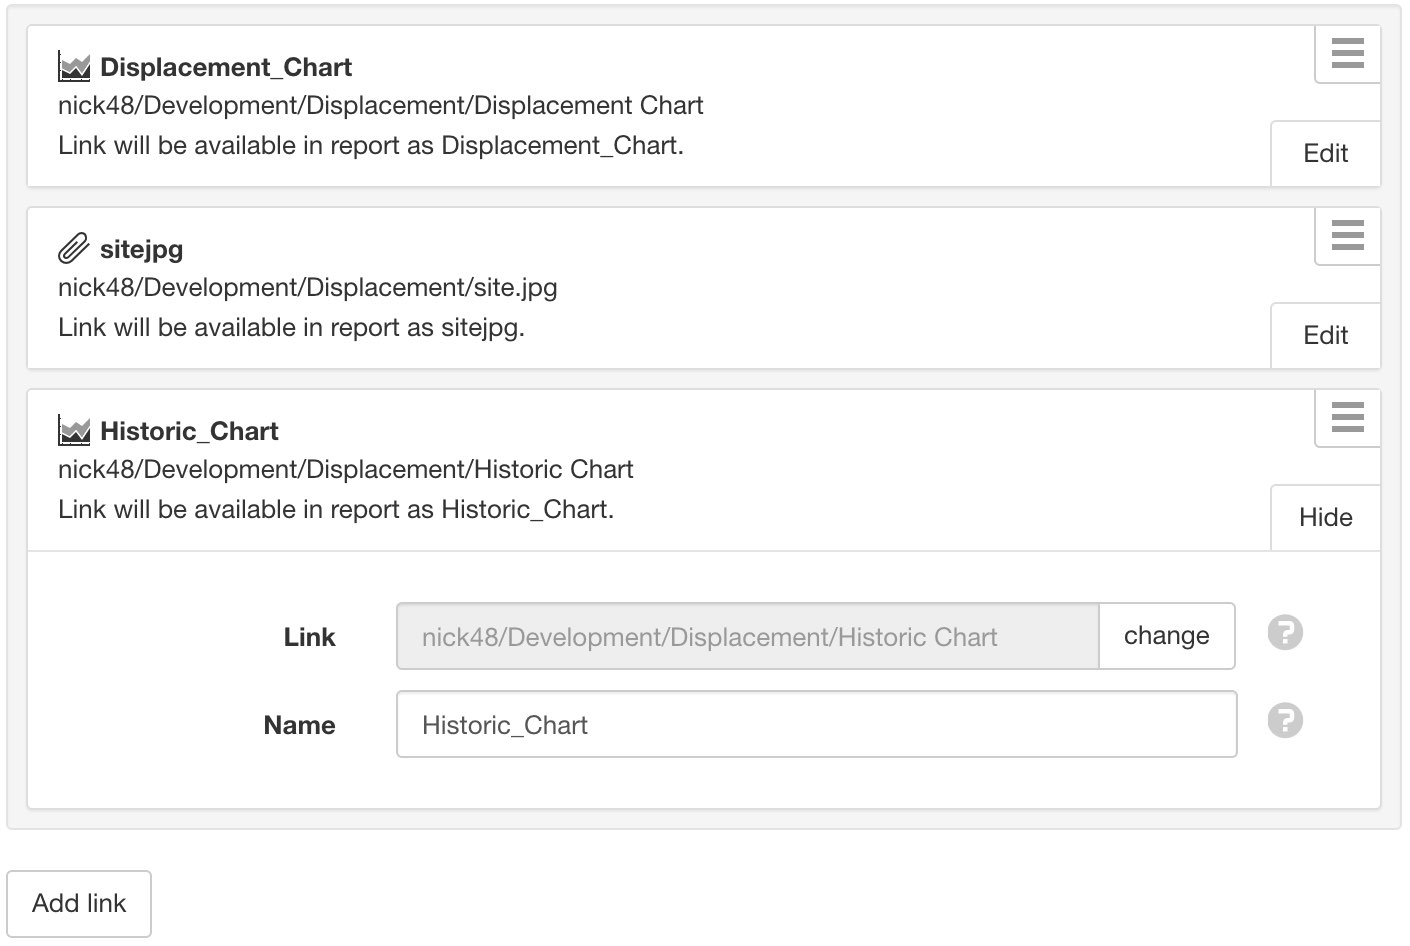
Links
Links assign Nodes in the Workspaces Tree to the report. They will appear under the Tags menu in the report editor and can be used to insert content into the report.
Click the Edit button to show and modify the configuration for each link. Use the Add link button to display the Workspaces Tree and select a new Node to link. Links can be removed via the dropdown menu (accessible by clicking the menu button on the top-right corner of the link item).
Reports can not have links to Nodes in different Workspace.
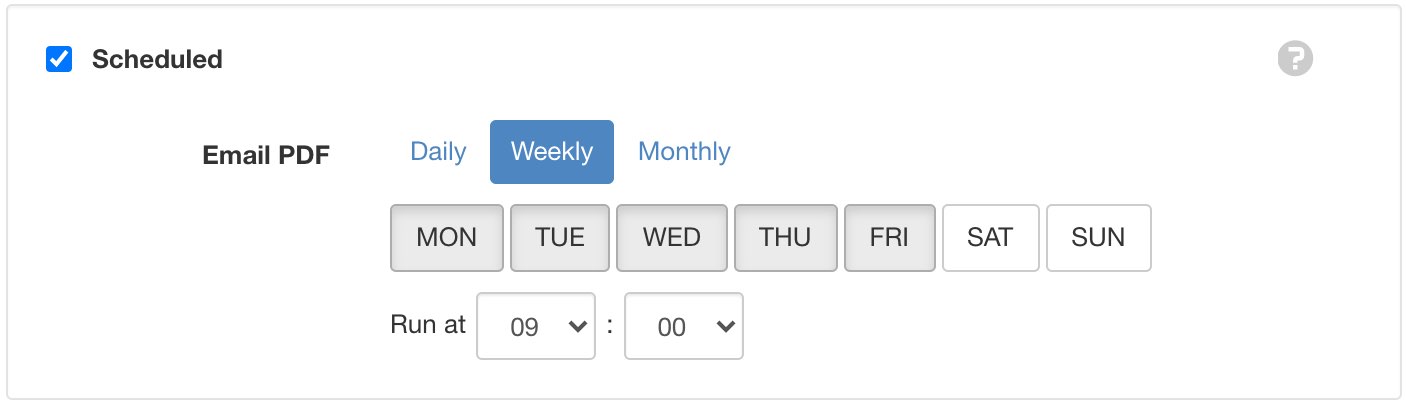
Schedule
Enable a daily, weekly or monthly schedule for the report to be generated and delivered to subscribed users and groups via email.
Time
Time allows you to configure the timezone the Source should use for rendering timestamps.

- Timezone
- Select the default timezone the Source should use for rendering timestamps.
- Ignore Daylight Savings Time
Check this option if the Source should not offset the timestamps to account for DST.
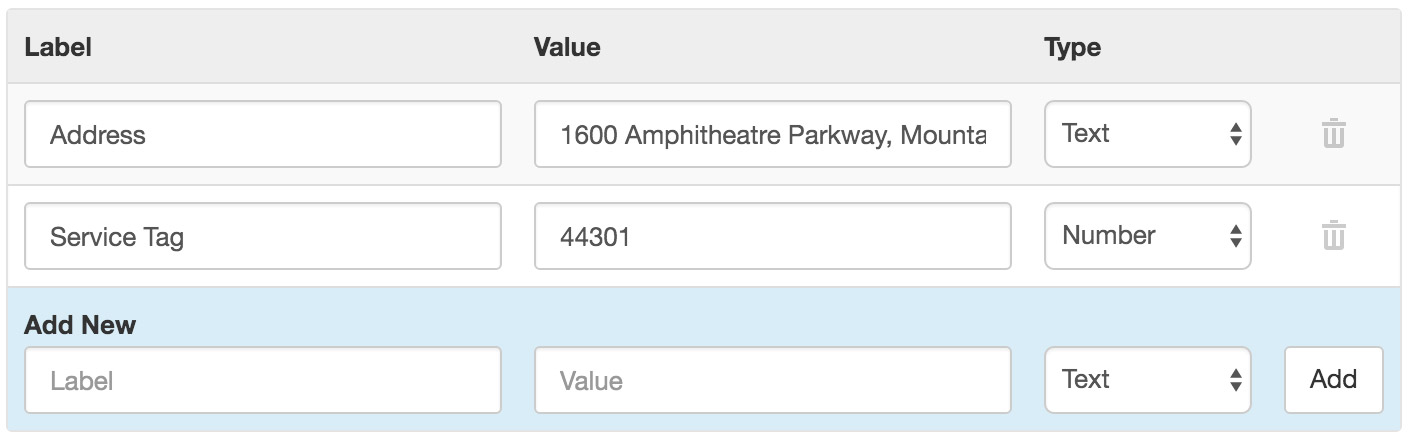
Metadata
Metadata provides a simple key/value data structure that can be used to store static information about the location. Values can be saved as Number or Text and are displayed in the Locations List View.
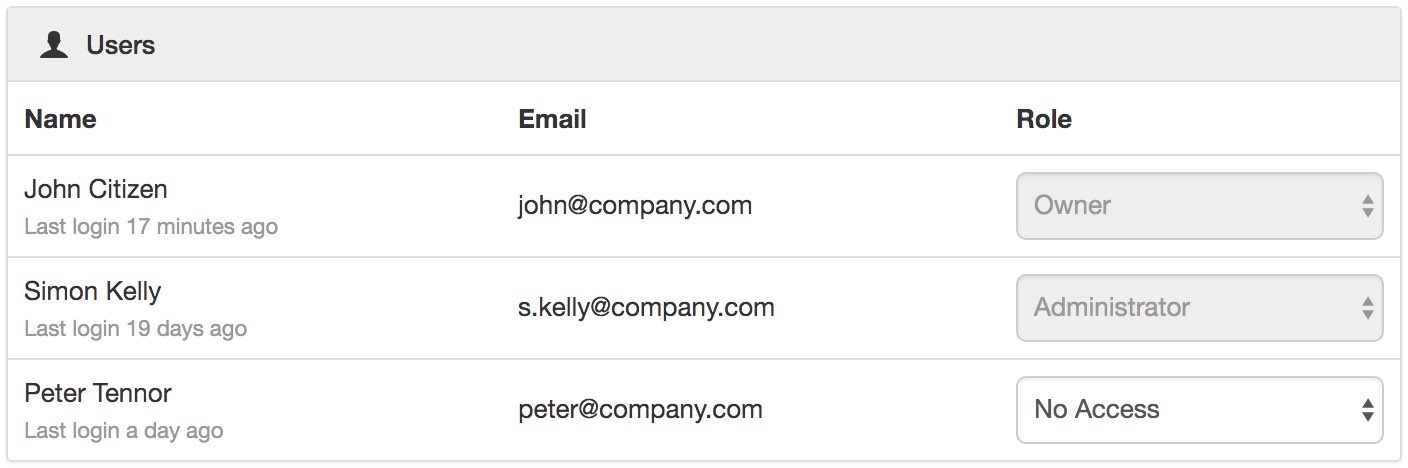
Security
The Security section displays a list of all users and groups that have access to the Node. Users with security permission can restrict user and group access to the node and its descendants by assign the No Access role.
New users and groups must be added via the Workspace Security section.

Note
The Account Owner, Administrators or Workspace users/groups that have been assigned a Workspace role with the configure permission can not be assigned the No Access role.
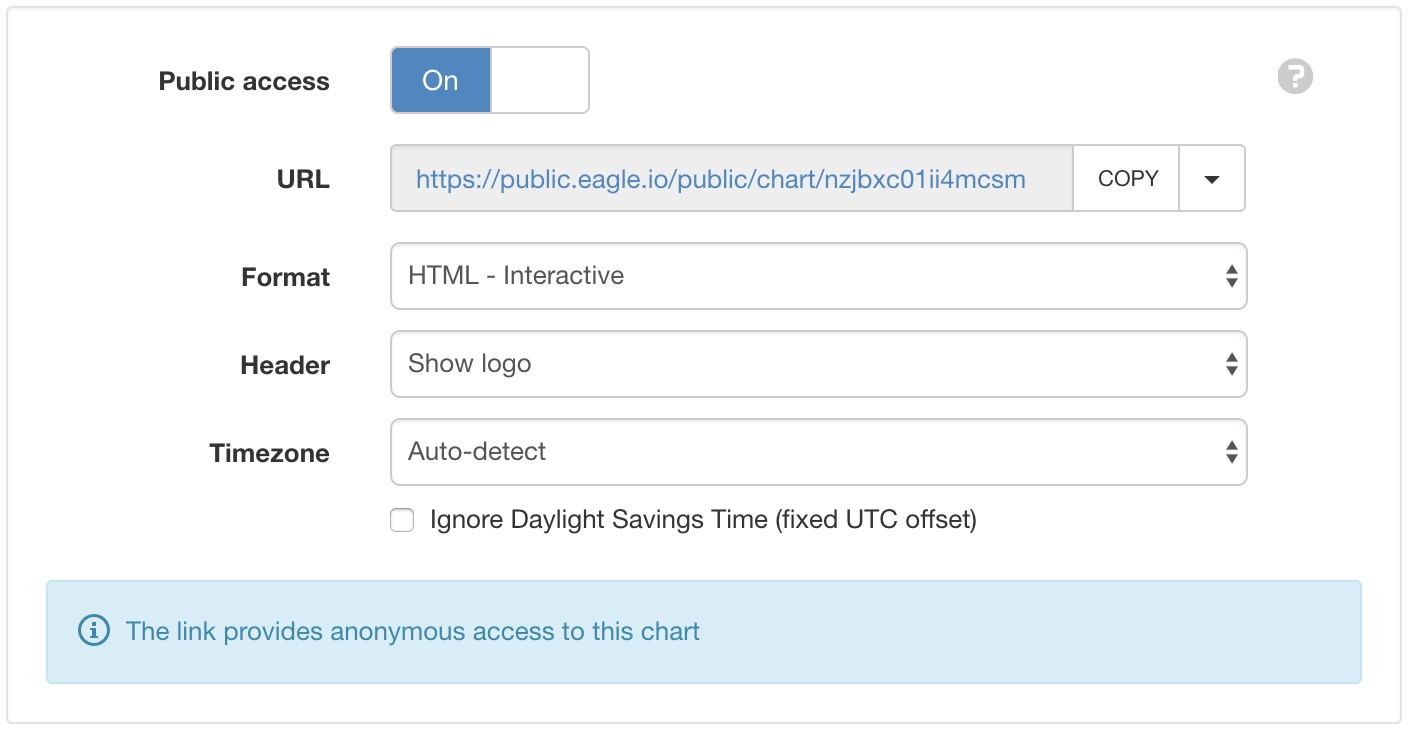
Public access
Enabling public access allows anyone to view the node (attachment, chart, dash, report or historic data) using the generated URL.
You can also embed charts and dashboards into your own website with basic HTML. Select Copy embed HTML from the URL dropdown menu for a generic code snippet (you will need to paste this in to your website). You can also revoke and replace the automatically assigned URL by selecting the Generate new URL option in the menu.
Use the available options to customize the URL based on your display preferences. These options are transient and you can use multiple variations of the URL at the same time.
Note
This feature is not included in Starter accounts.