Quick start
This documentation is intended as a quick introduction to the reporting feature. Please refer to the using the report editor section for a comprehesive guide to building reports.
Creating a report
- Using the
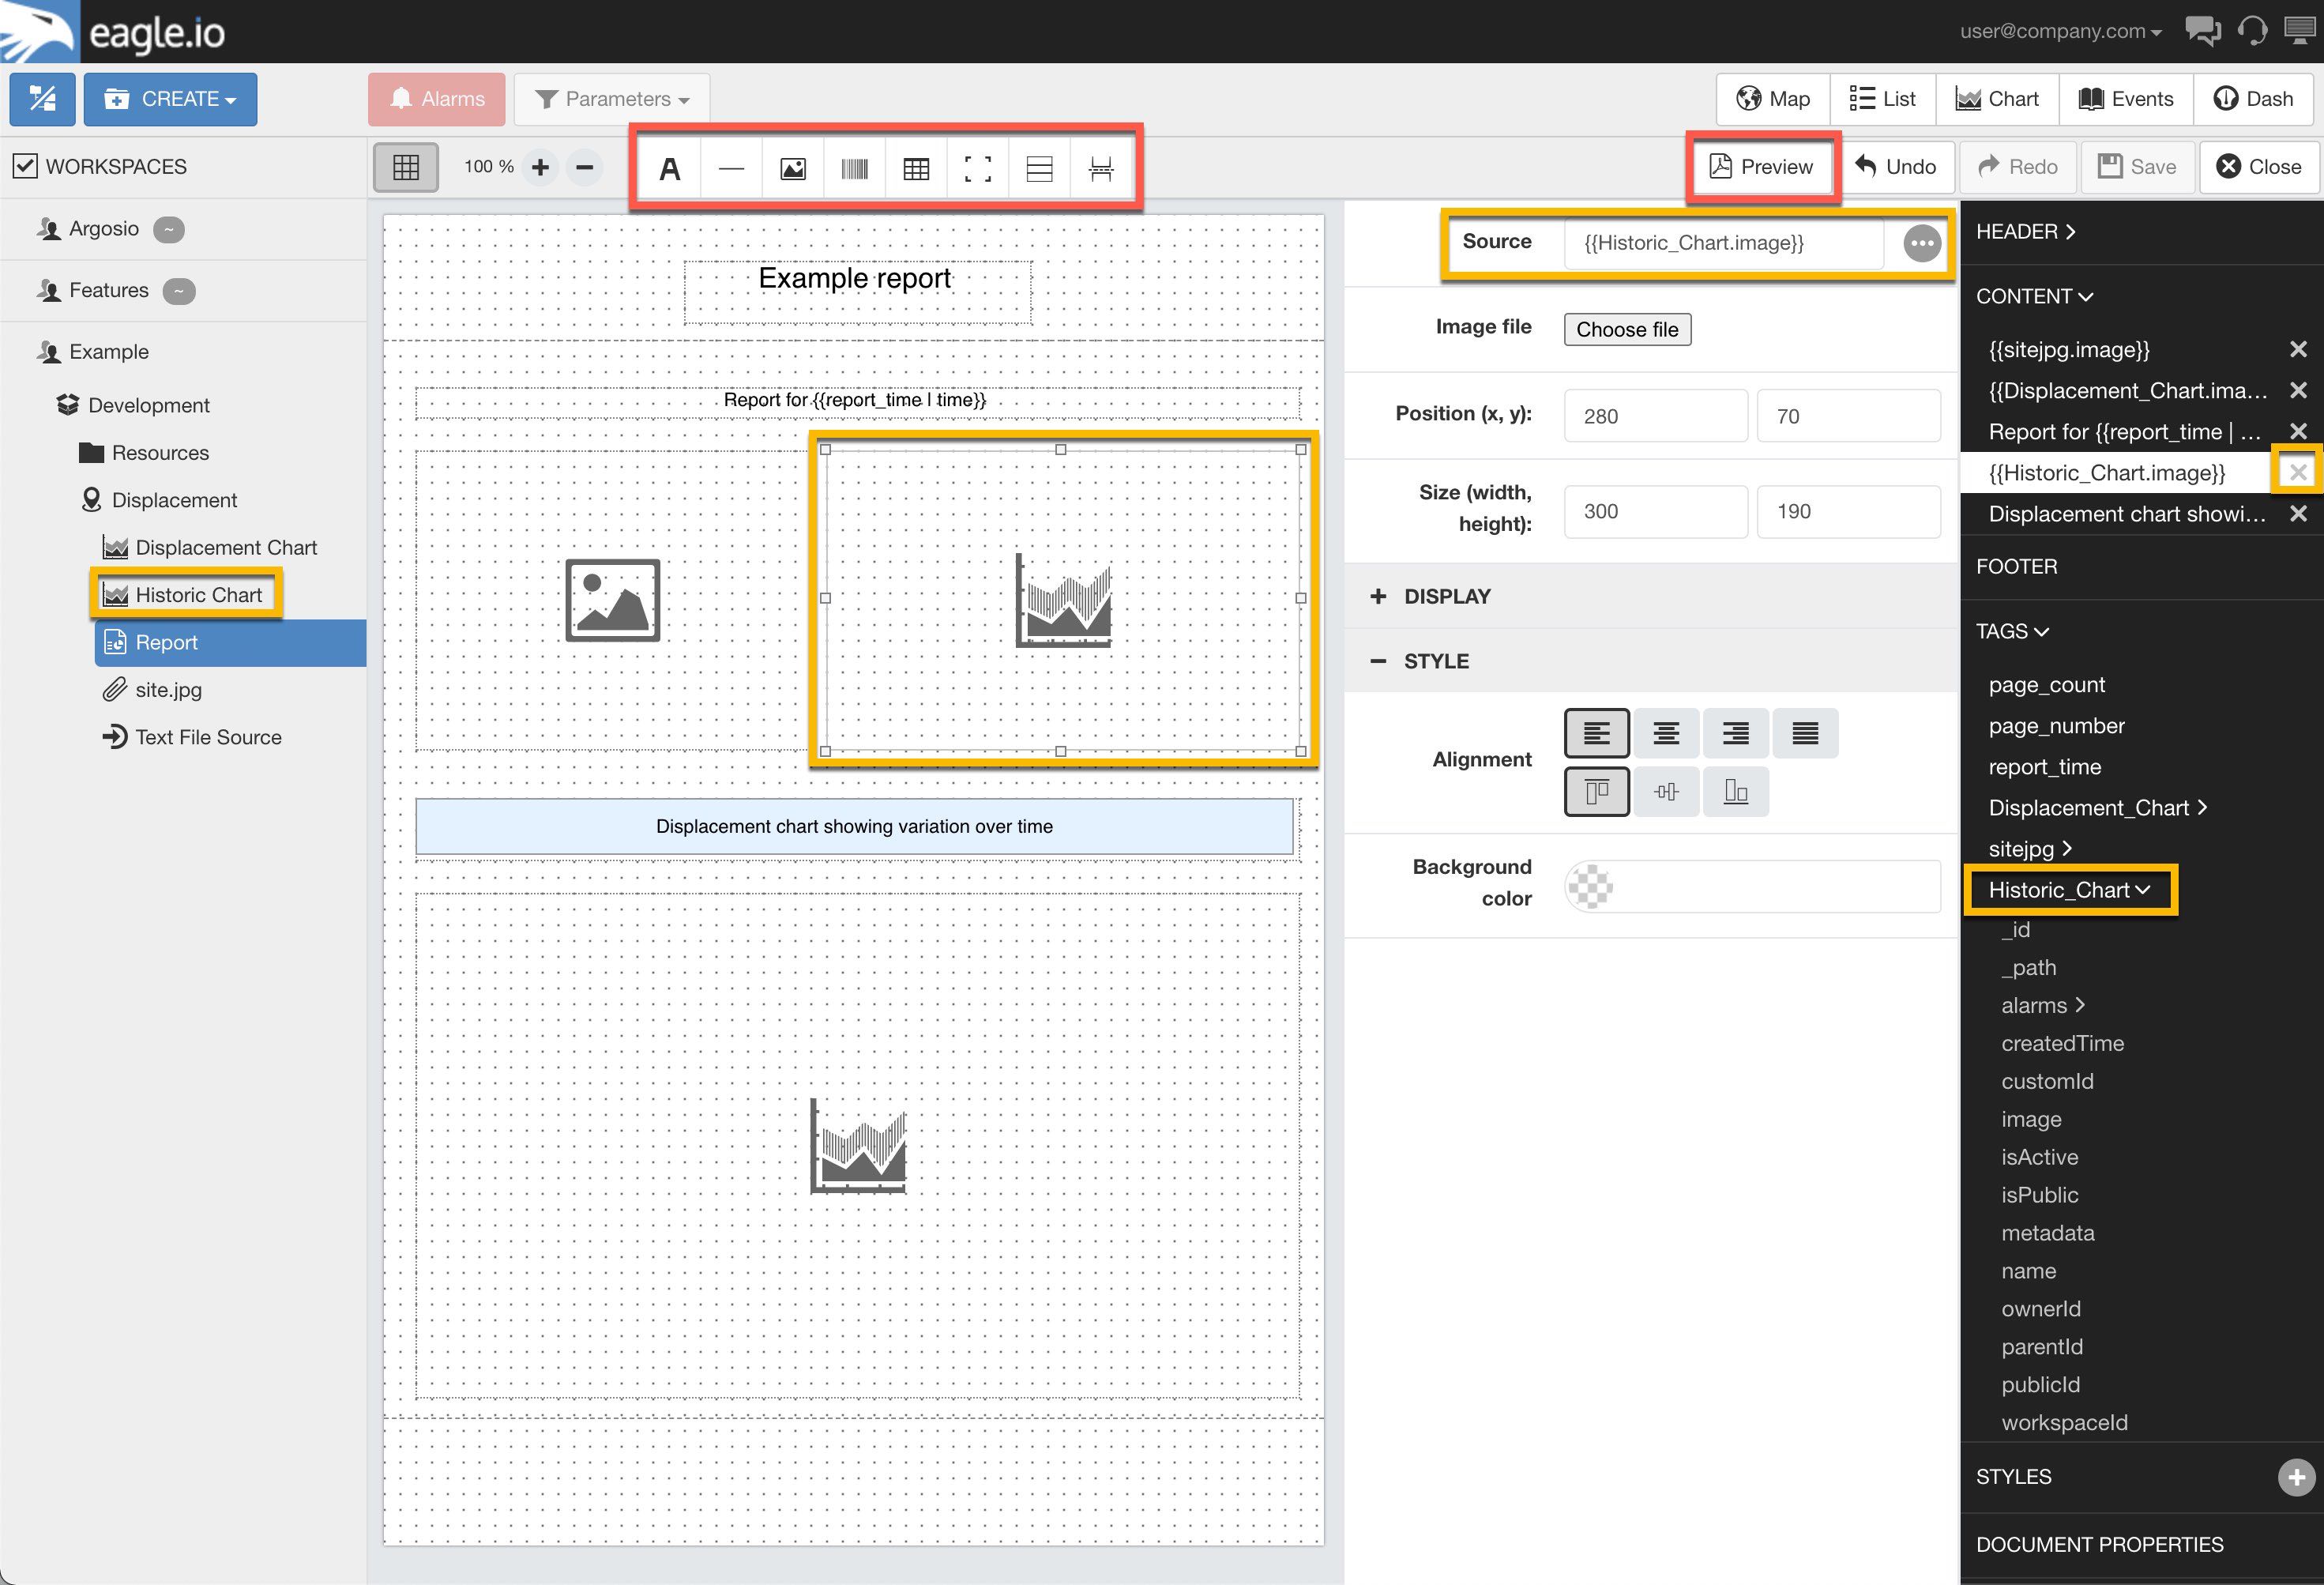
Createmenu in the workspaces tree, selectReport. The report node will be created and the report editor will open with a blank report template. - Click (or drag) a report element from the editor toolbar to insert it.
- Drag nodes from the Workspaces tree to quickly insert them into the report template. eg. Drag an image attachment node or chart node to insert as an image in the report.
- Remove an element by clicking the
xnext to the item in theCONTENTmenu (on the right-hand side of the screen) or selecting the element(s) in the editor and pressing thedeletekey. - Insert page break elements to split content over multiple pages.
- Click and drag the resize handle at the bottom of the page to adjust the content height so that more elements can be added to the report.
- Click on the name of a linked node (automatically added after drag-drop from Workspaces tree) in the
TAGSmenu to display all of its available attributes. - Use expressions directly inside report element content to control the output of the content and its formatting. A common scenario is to apply the time expression filter to format the display of timestamps.
eg.
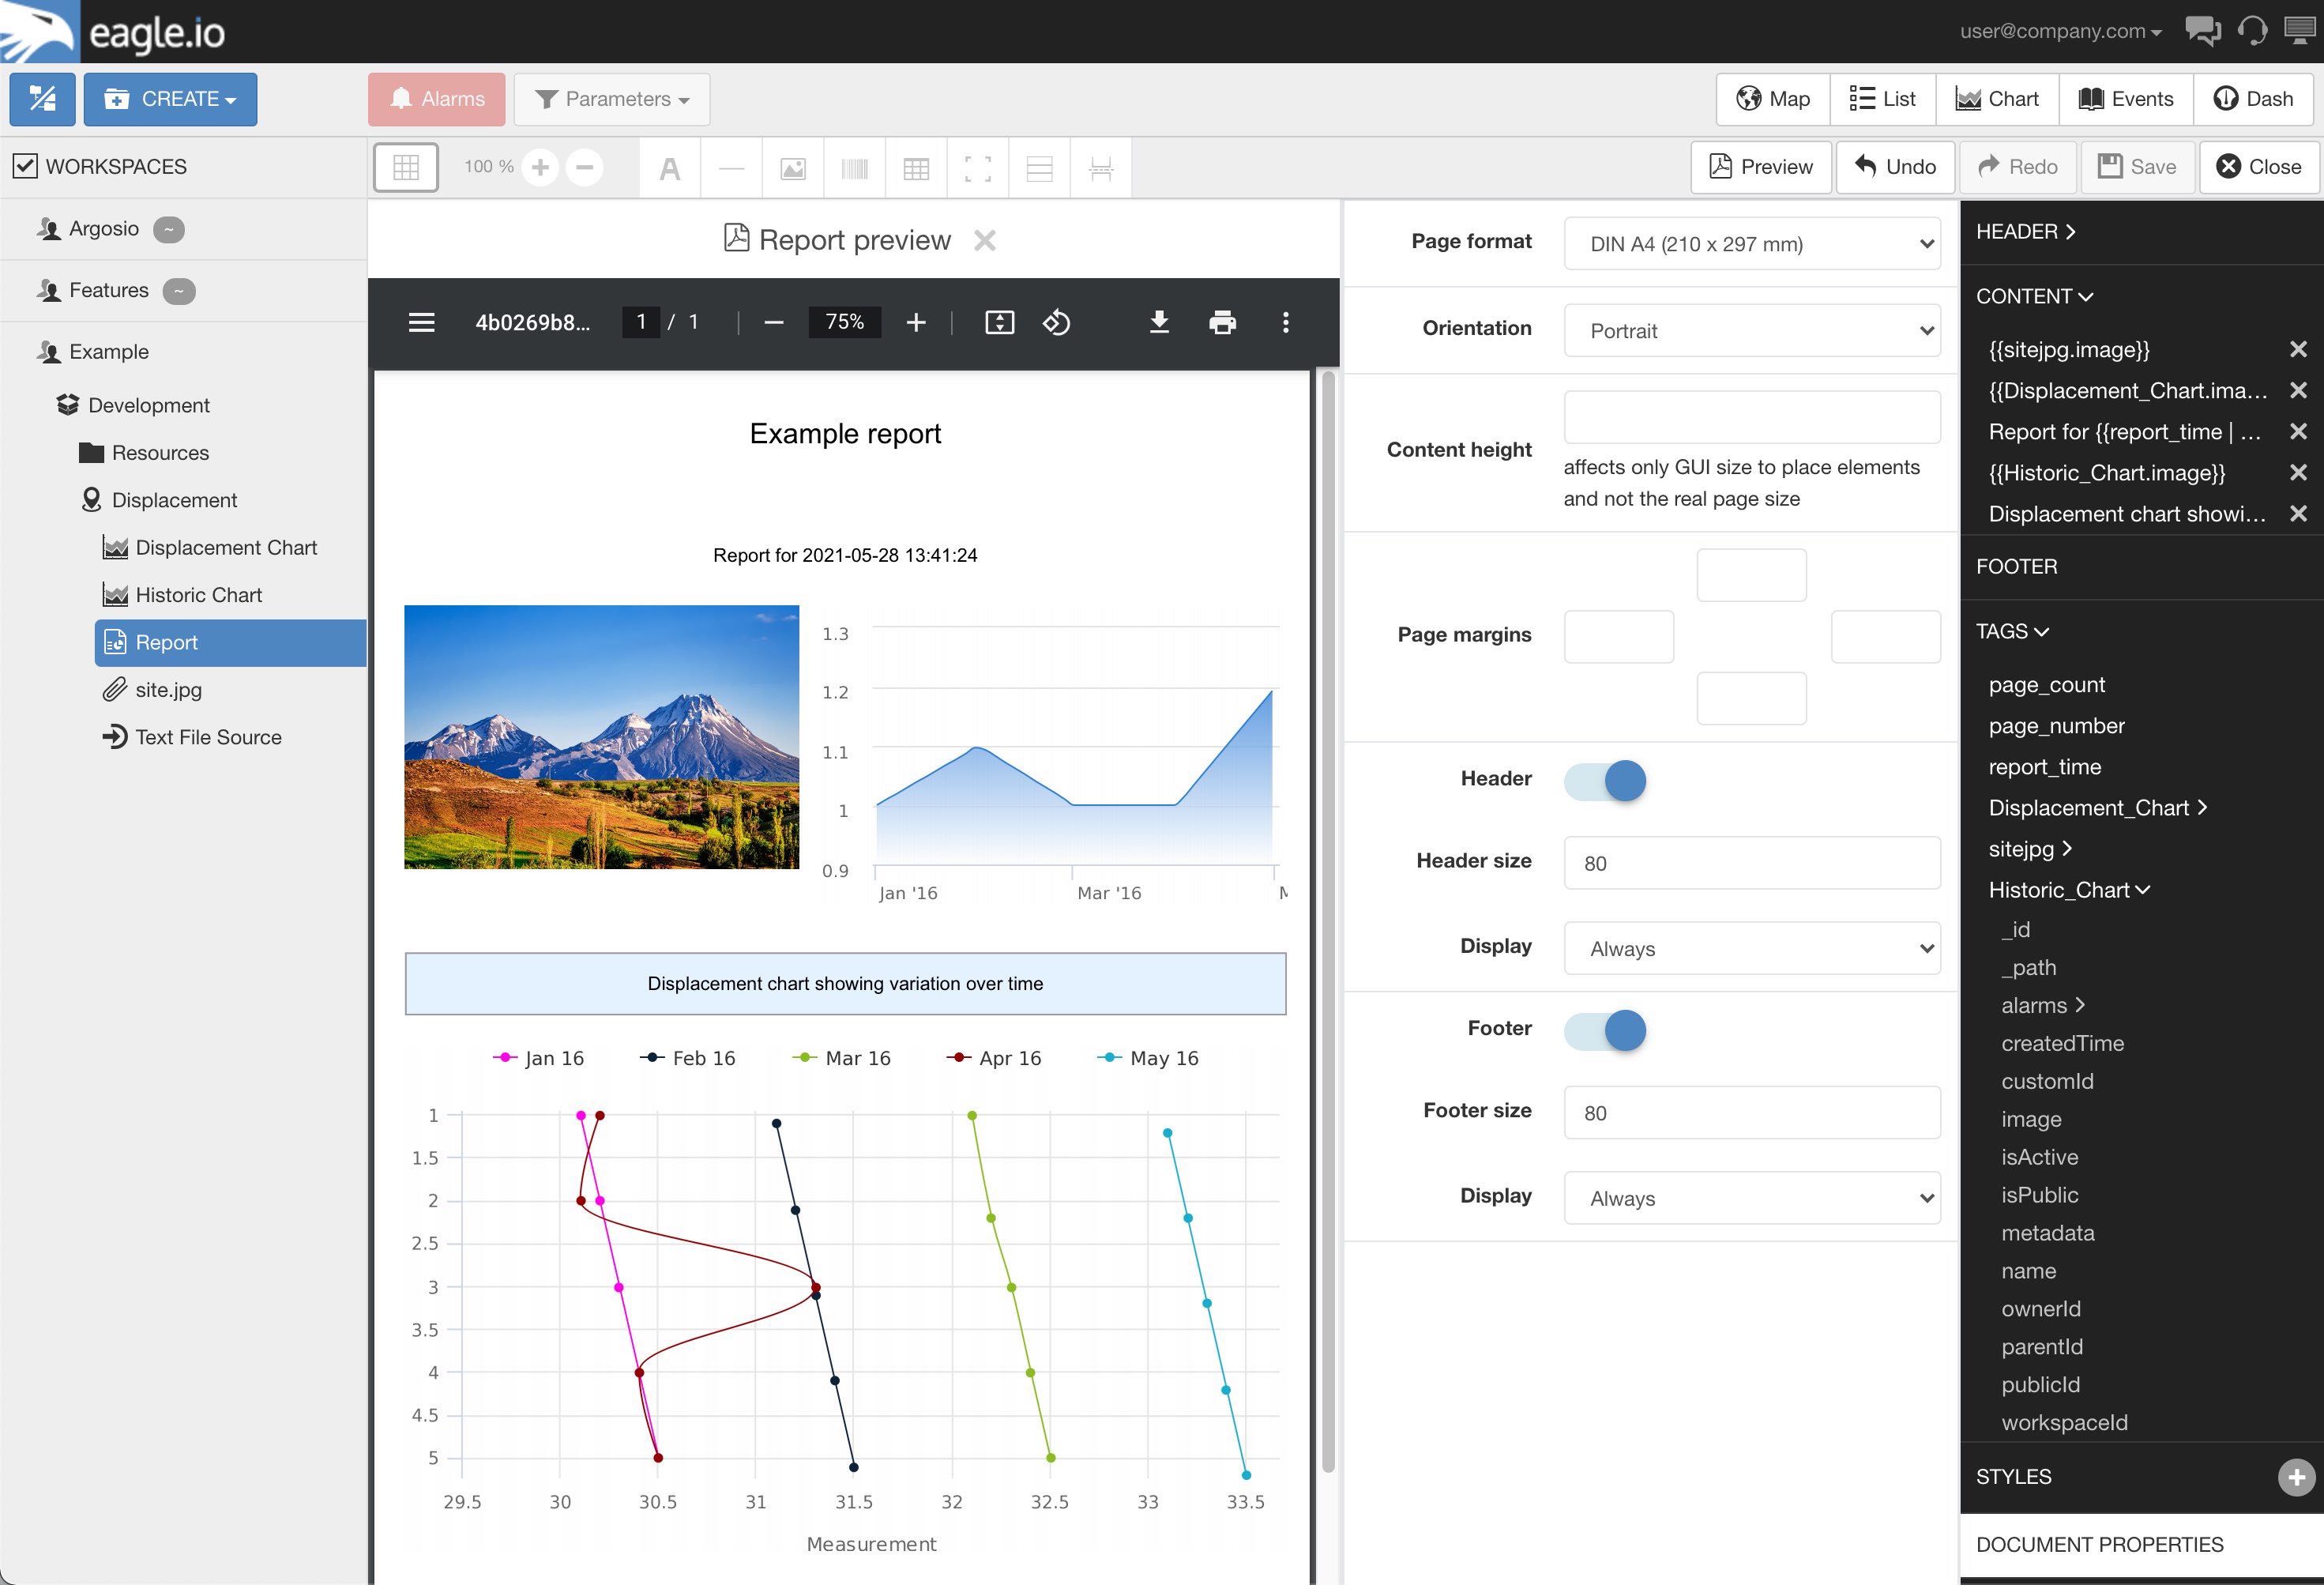
{{report_time | time}}or{{report_time | time: "DD MMMM YYYY"}} - Select Preview from the editor toolbar to generate a preview of the PDF report using the latest data.
Note
The report editor will automatically save changes made to the template.
Report editor
Report preview
Downloading and Scheduling
- Locate the Report node in the Workspaces tree or from the Reports List content view.
- To edit an existing report, select
Editfrom the context menu. - Alternatively select
Downloadto generate a PDF report using the latest data. - Enable
Public accessto get a public URL to a report that will be generated on demand. - Use the HTTP API to generate a PDF report on demand.
To schedule a report
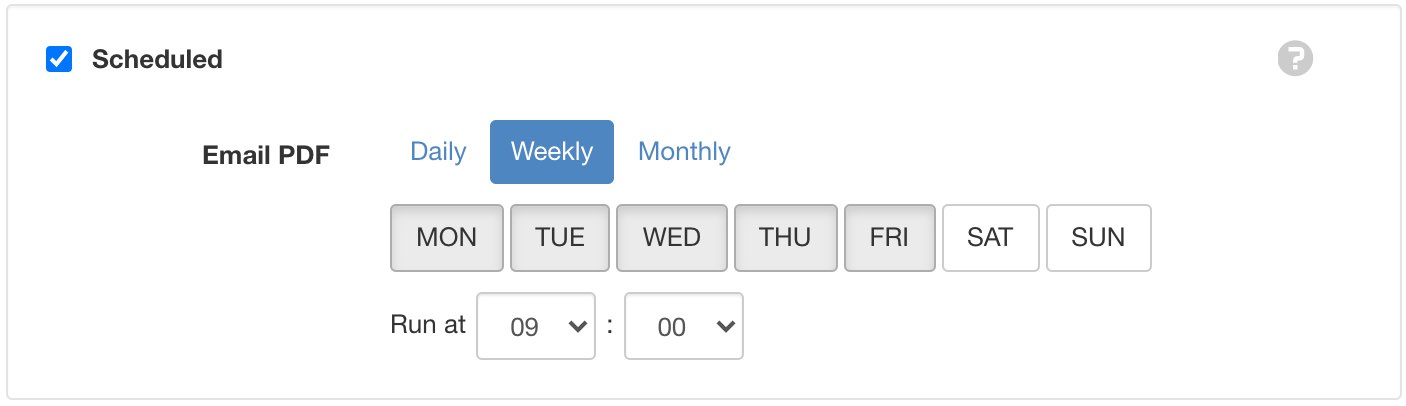
- Open the report properties from the Workspaces tree context menu.
- From the
Schedulesection, click the checkbox to enable a schedule and select eitherDaily,WeeklyorMonthly. - The report will be generated at the scheduled time (check debug level Events).
- Users must be subscribed to the report node to receive the report at the scheduled time (the same way users and groups are subscribed to receive sms/email notifications). See notification subscriptions for details.
- Use the Events view with
debugdetail level to audit when scheduled reports are generated and sent to subscribed users.
Report properties - schedule
Note
Dashboards currently can not be displayed as images on the report. Historic table data display will be available at a later time.